
In 2015, I volunteered to help out a local Cub Scout troop who were involved in a robotics competition. They wanted to create a robotic, shoulder-mounted, dragon puppet. I sculpted this model out of polymer clay, which will be used to create molds and to cast the puppet in foam rubber.
If you want to know how to make a baby dragon out of clay, or how to make clay dragon sculptures, this is the tutorial for you.
Below you’ll learn how to make a clay dragon step by step
1. The Design
The first step was to figure out the dimensions of the puppet, decide what actions it would perform, and plan for how the robotics would fit inside. Working with Keith, the troop leader, we got a rough plan together. I then had to sketch up something that everybody would approve of. My aim was to make a baby dragon, possibly something cute.
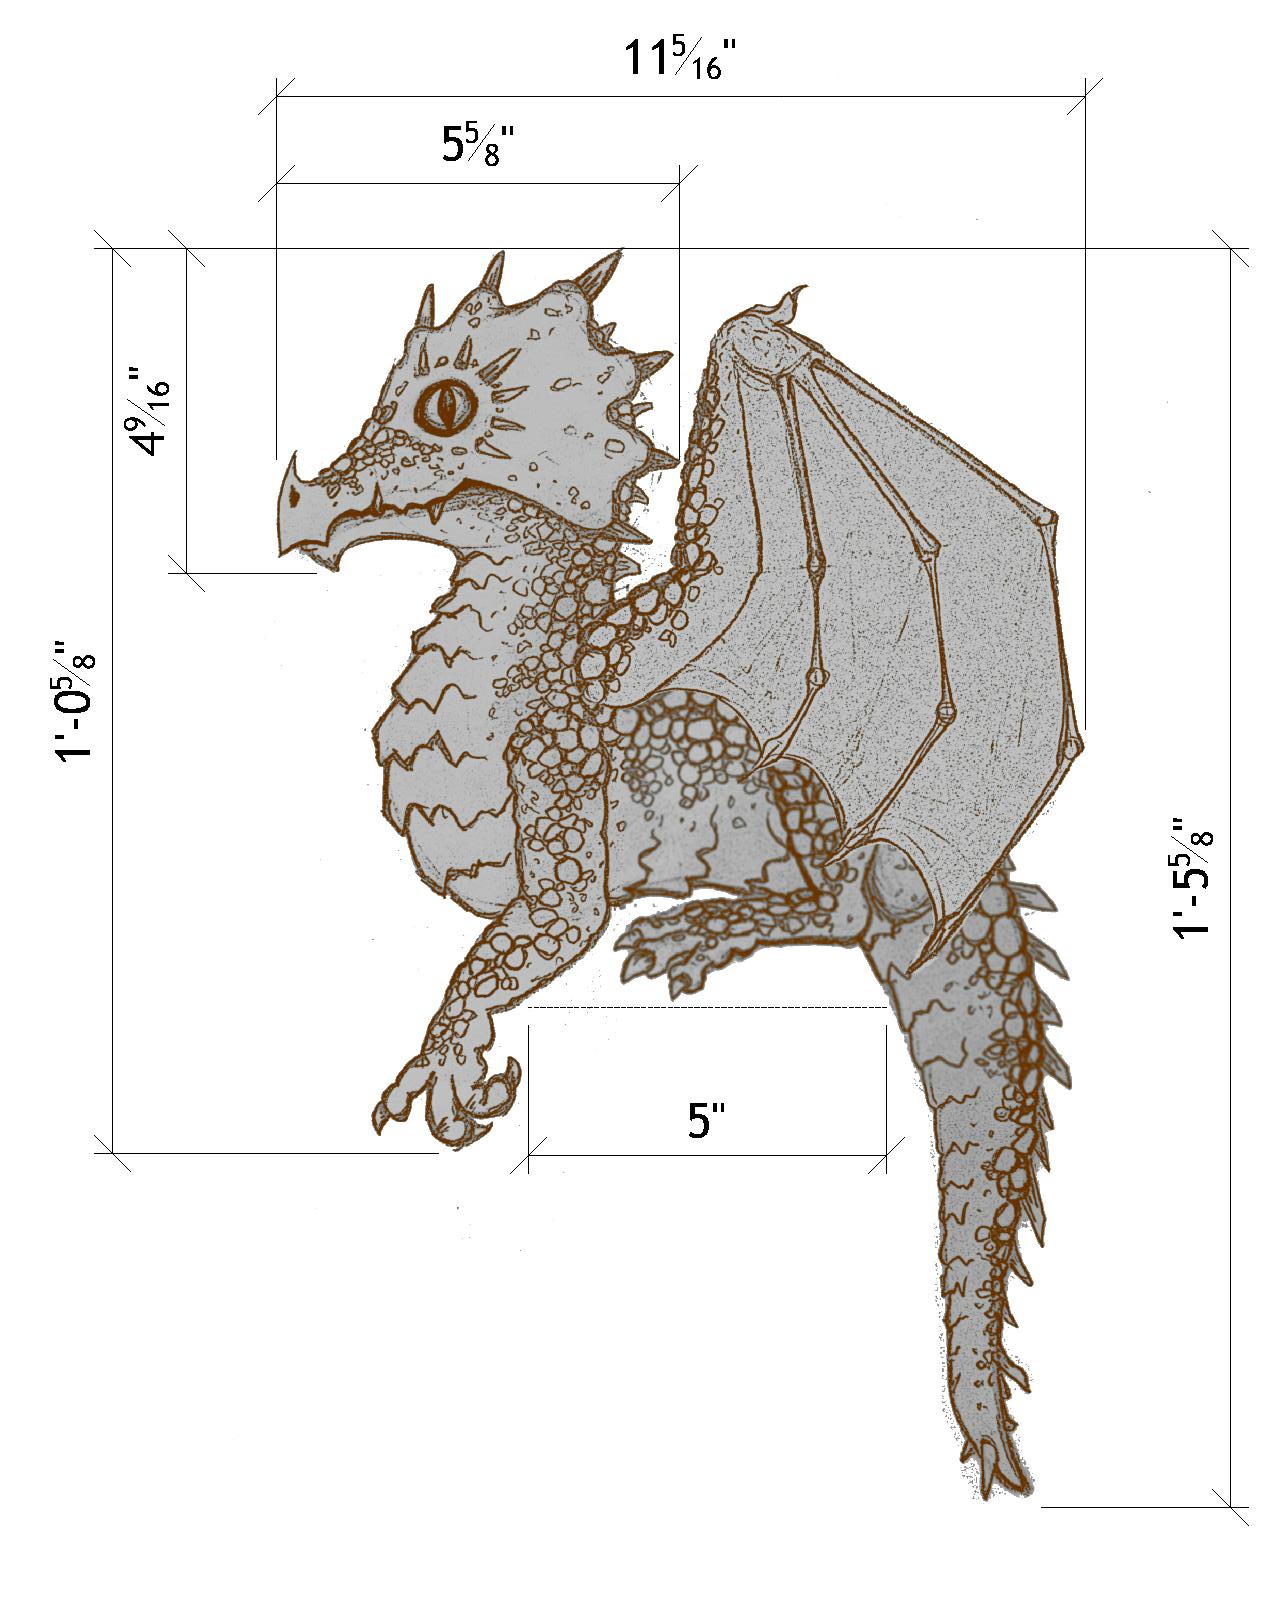
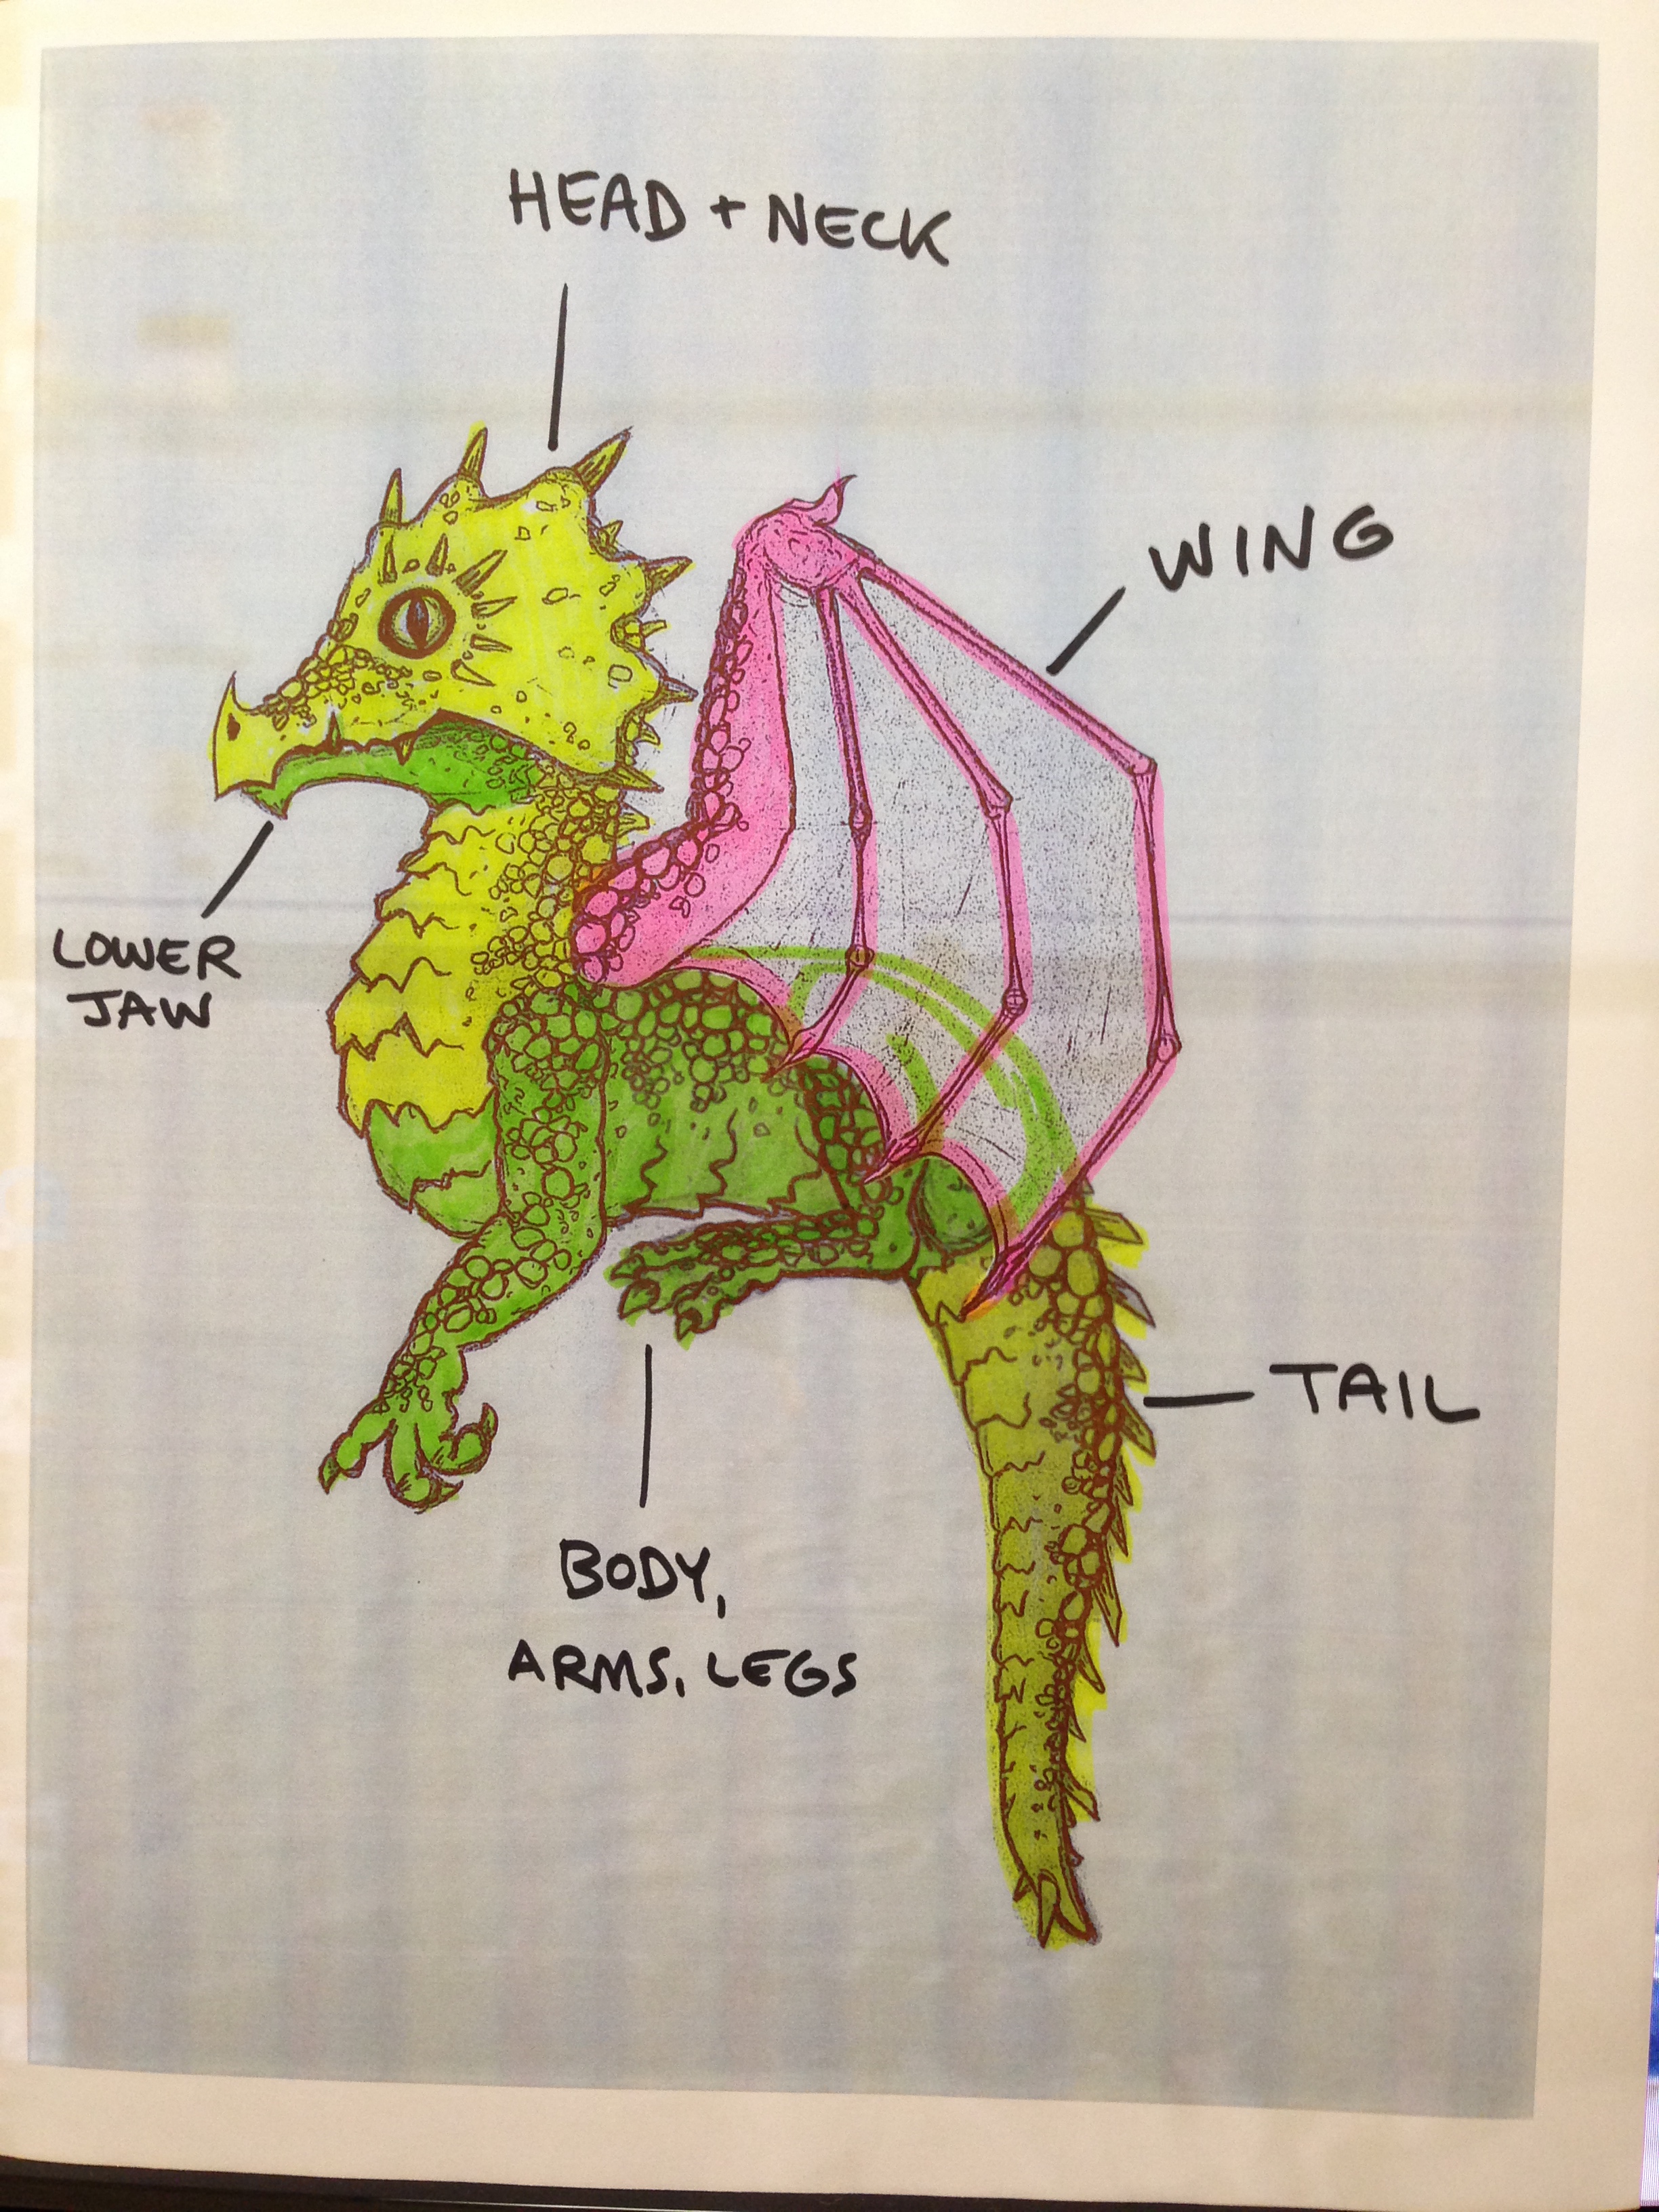
This was my original “cute” baby dragon sketch with rough dimensions added. You can see below that the plan here was to make the sculpture in multiple pieces due to the size constraints of my toaster oven (which is where the polymer clay would be baked) also for ease of molding, and to allow for access to certain parts of the future robotics.
2. Materials
Second, I gathered my materials together. Which included: various gauges of wire for the armature, small pieces of steel tube and bar, J B Weld to attach the bars to the wires, tin foil for bulking out the armature and plyers/wire cutters.
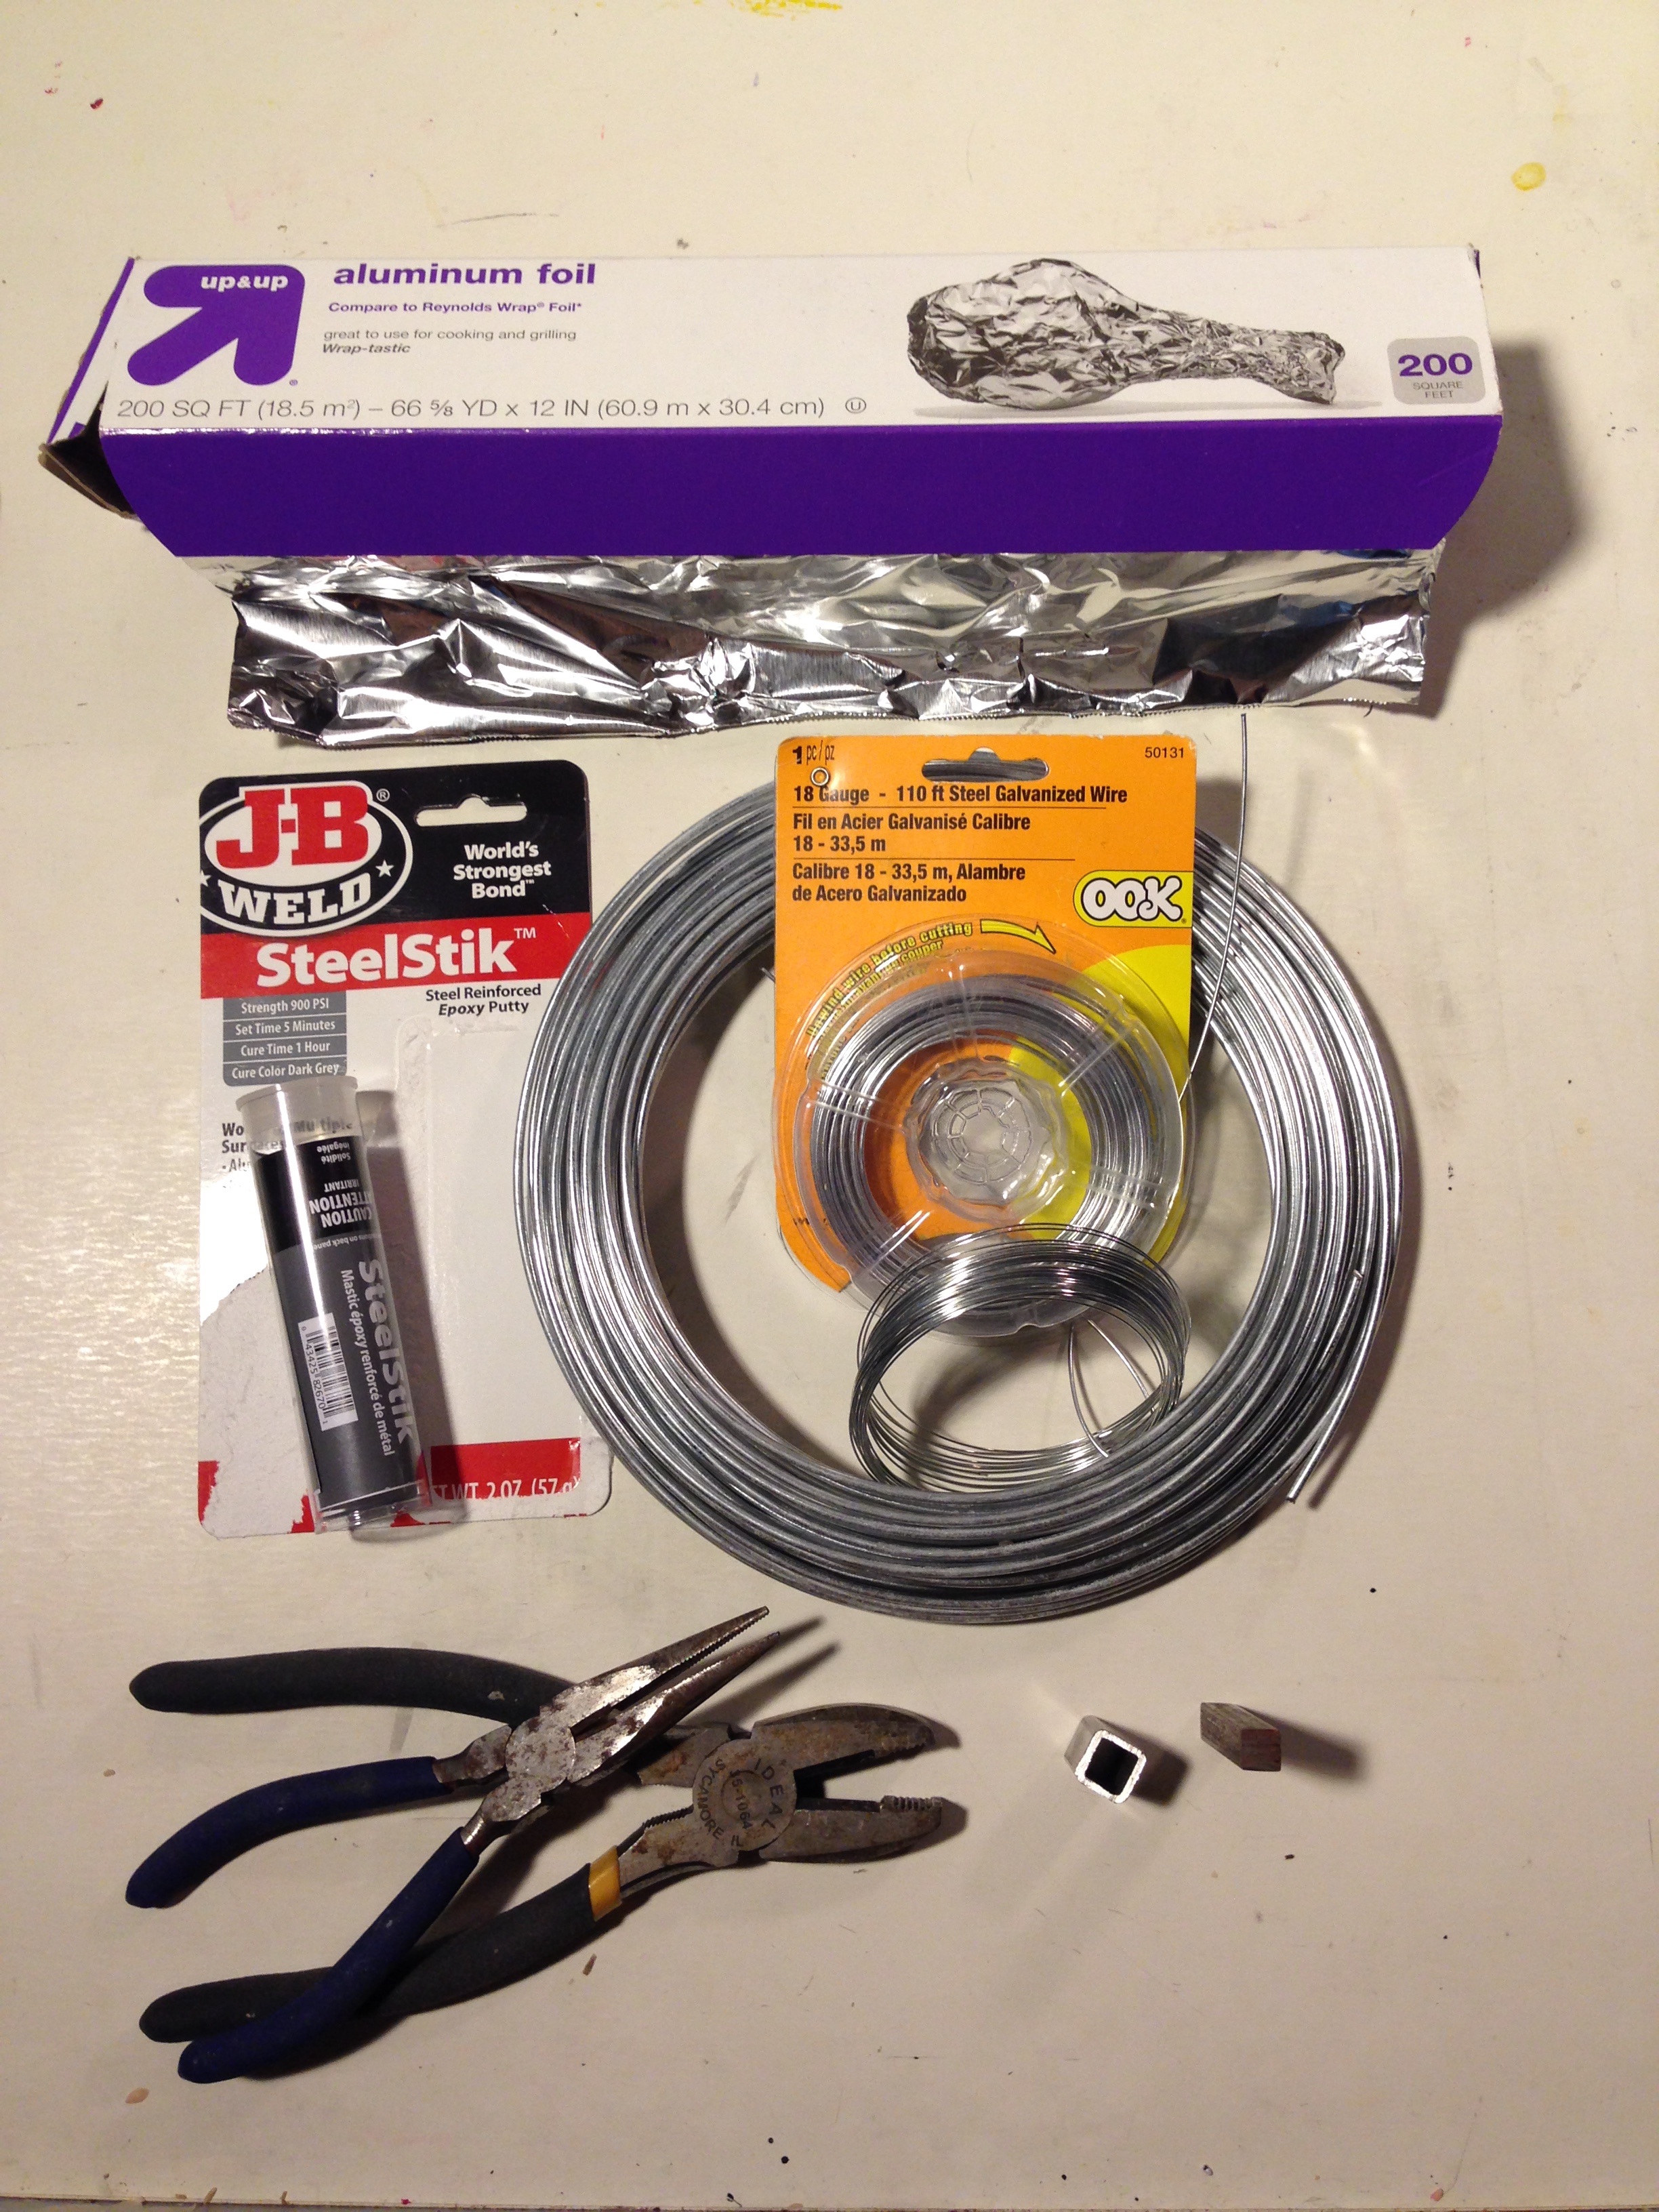
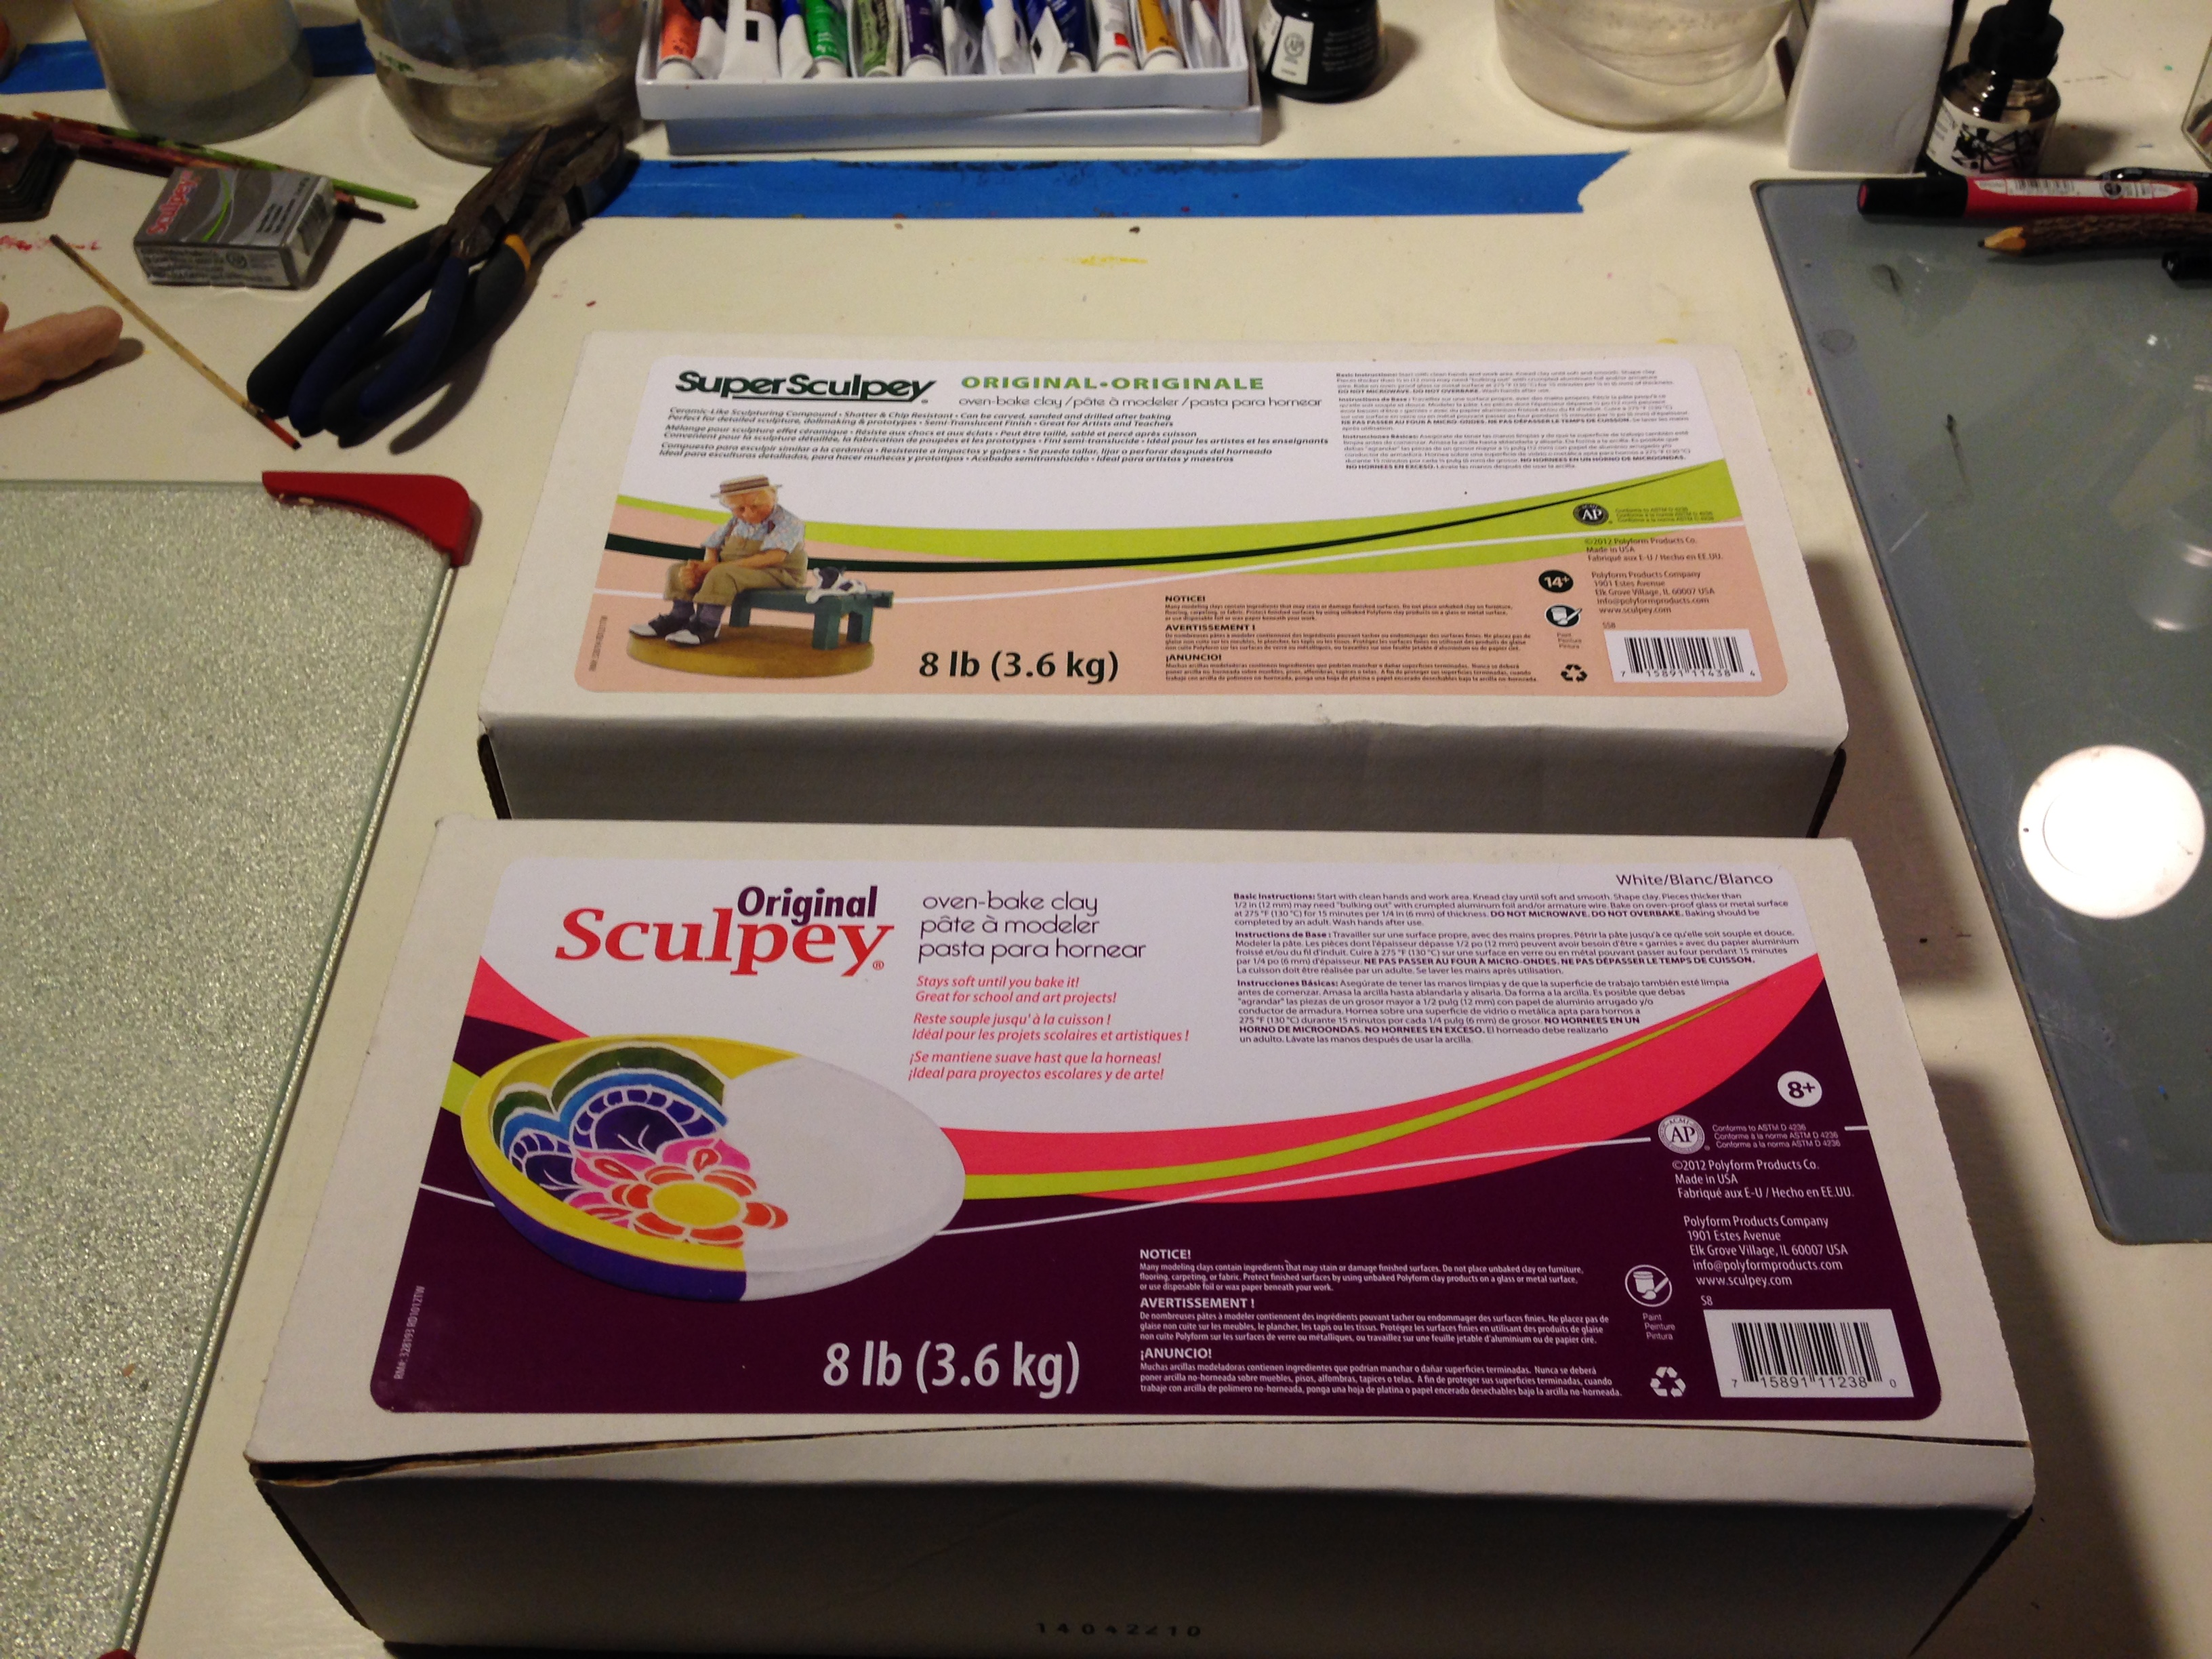
I also purchased two types of Sculpey Polymer Clay.
3. Building the Armature
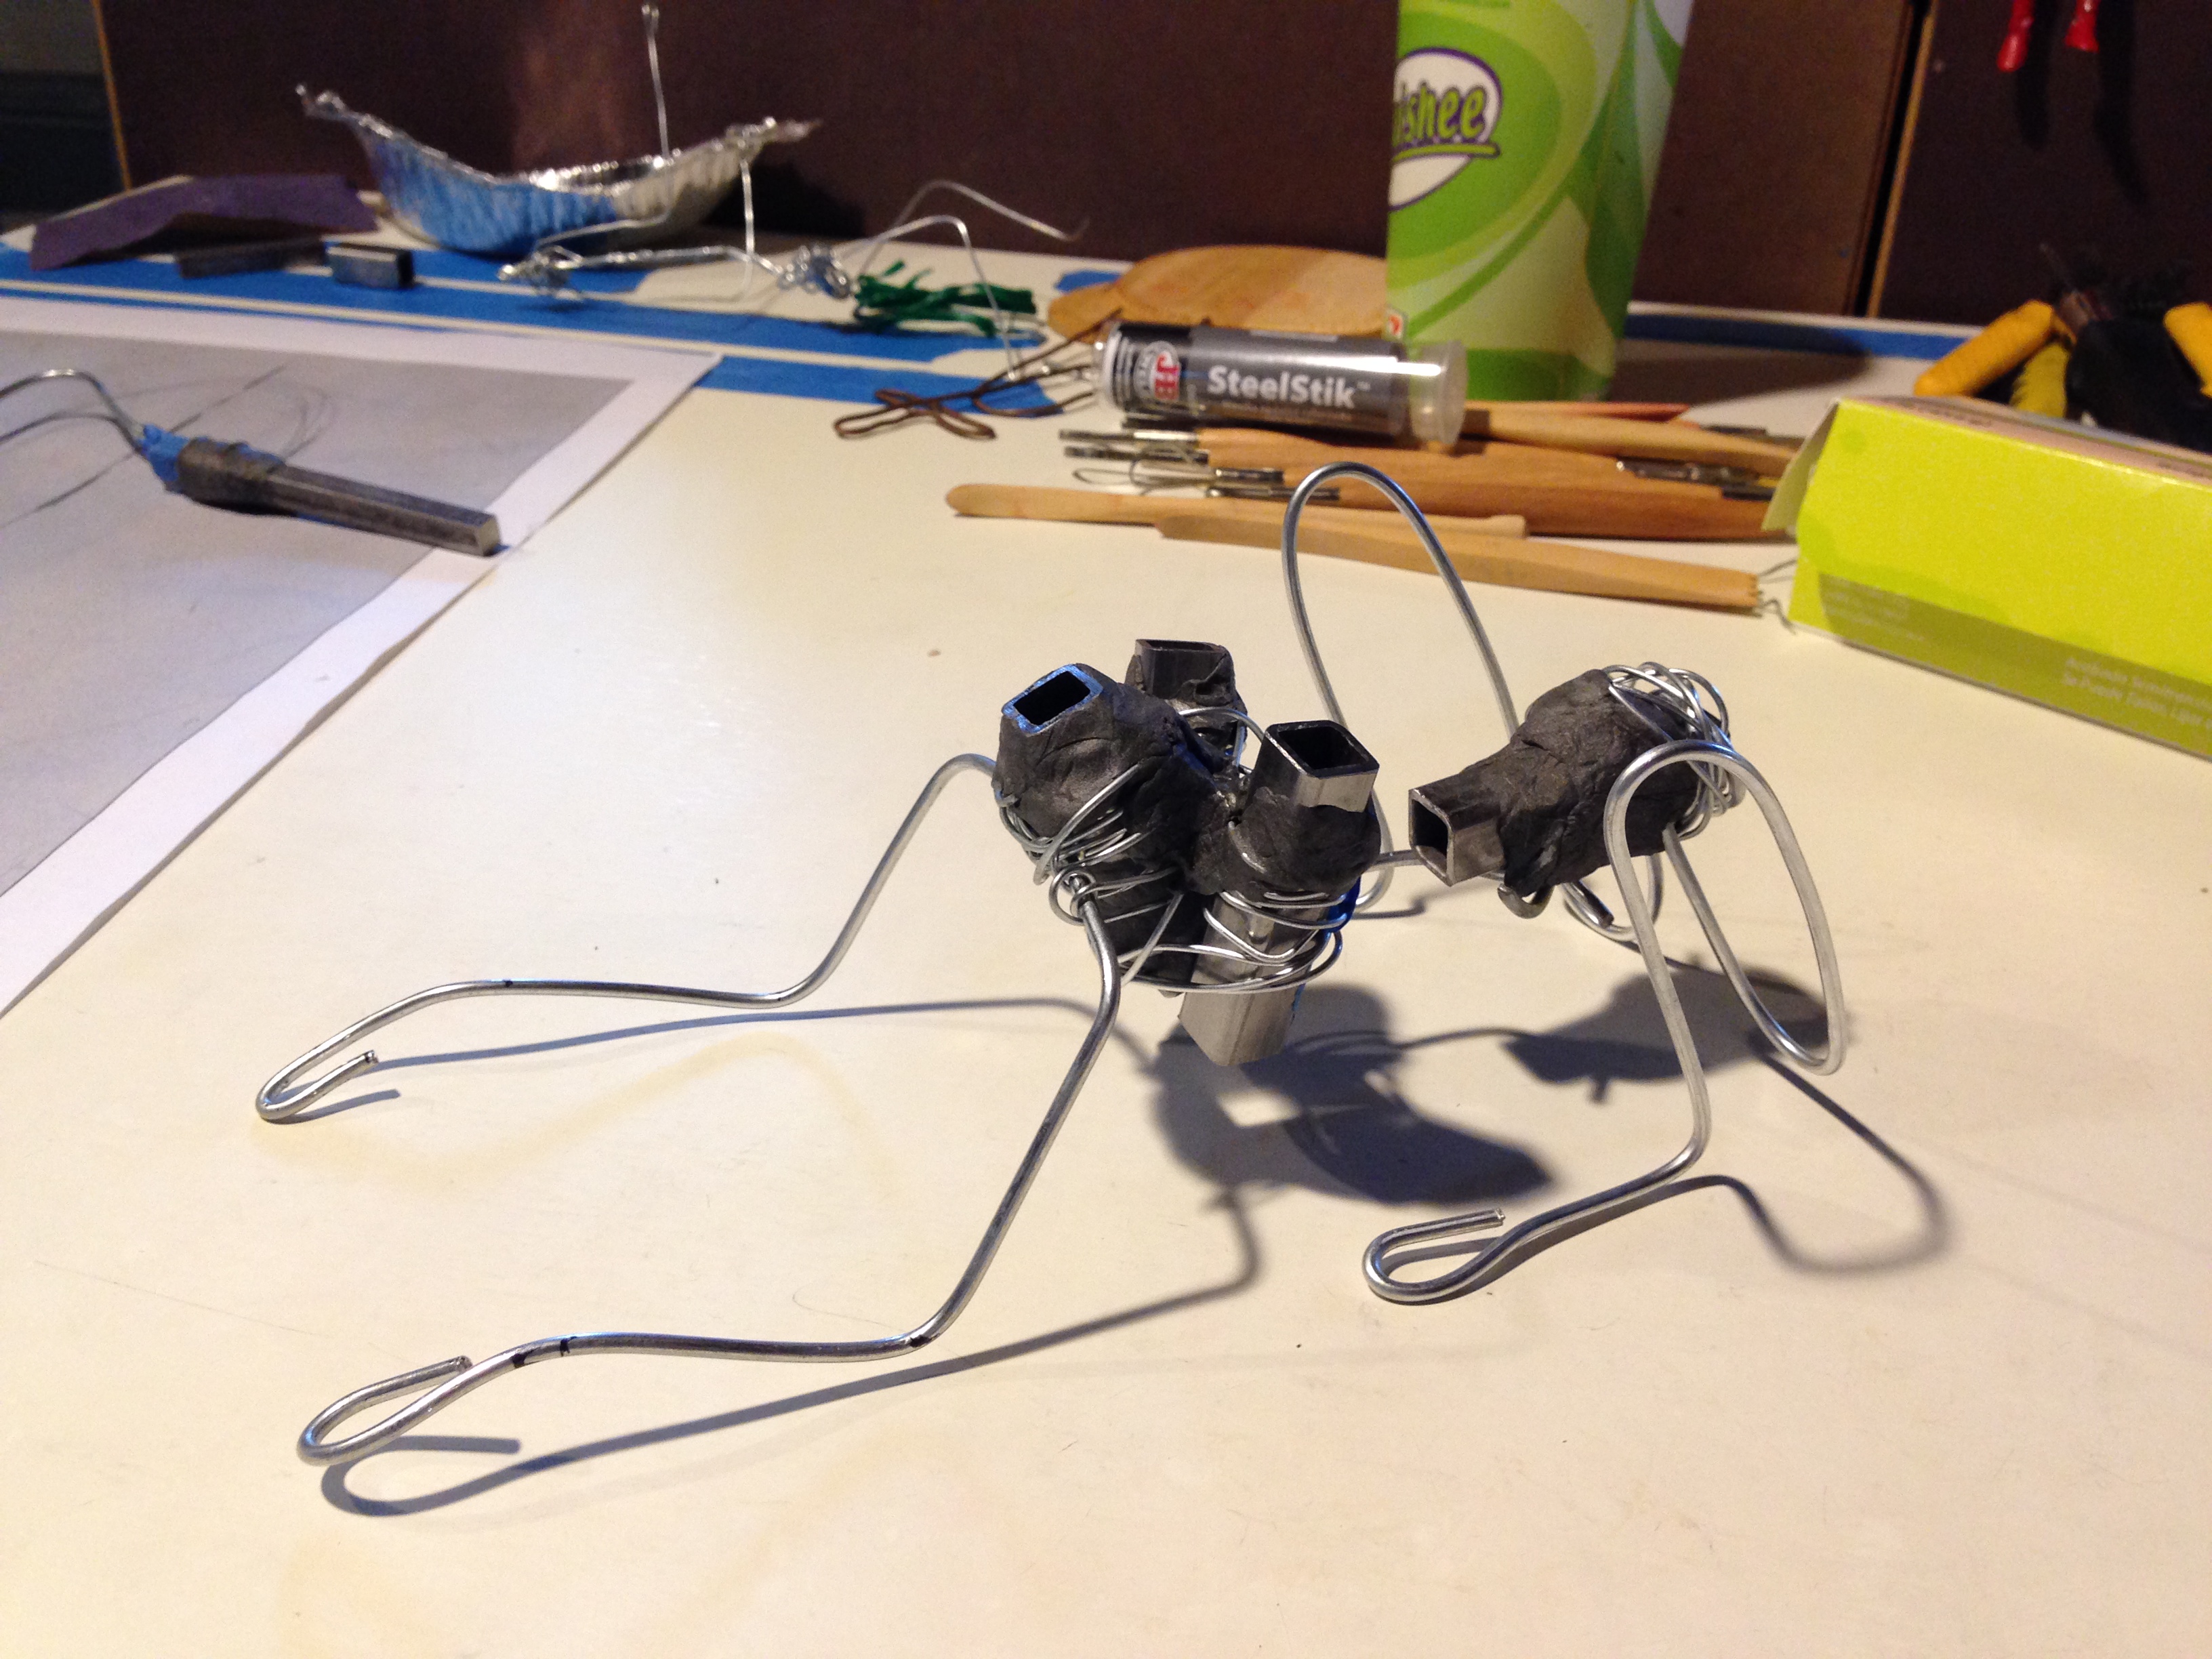
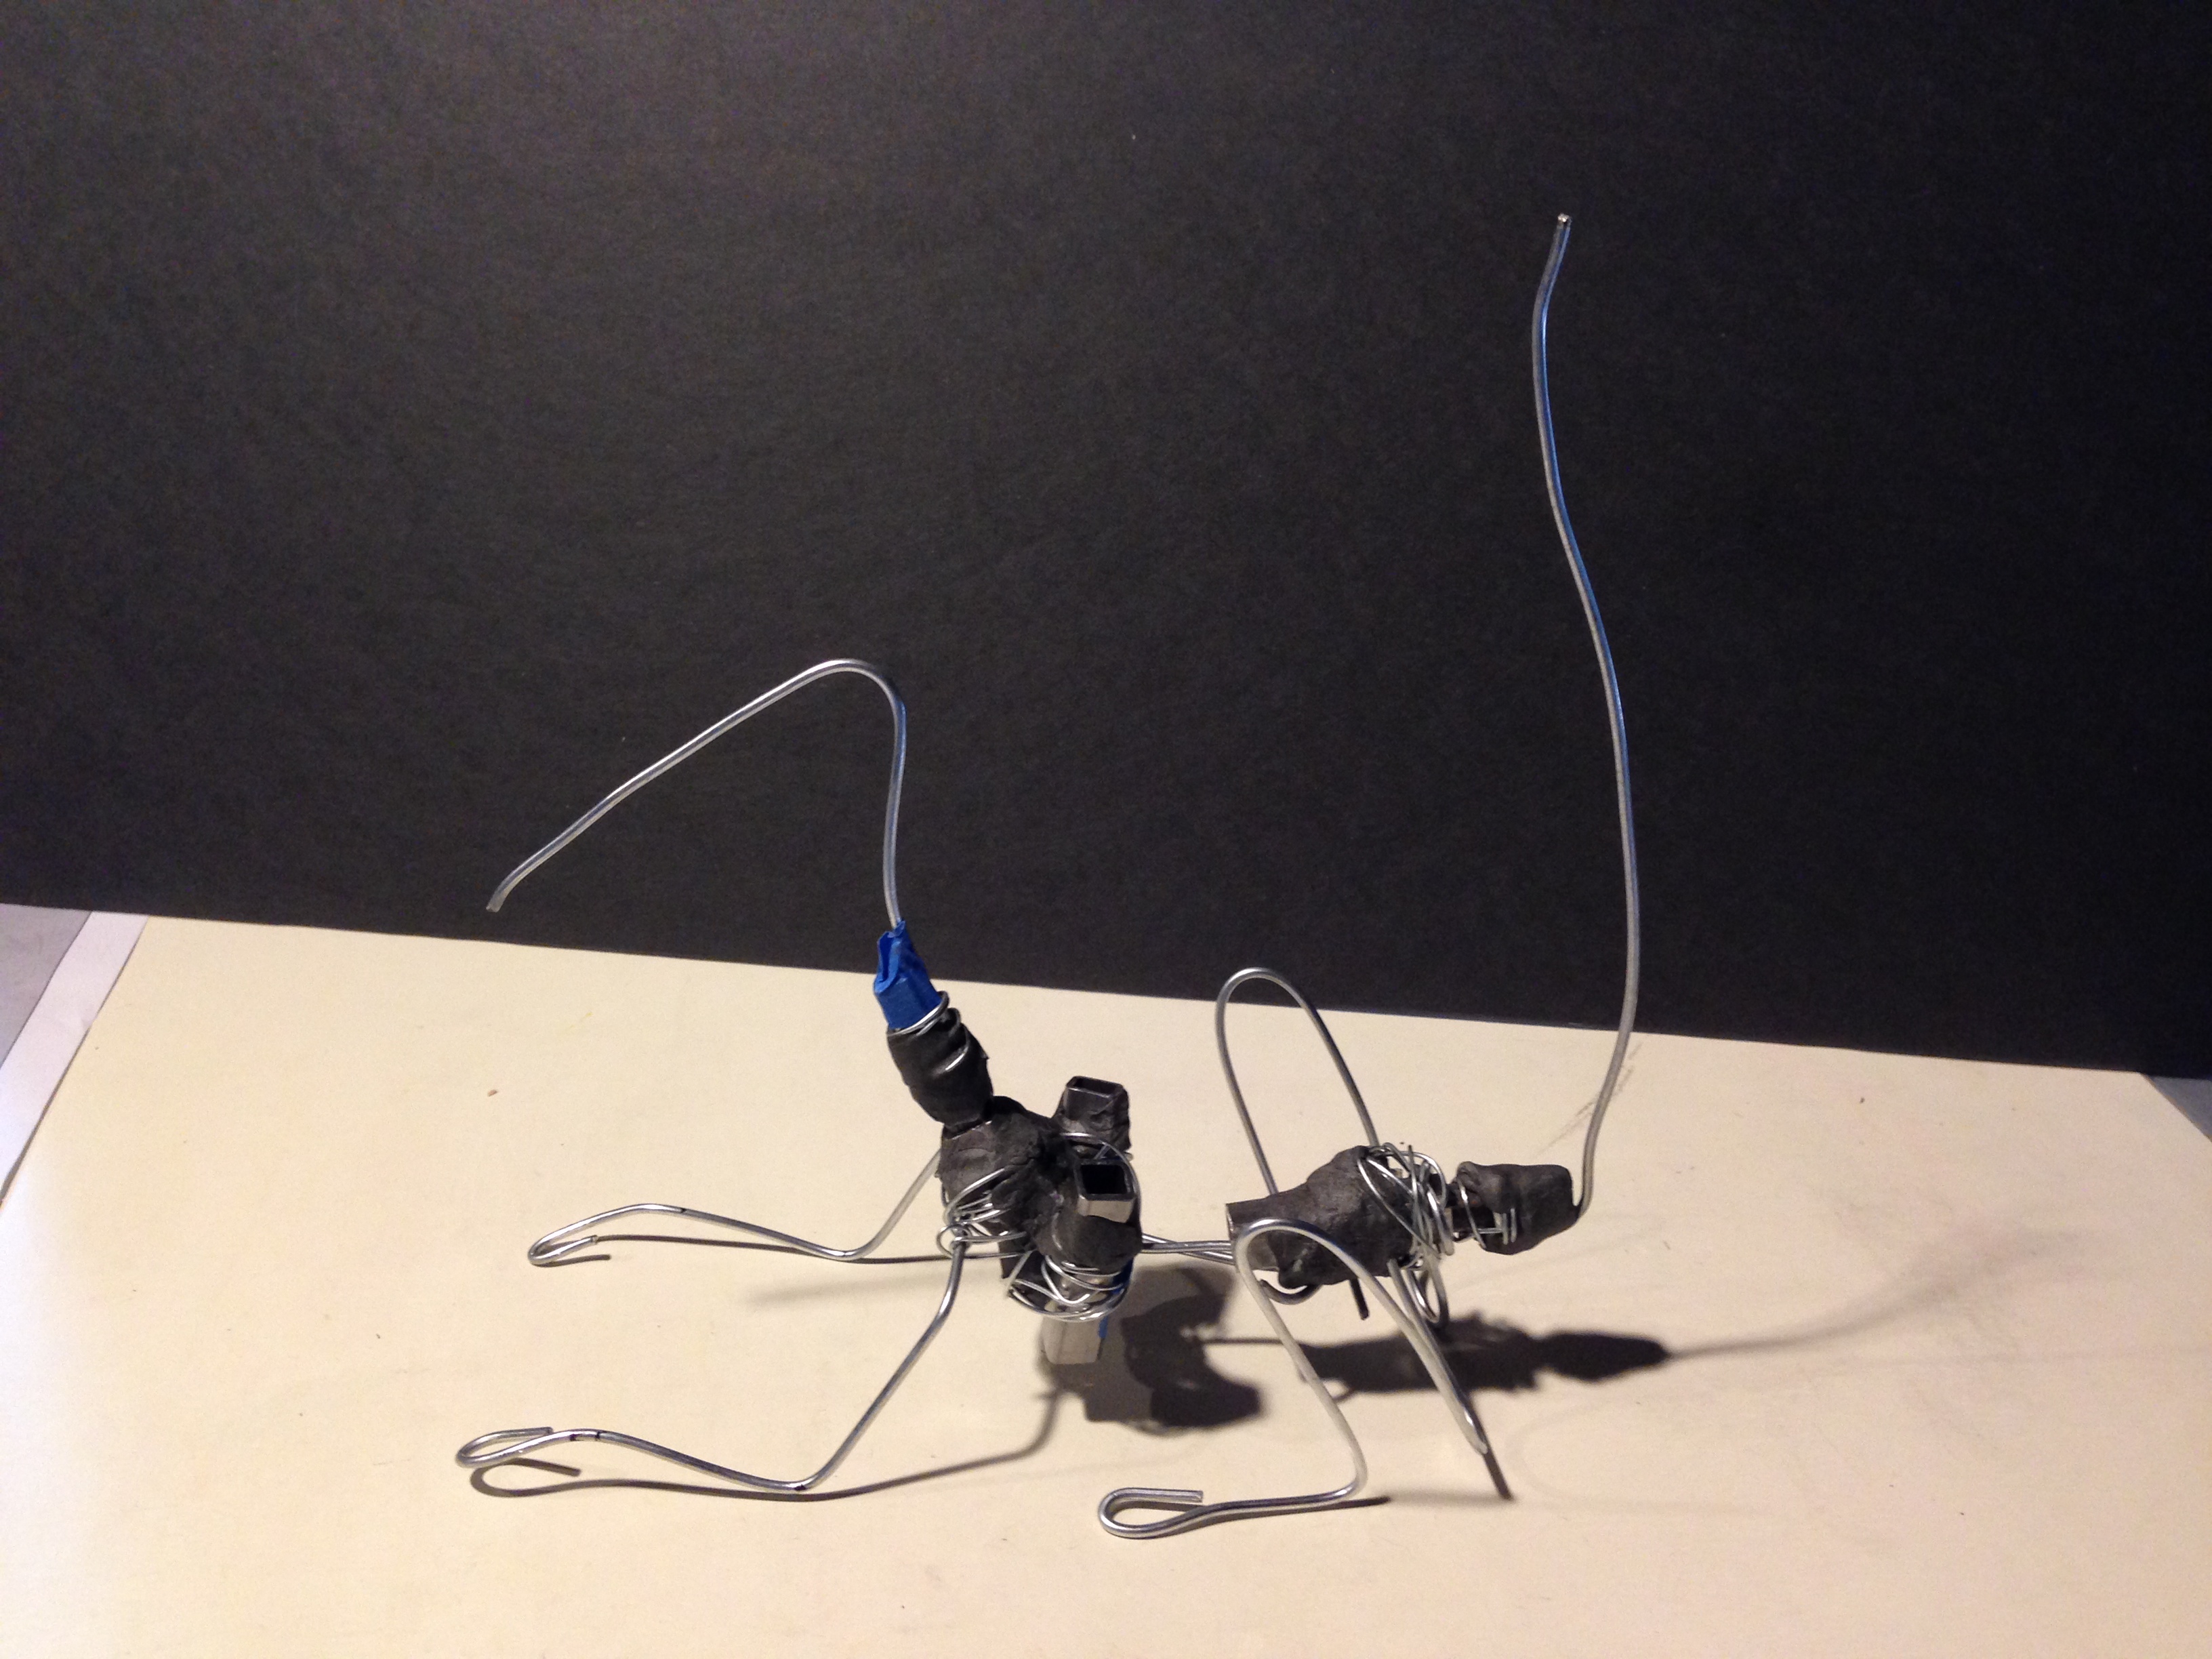
After gathering all of my materials, I printed the dragon sketch out full size. I then used wire to start building the armature, using the full size print out as a guide. I used thicker 14 gauge wire for most of the skeleton and used an assortment of thinner wire to wrap the pieces together.
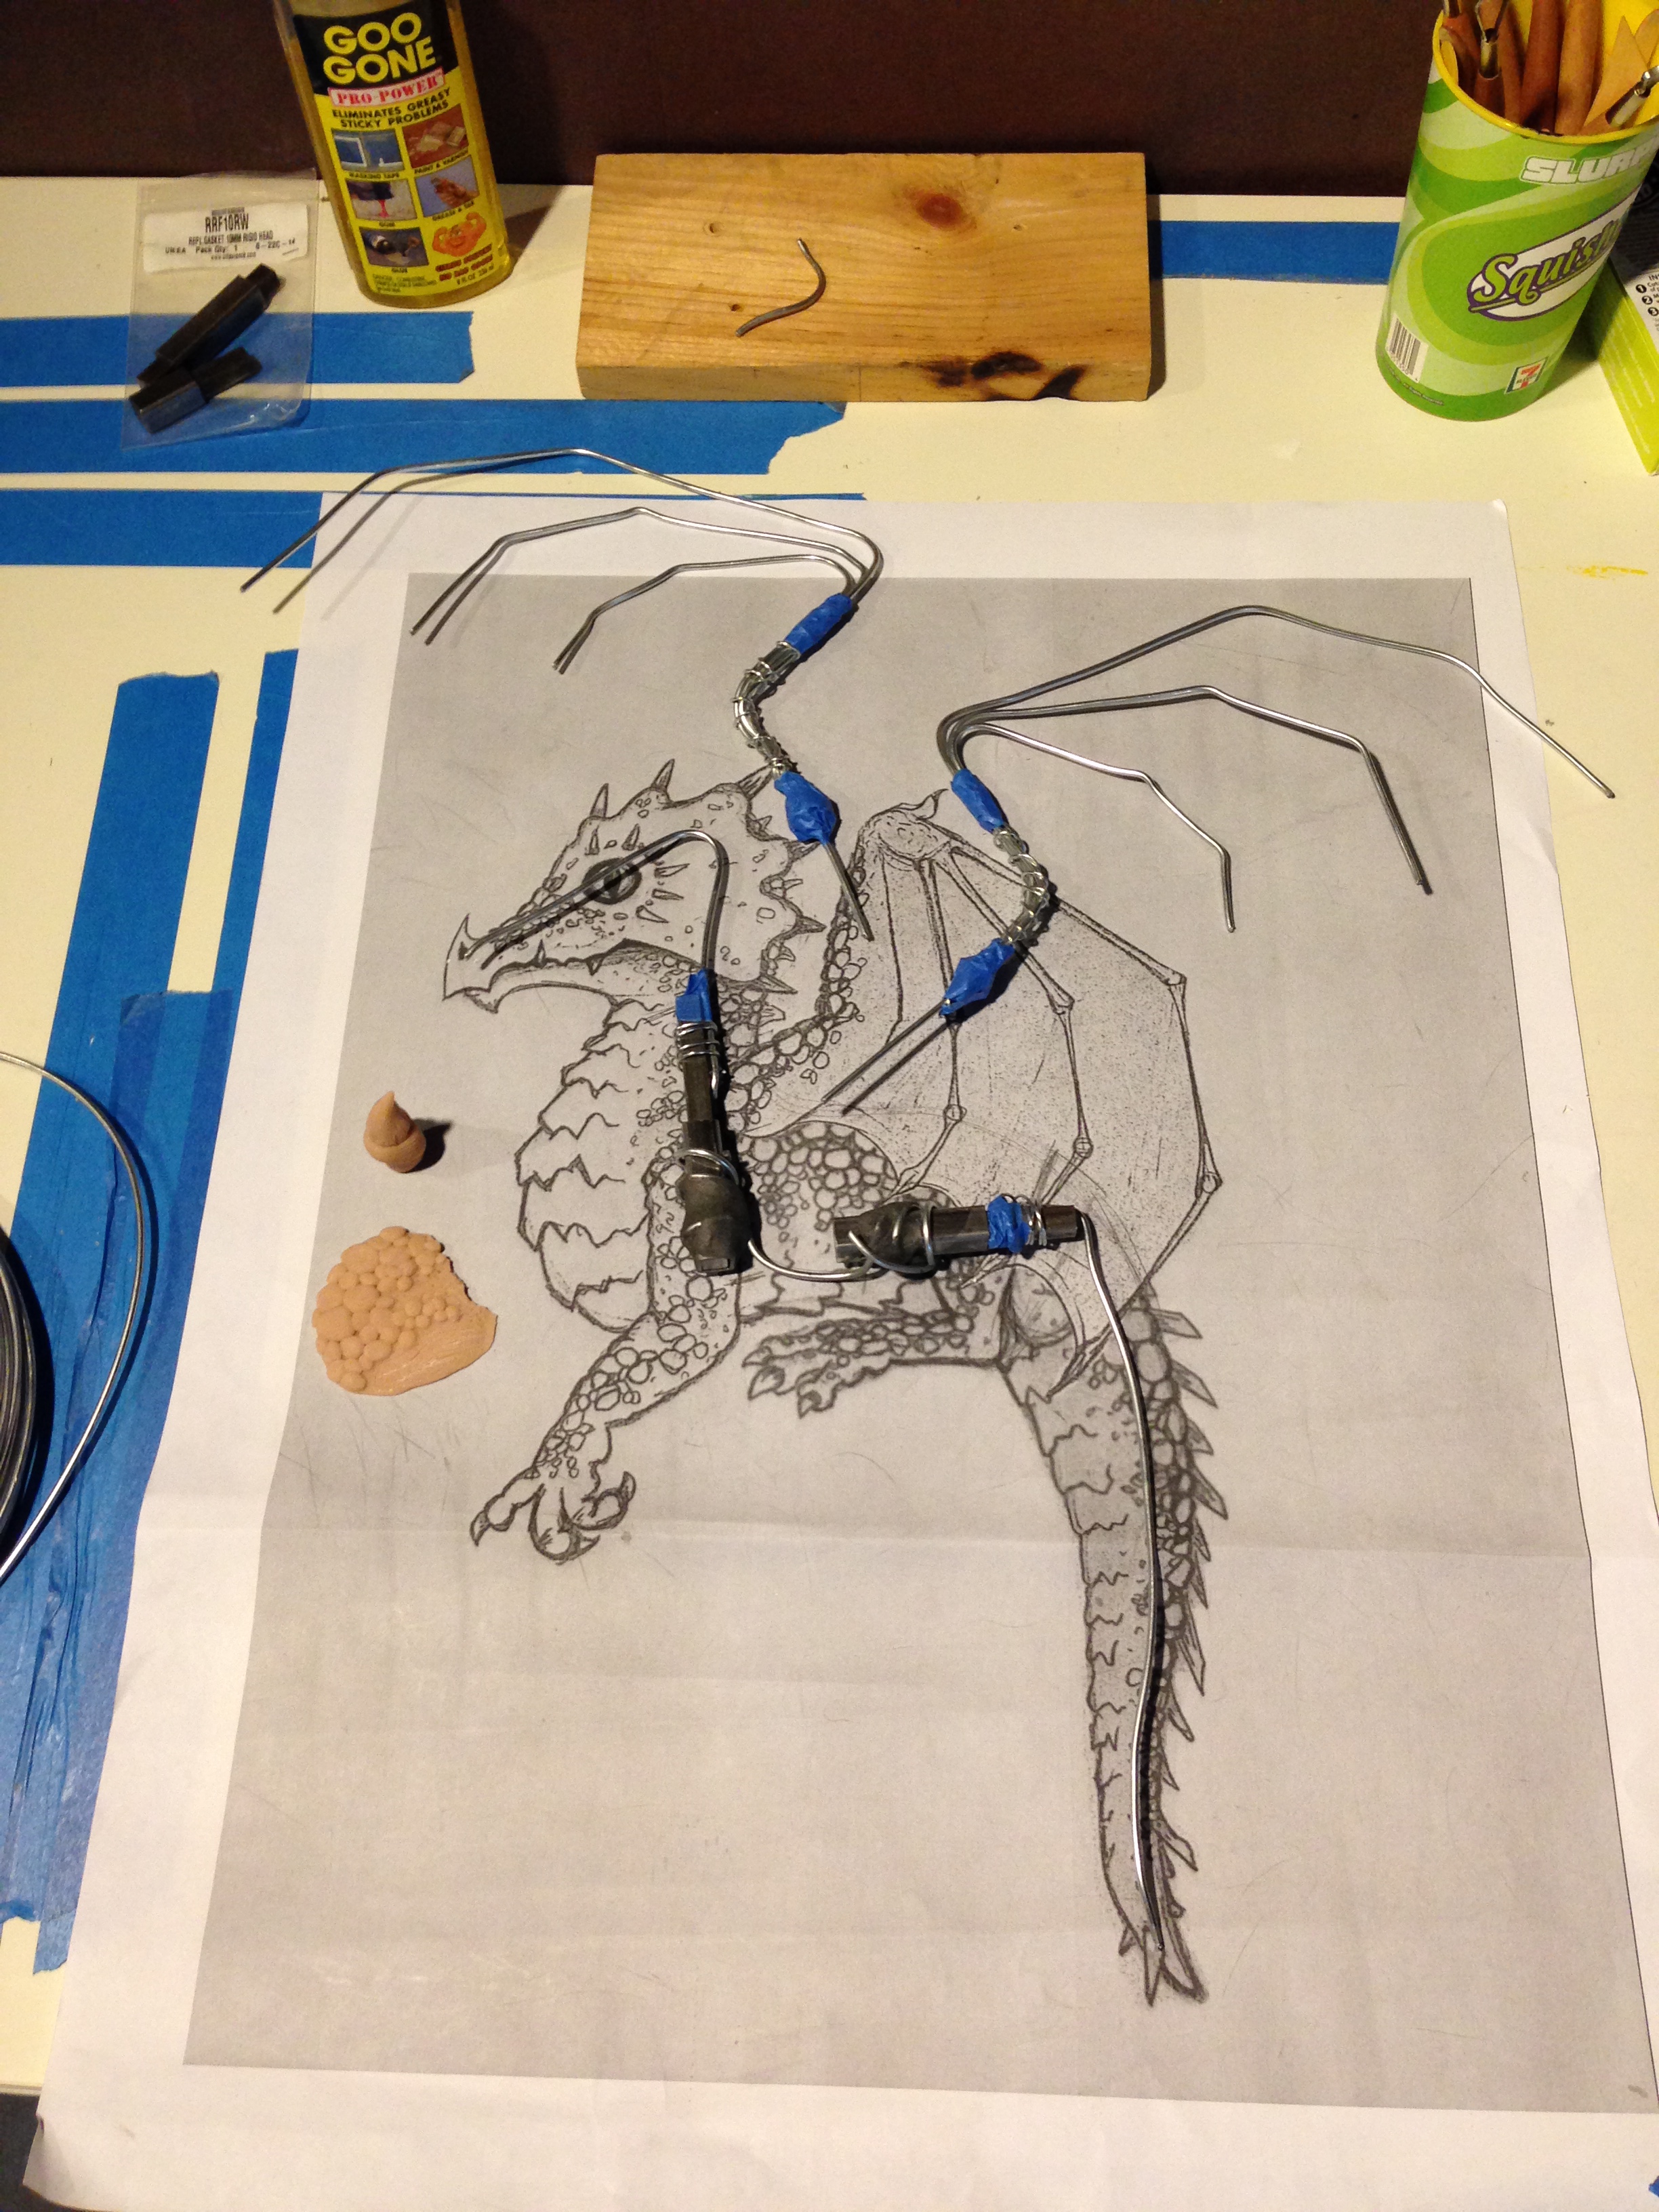
To make the head, wings and tail removable, I devised a plan to use small pieces of square steel tube to act as sleeves to receive small pieces of square steel bar. I used a product called SteelStik to connect the steel pieces to the wire armature.
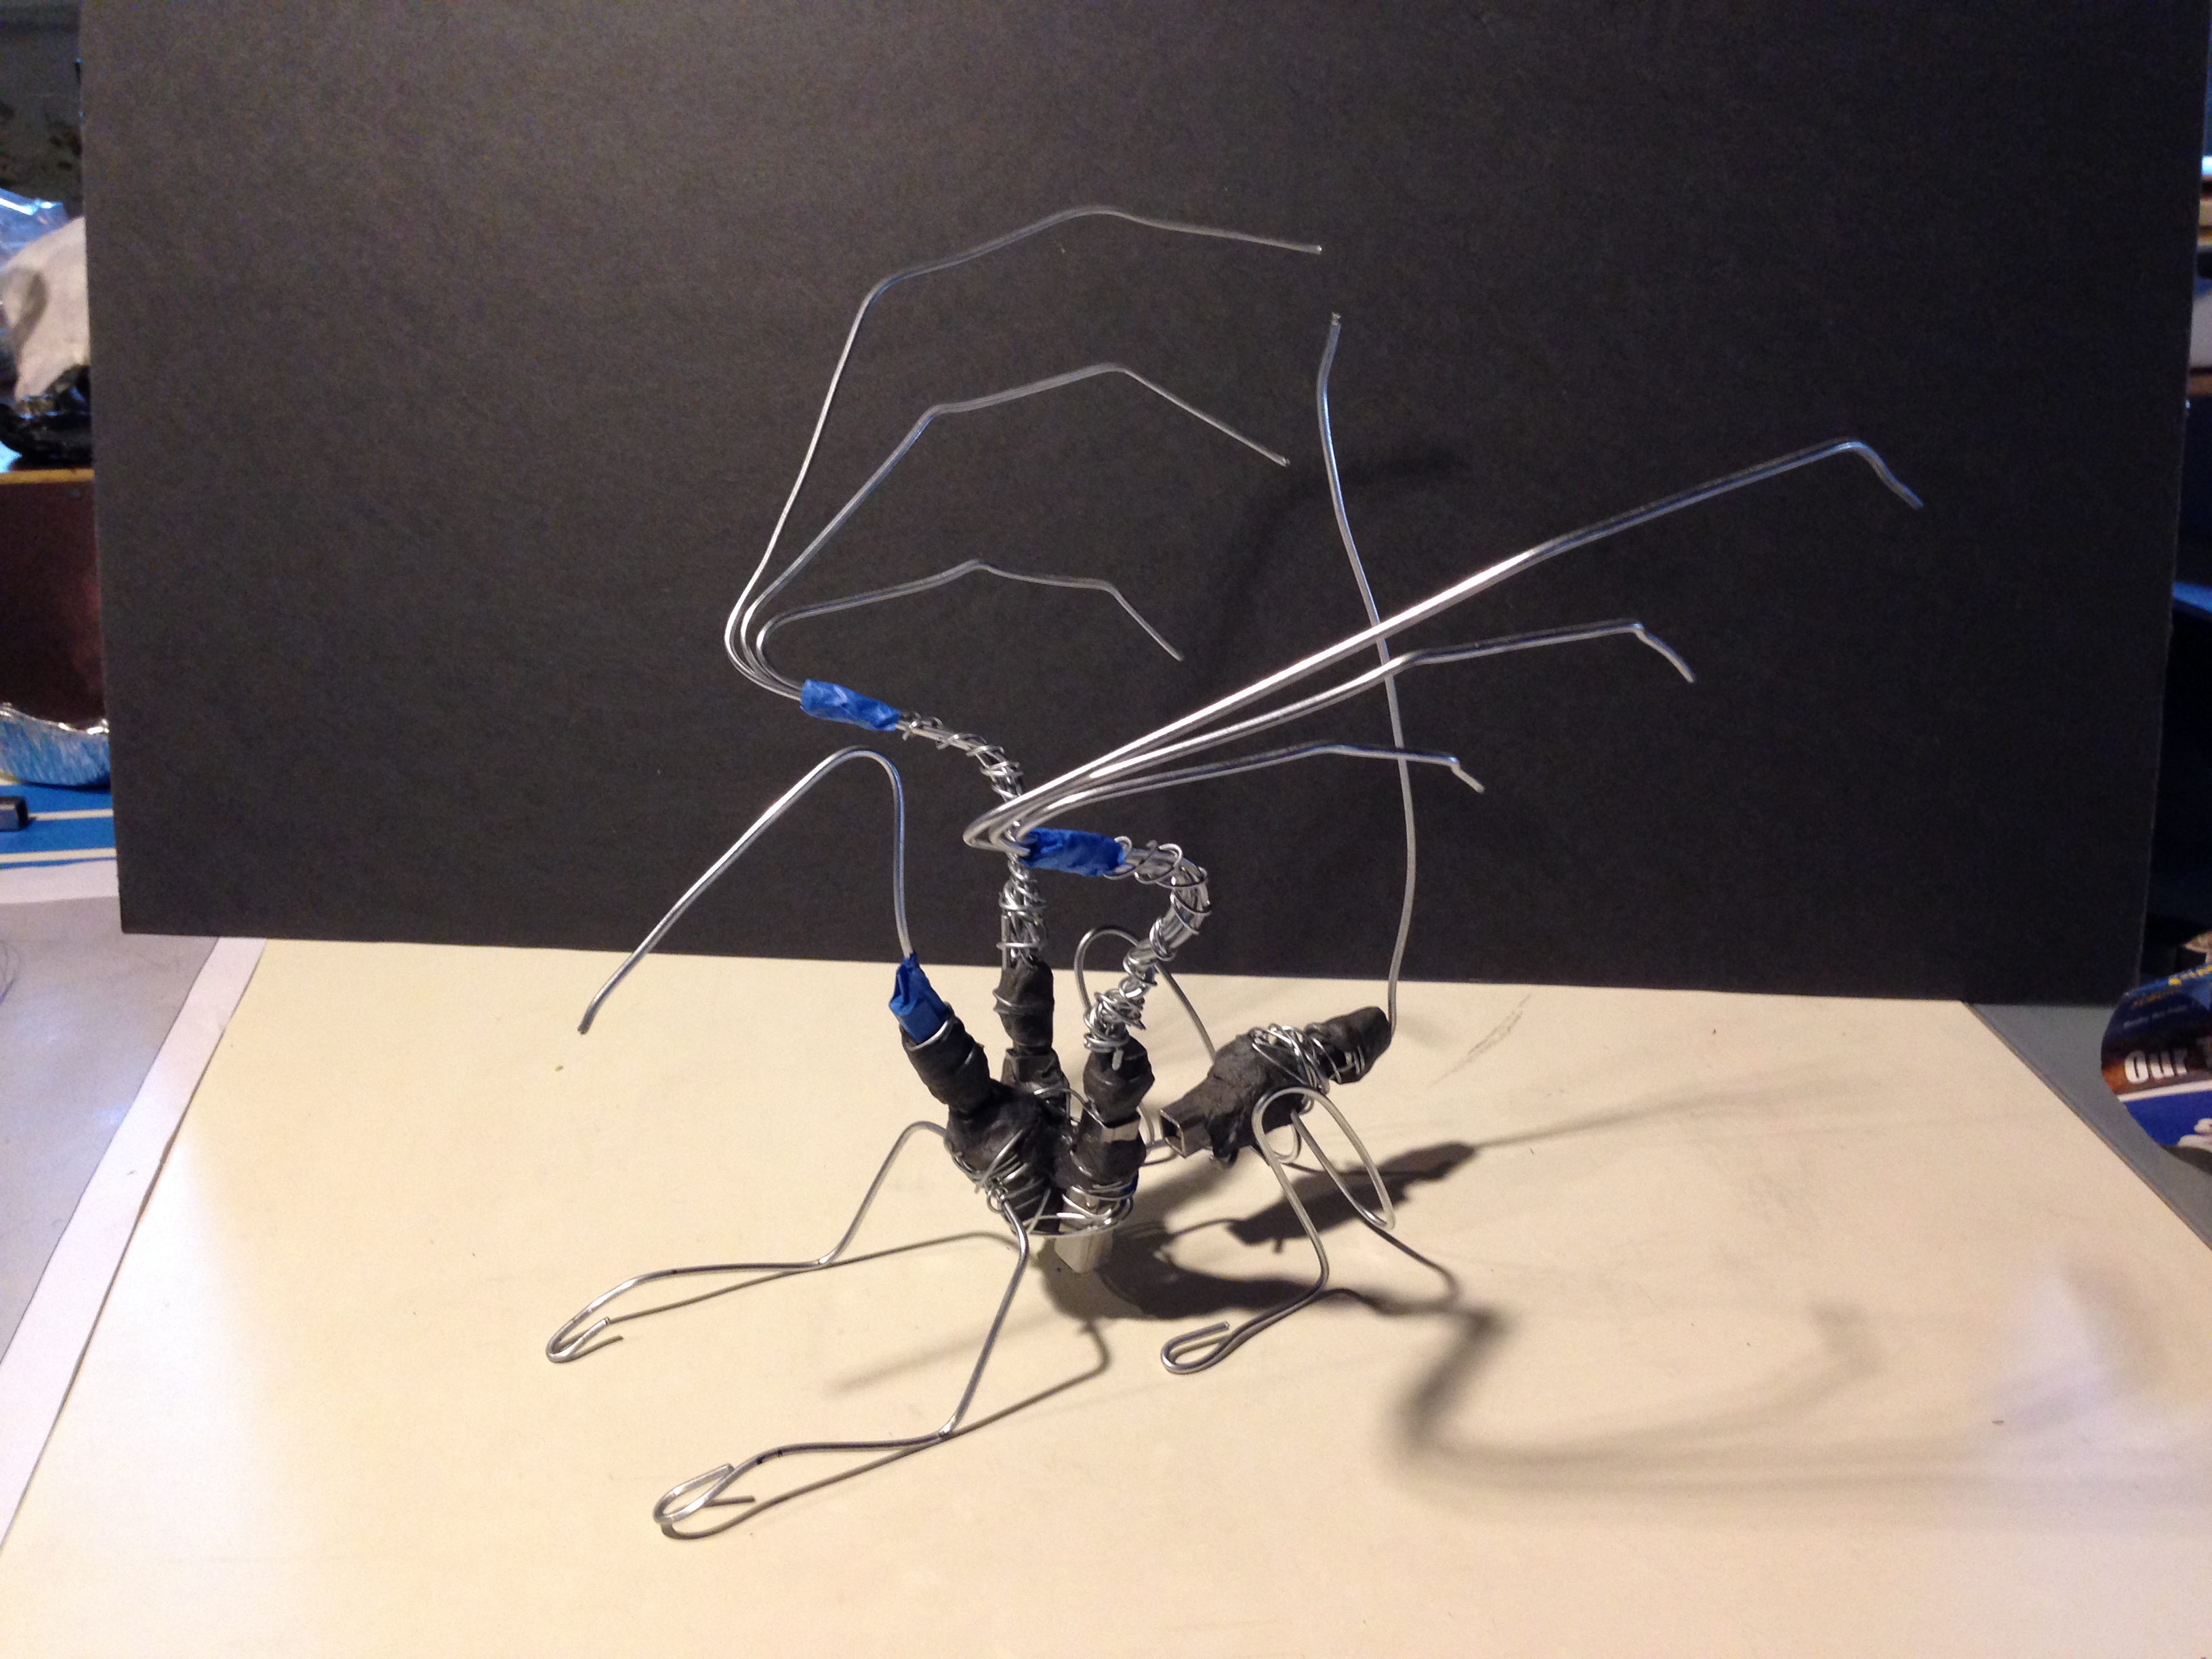
I then bulked out the armature using aluminum foil and wrapping it in painter’s tape. I should’ve used masking tape, it’s probably less expensive, but I didn’t have any on hand, so I just ran with it.
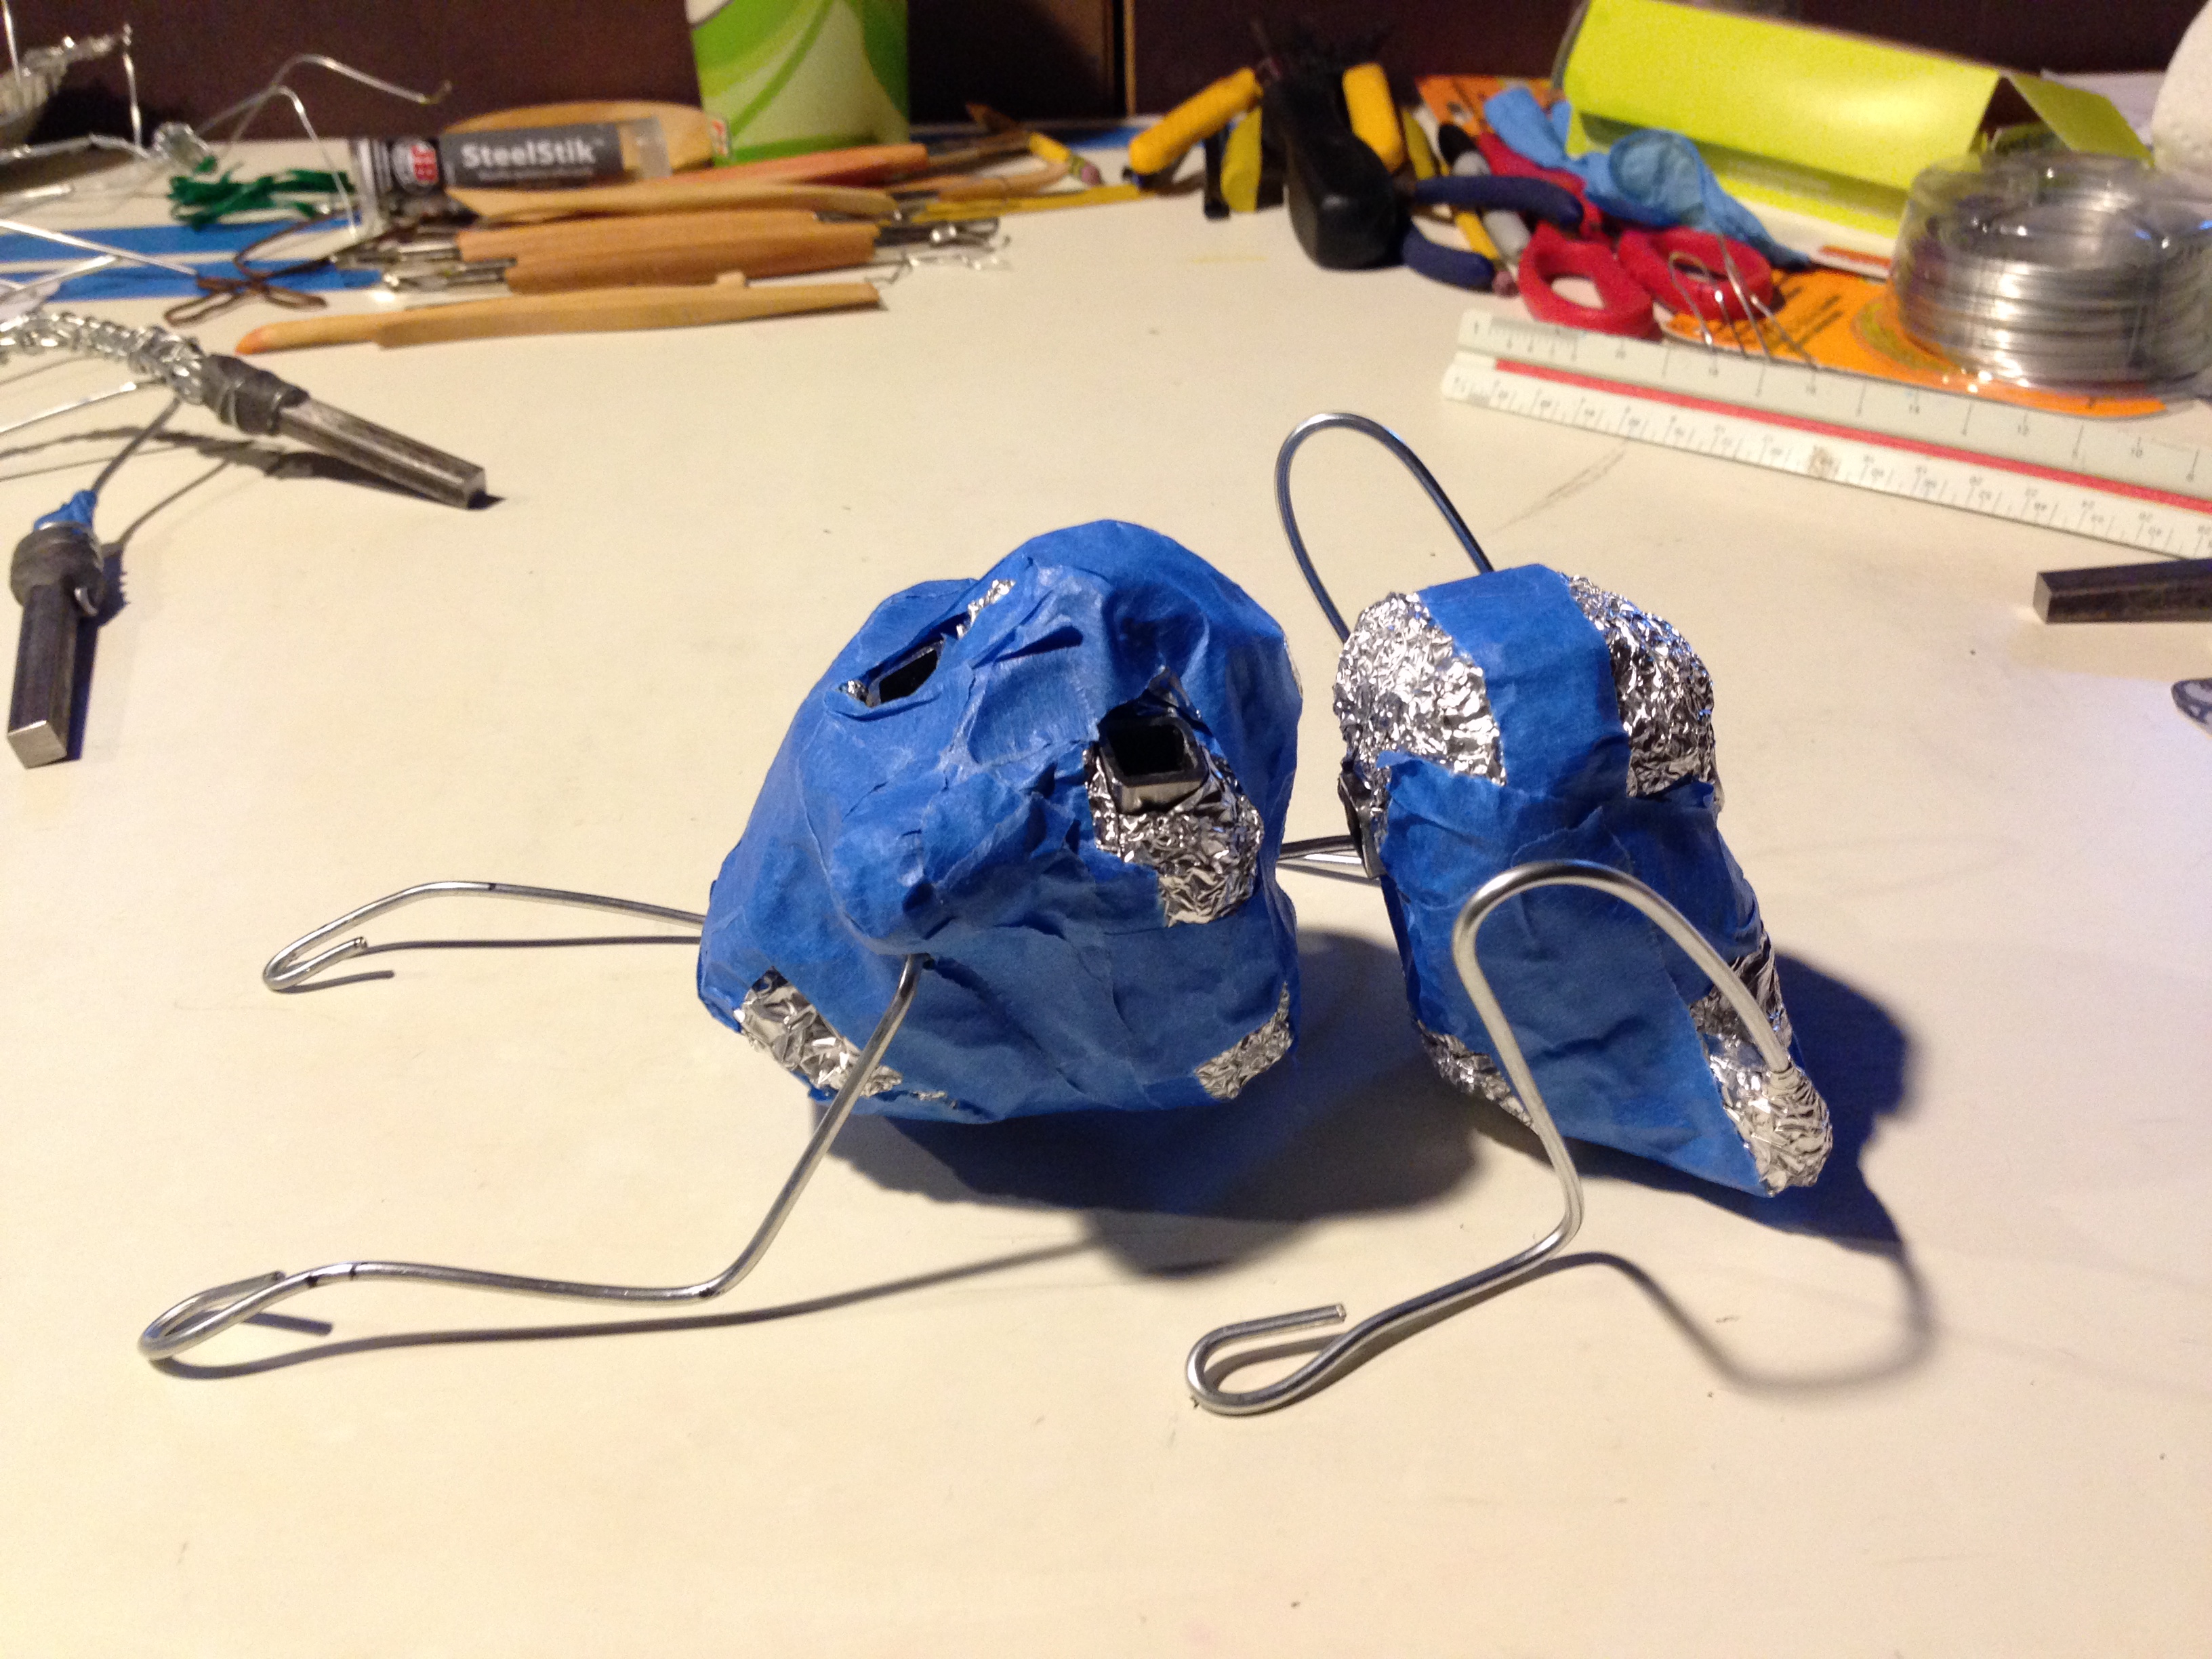
I bulked it out some more using Original Sculpey, trying to get closer to the finished shape of a dragon. In some areas I added too much clay and ended up shaving it down after it was baked.
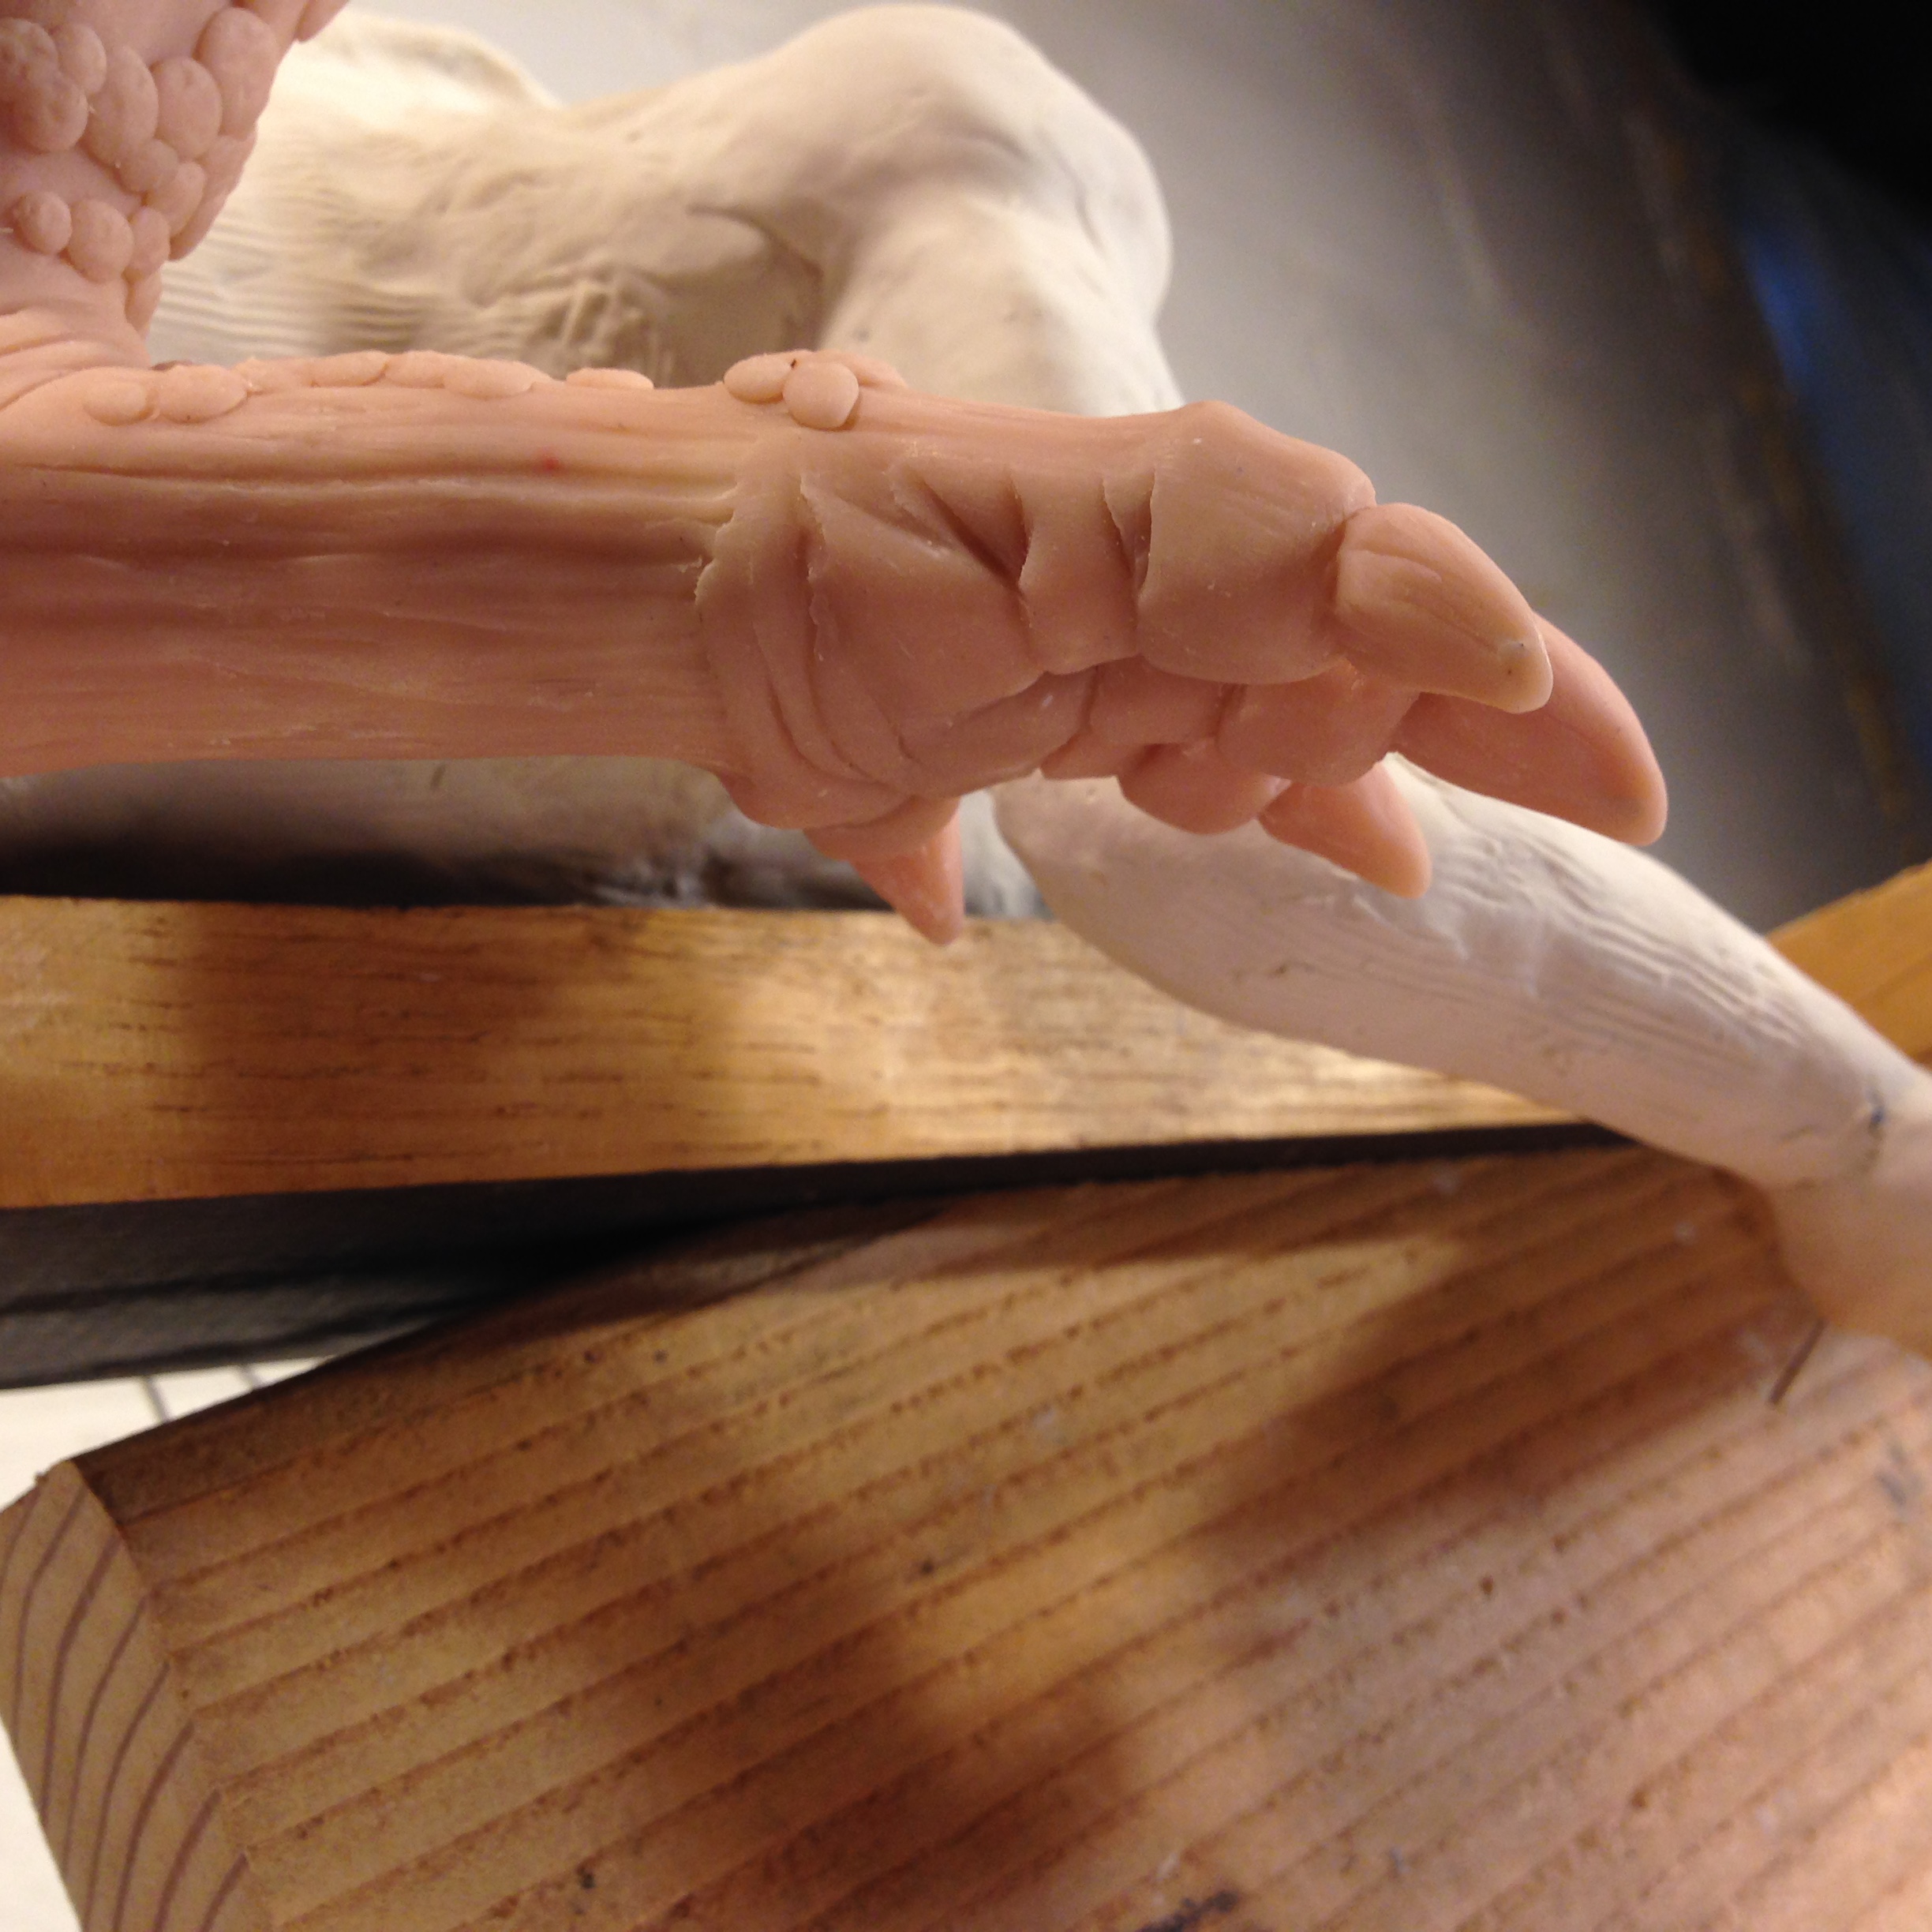
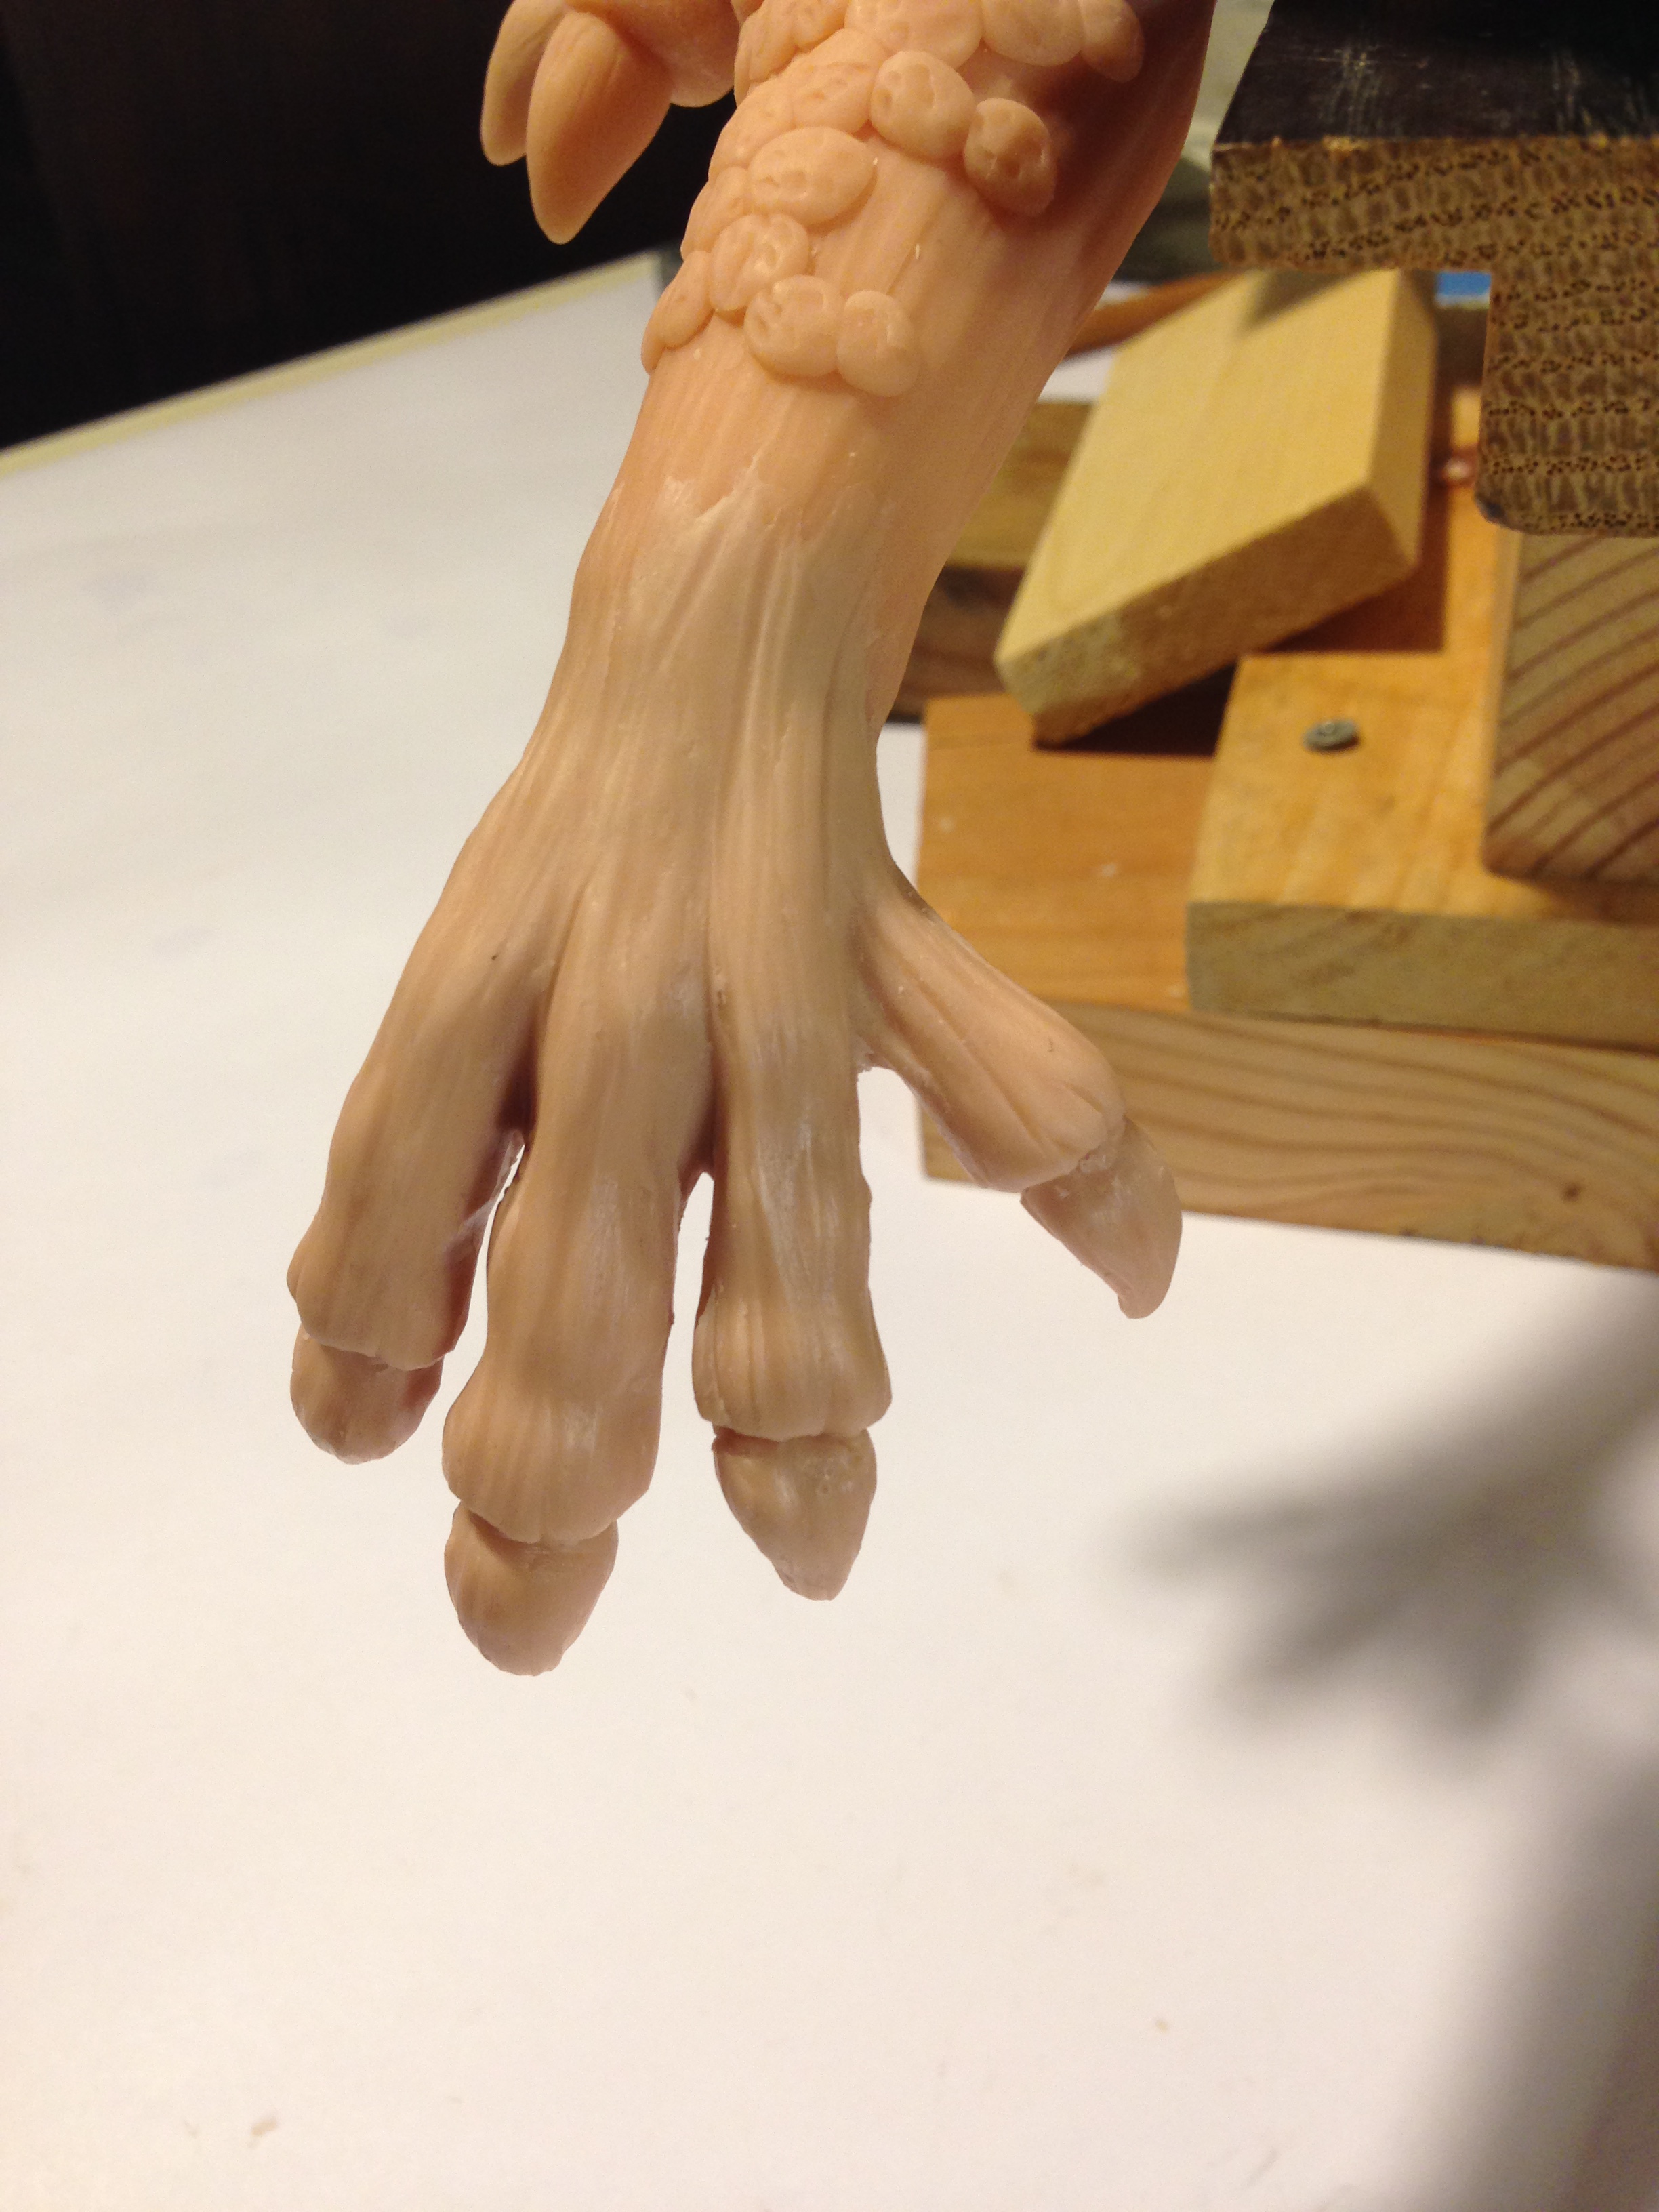
I added the wire claws before bulking out the rest of the arms and legs.
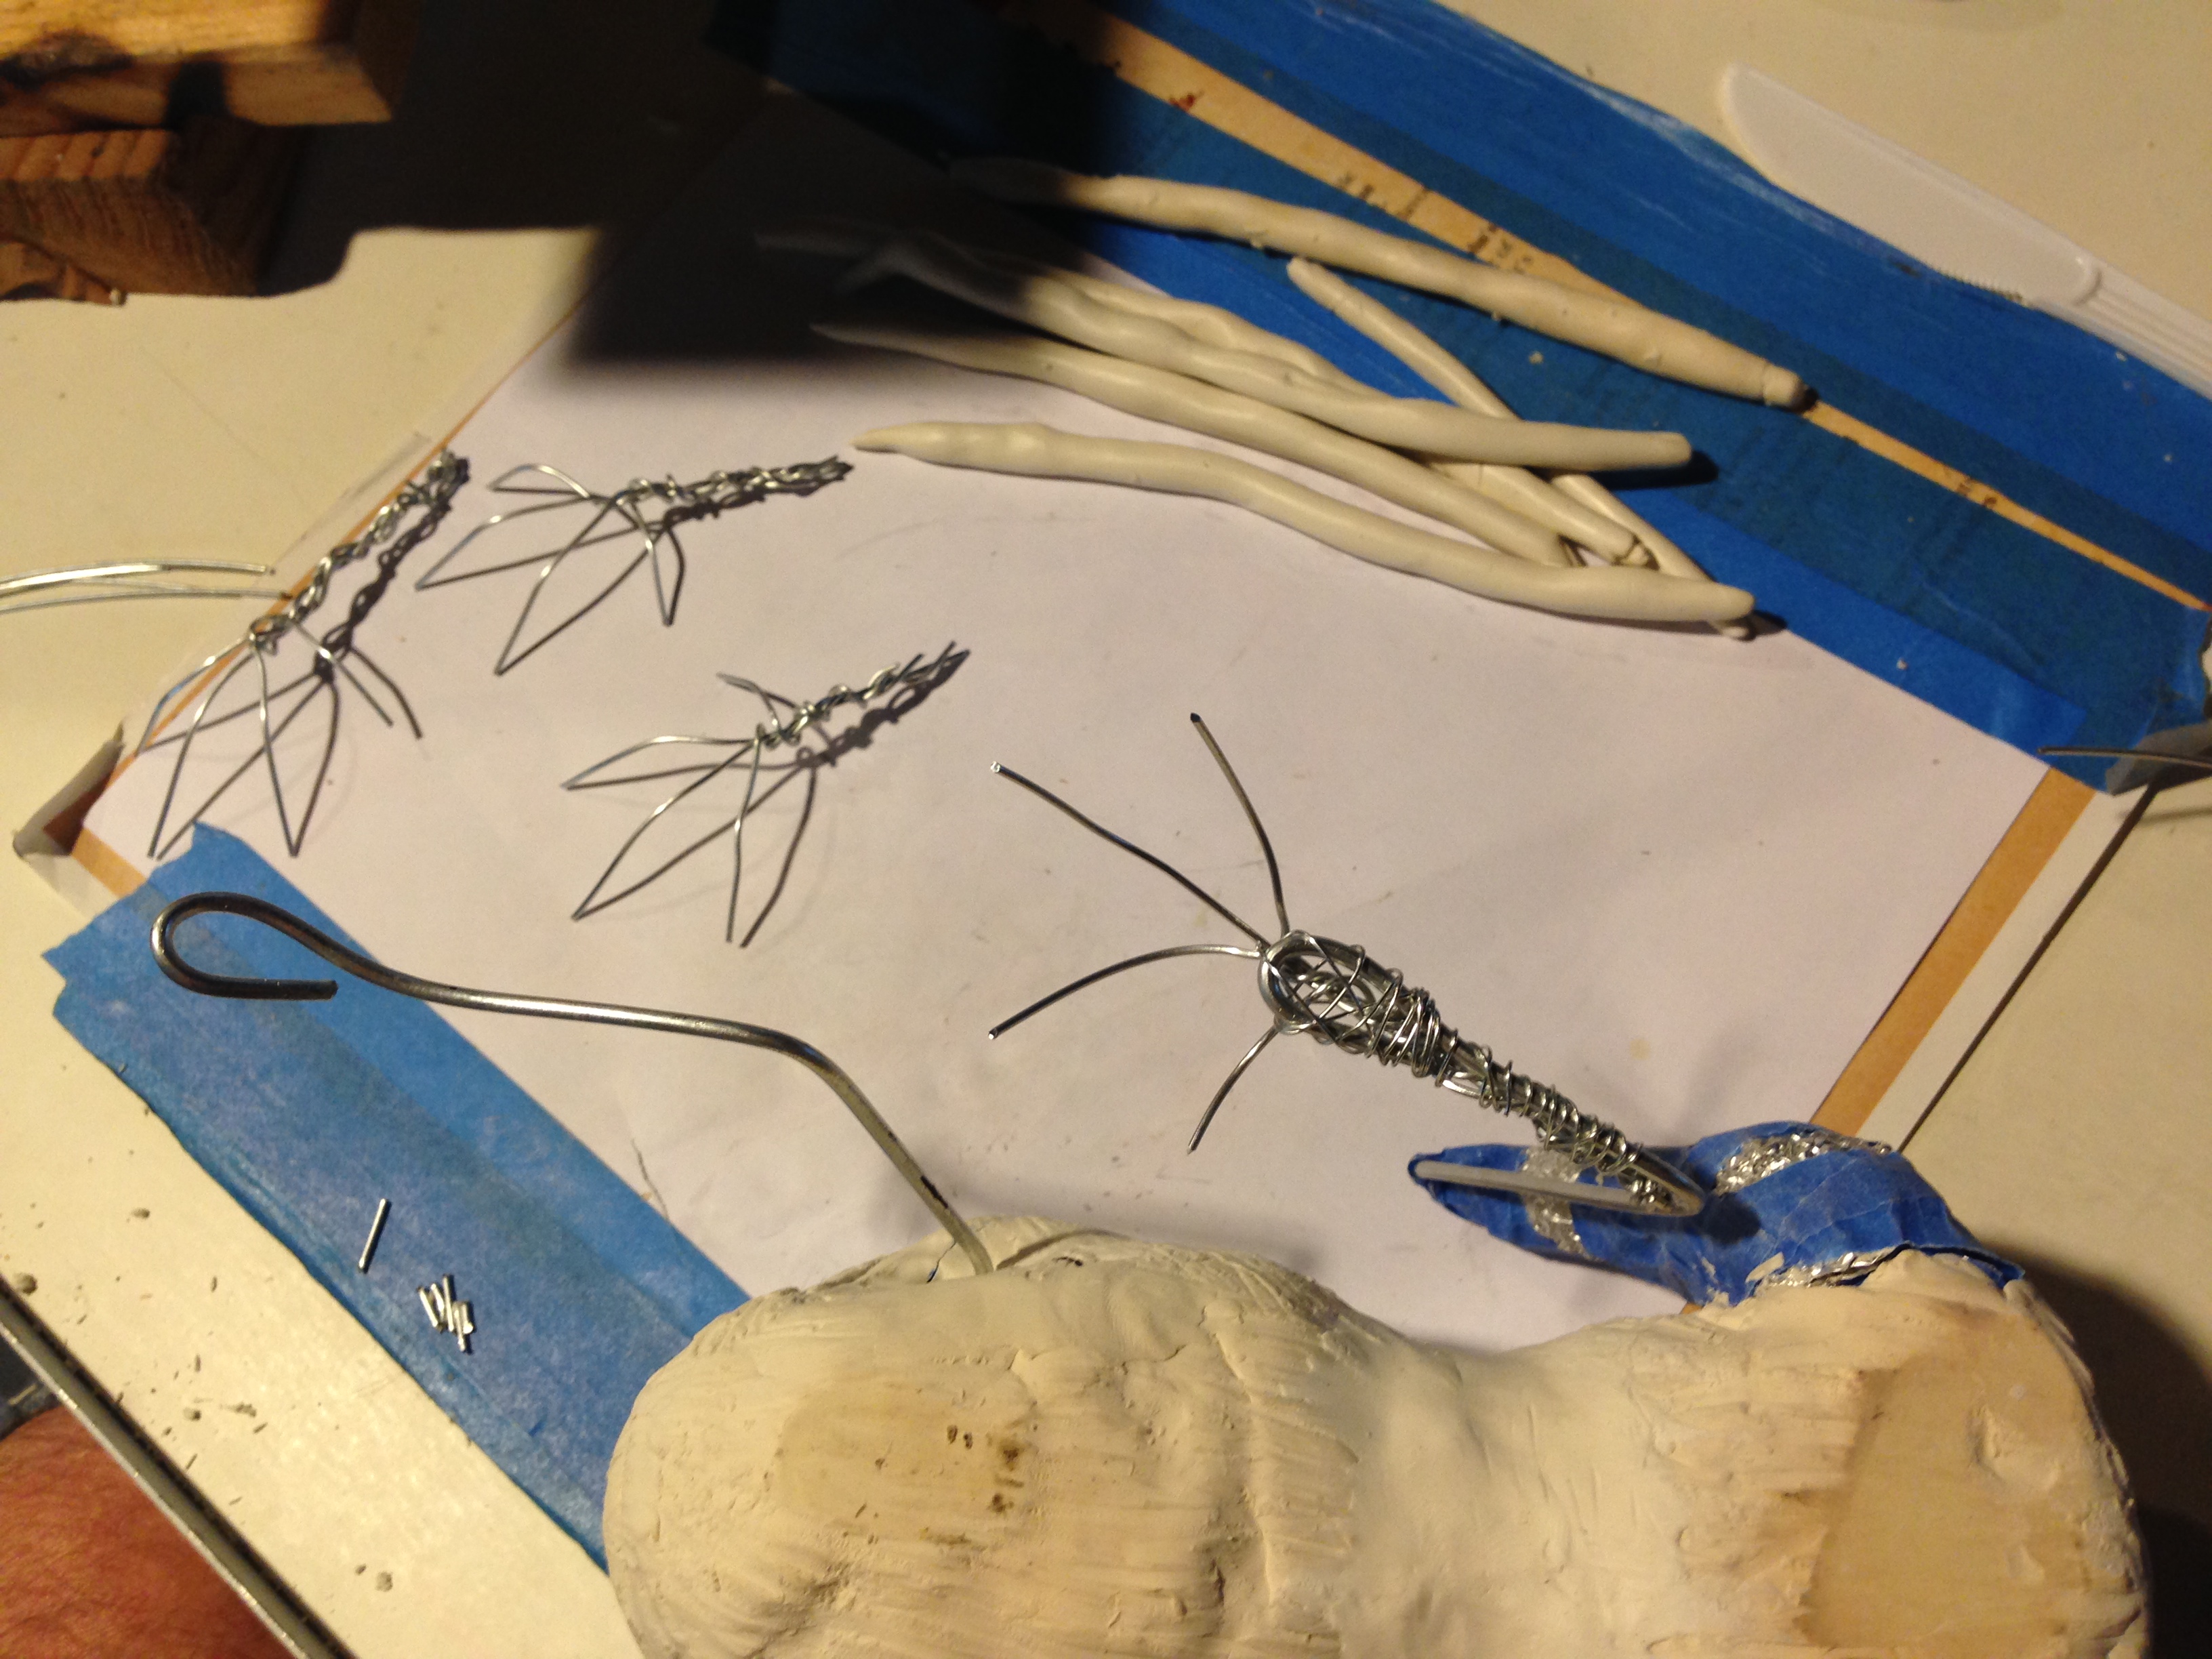
These claws were incredibly sharp and scratched me every chance they got. After a while I figured out that I needed to tape them up for my own safety.
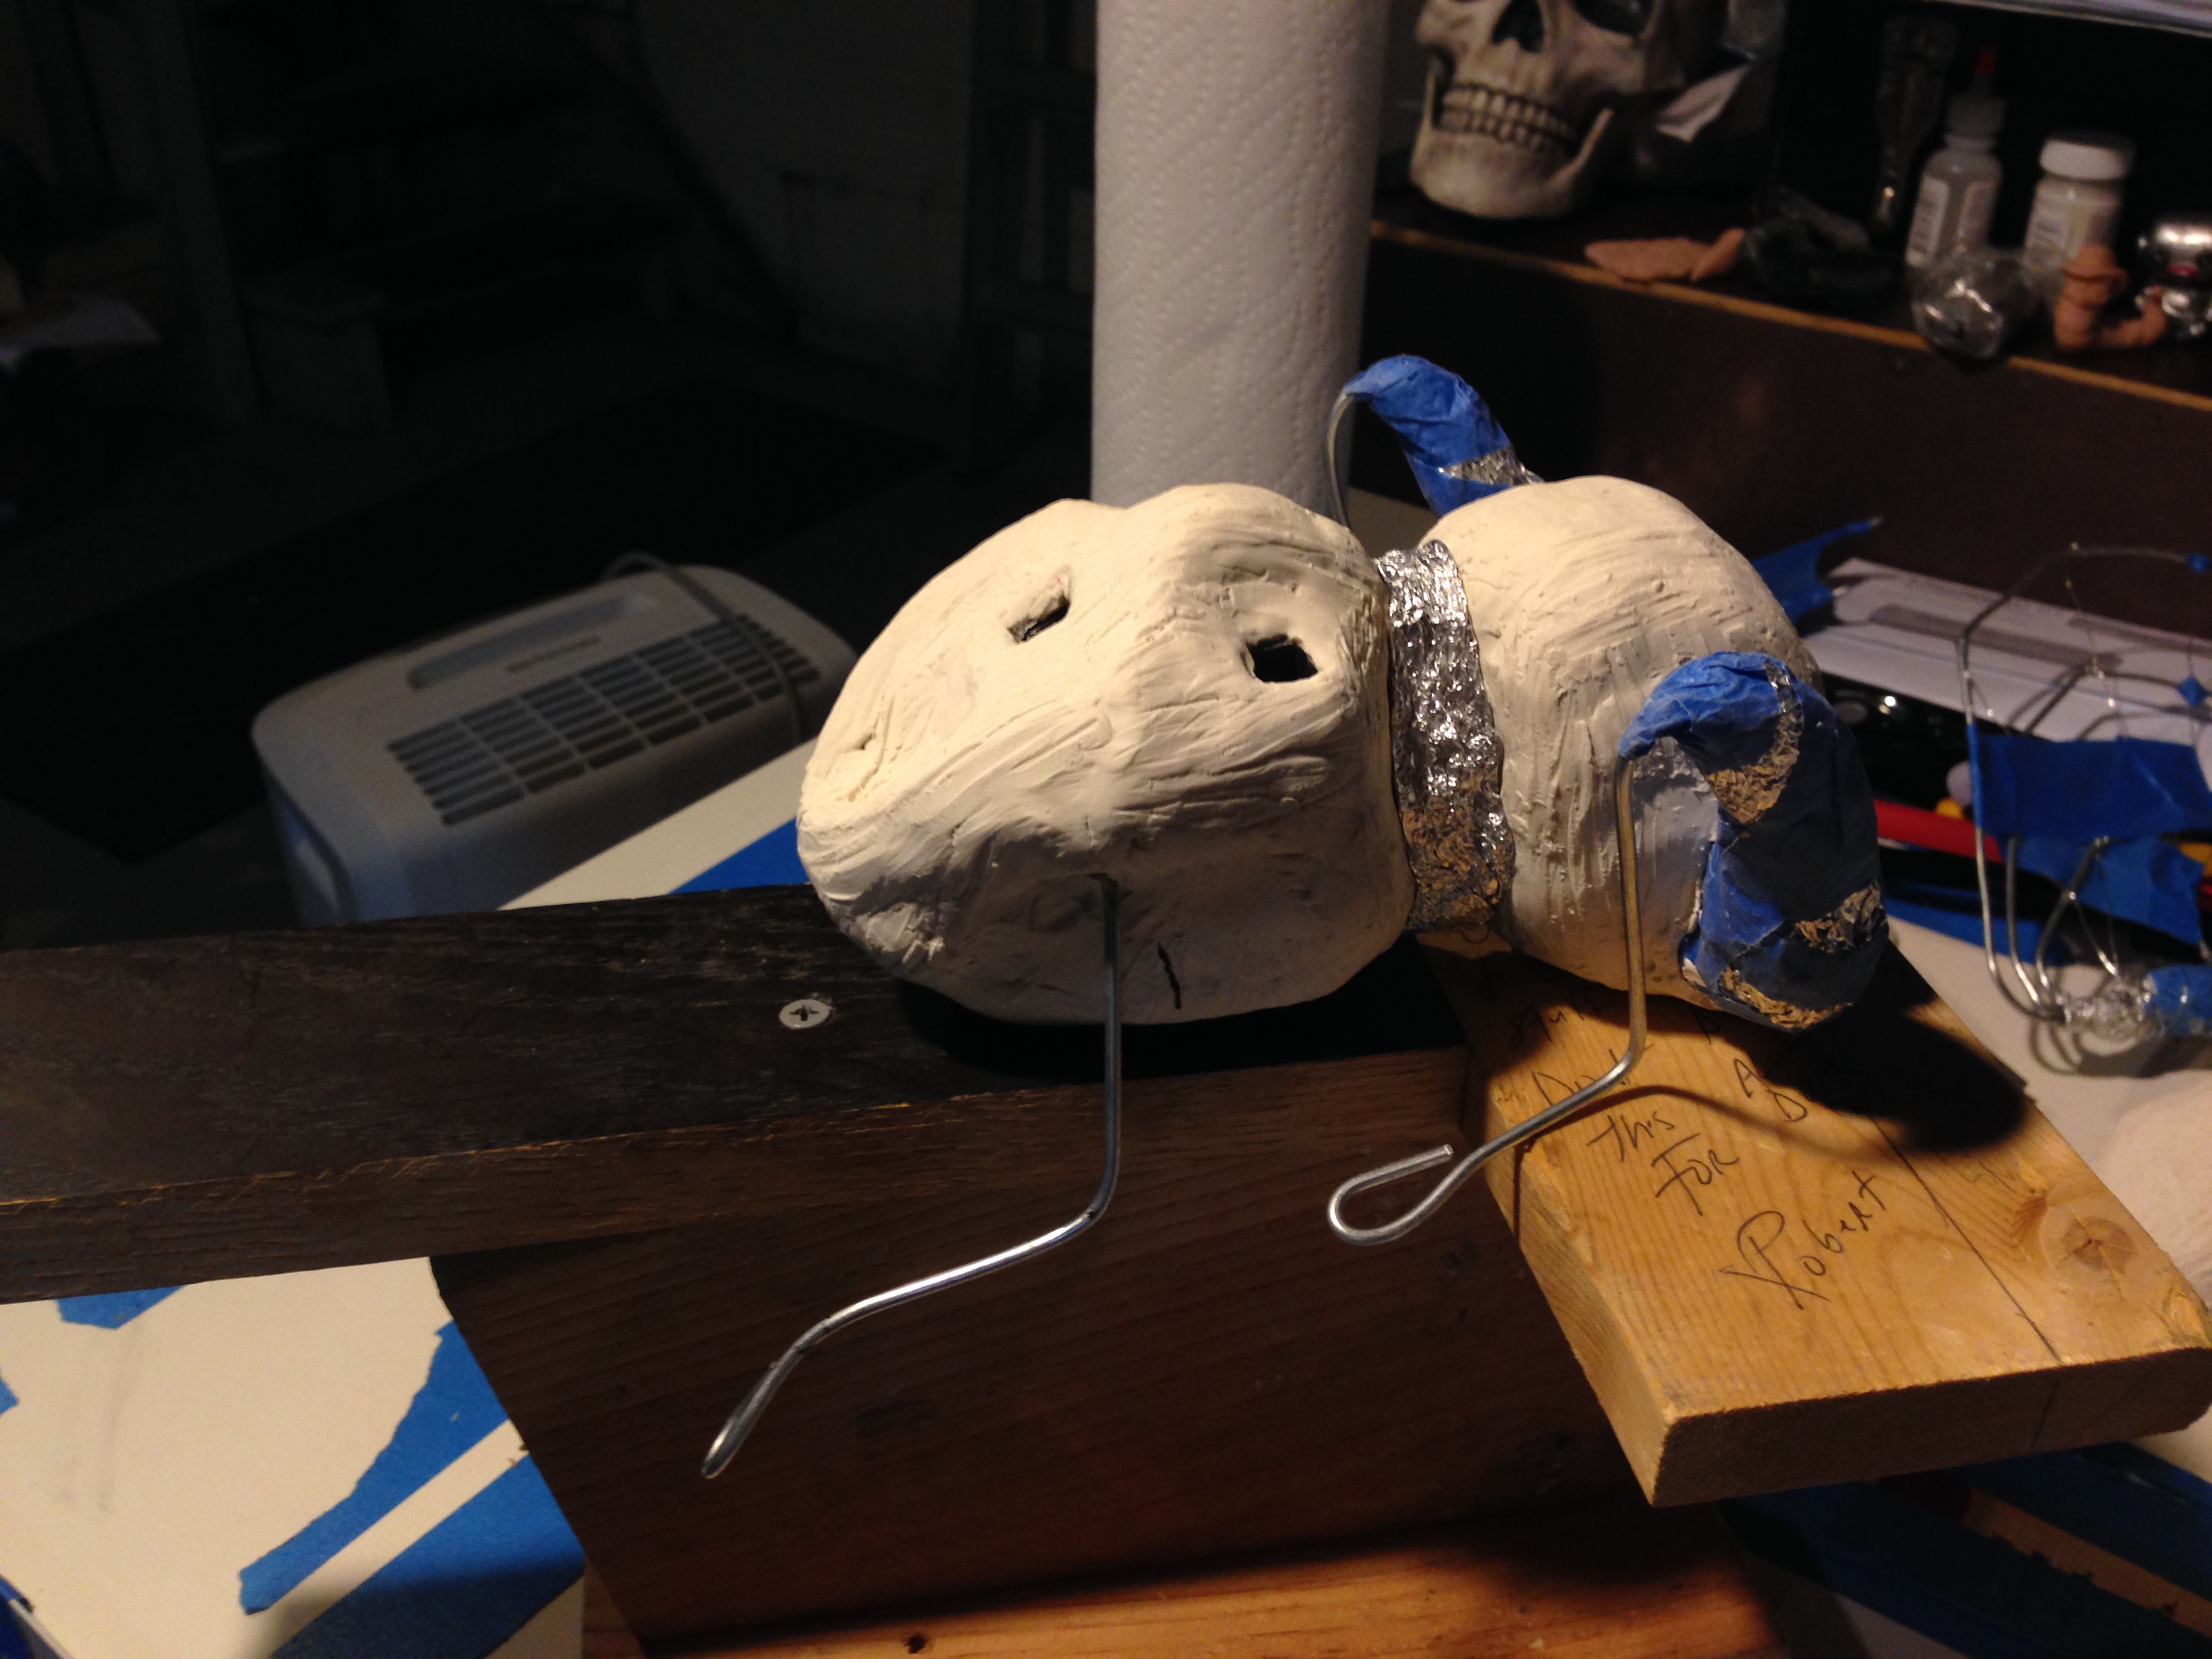
Below you can see the first layer of Original Sculpey on the head. I realized it was it was too much after it was baked, he looked like Snoopy, so I ended up shaving the clay down until it looked correct. Then I continued to bulk out the arms and legs with original Sculpey.

4.Sculpting the Dragon
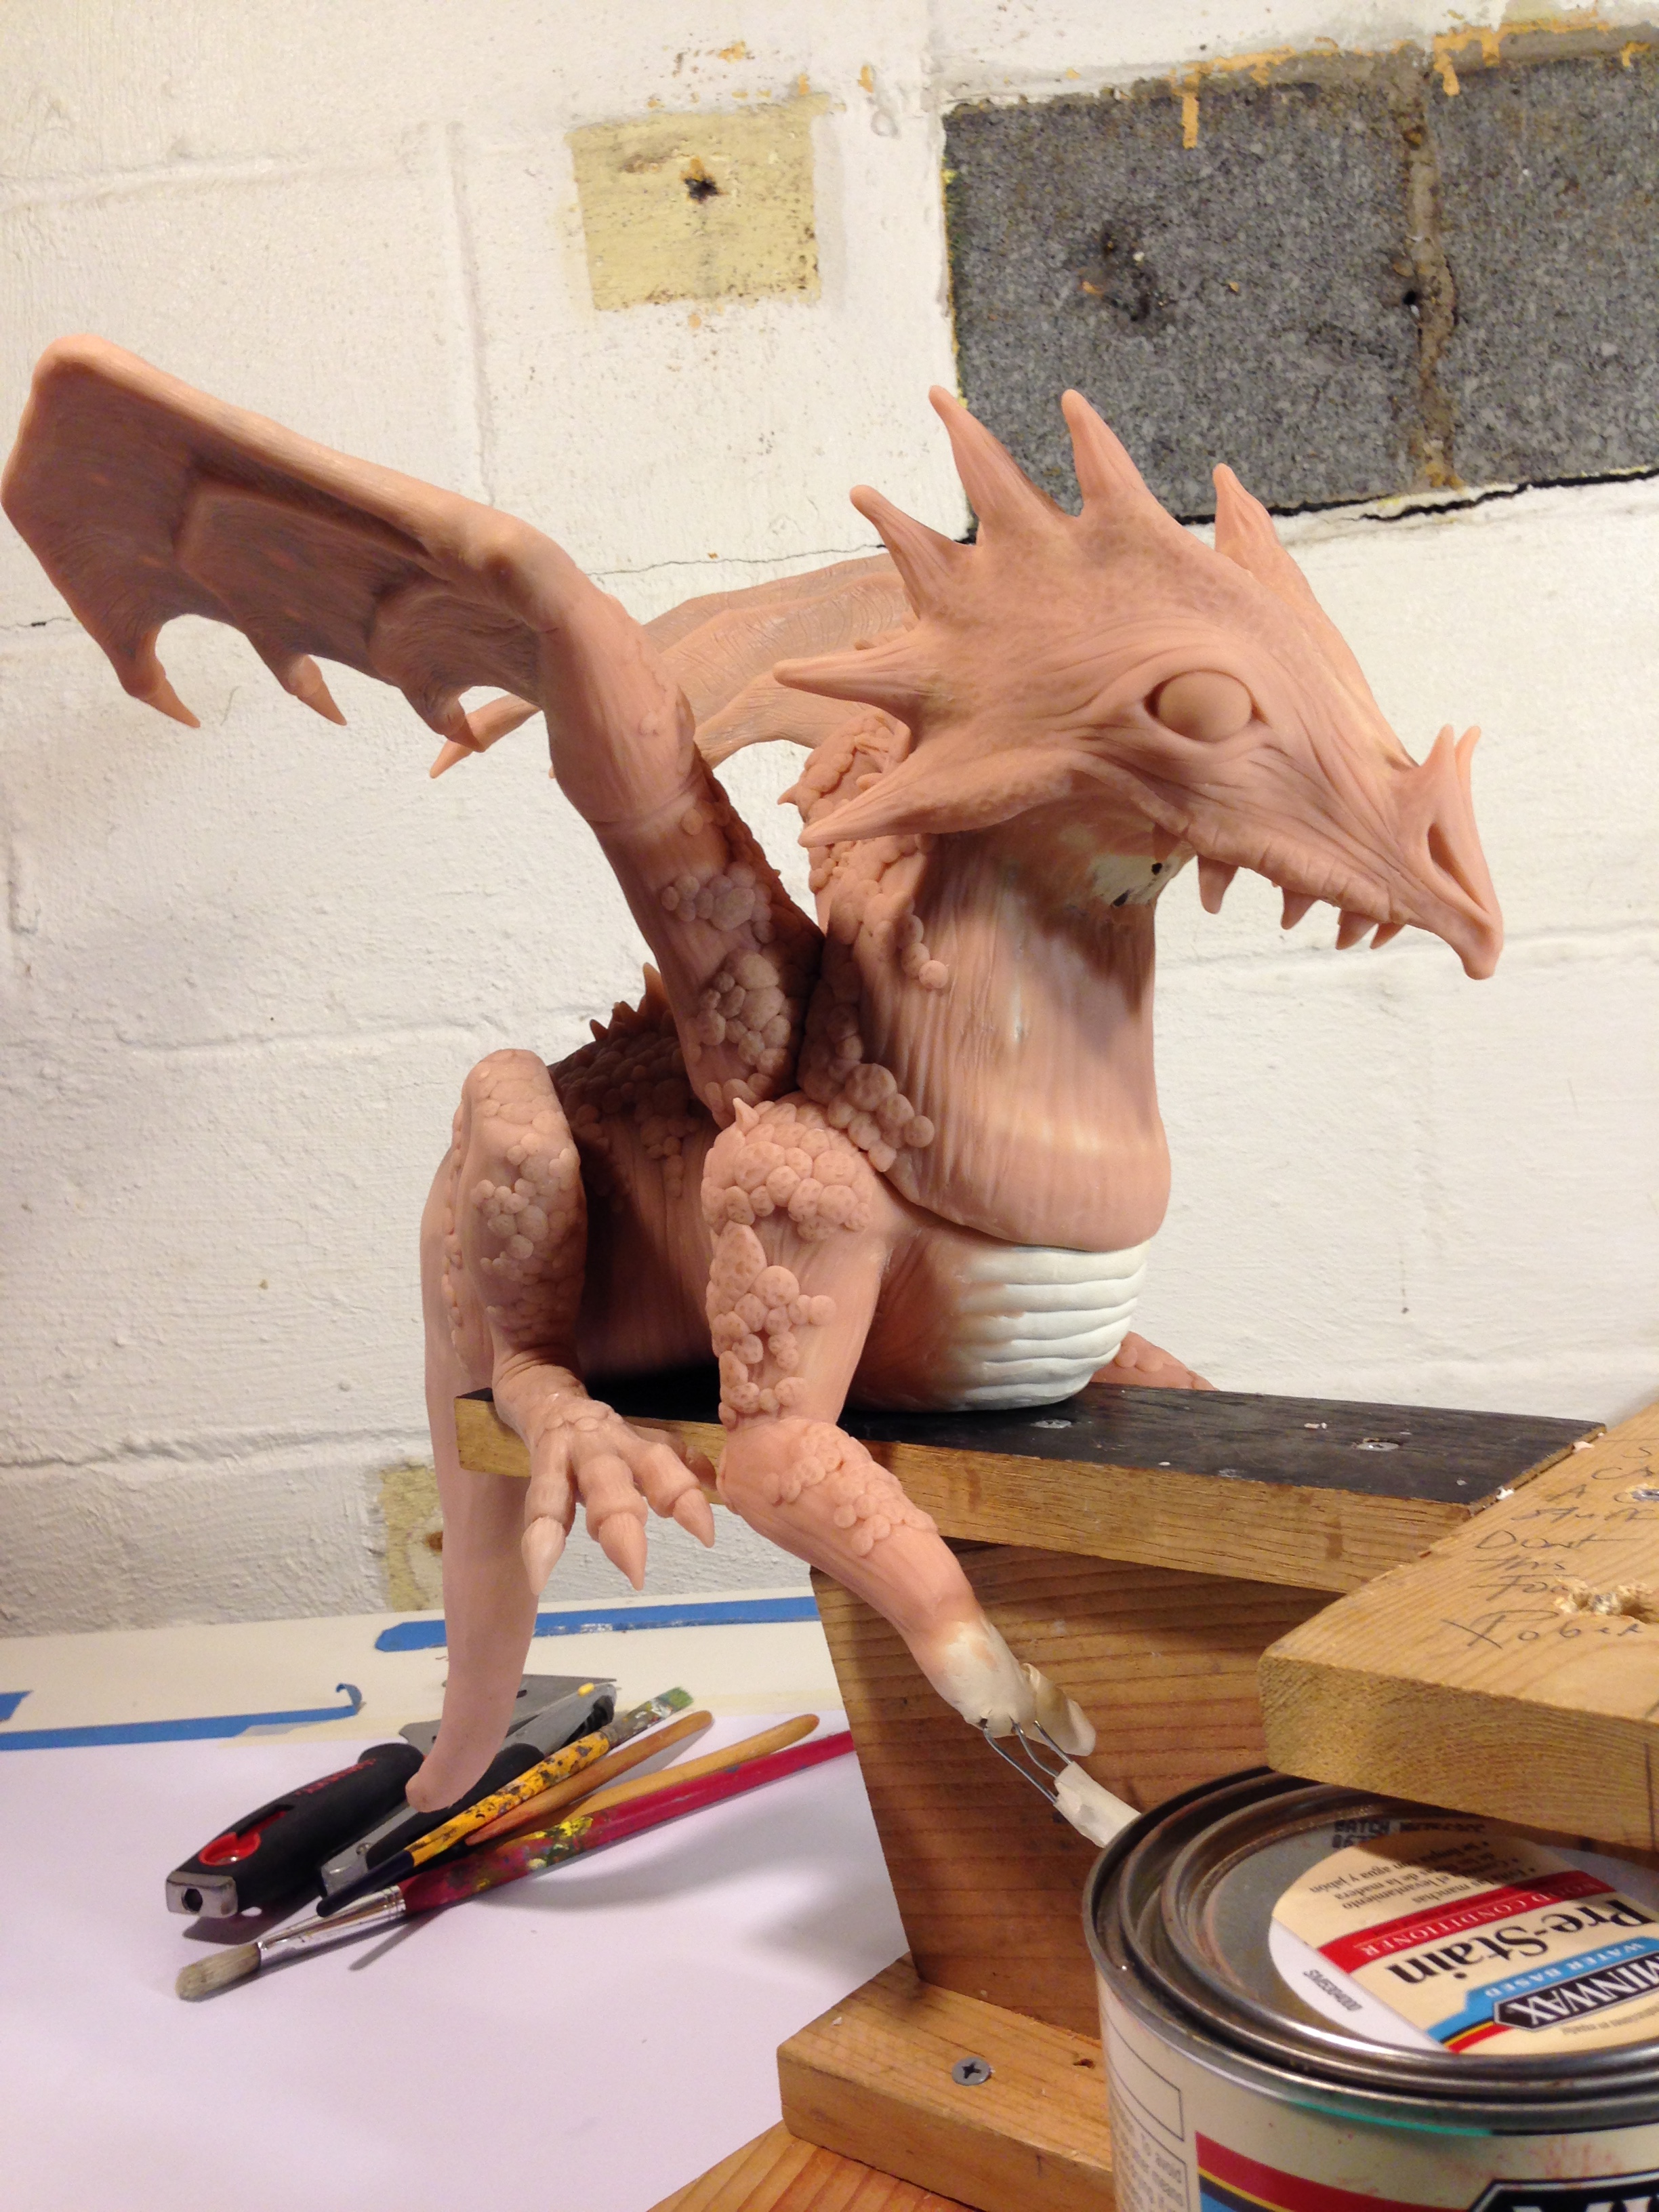
I began the final layer of Super Sculpey on a back leg, just in case it didn’t come out quite right. I was pleased with the outcome, the look of the scales and skin, and did the rest the same way.
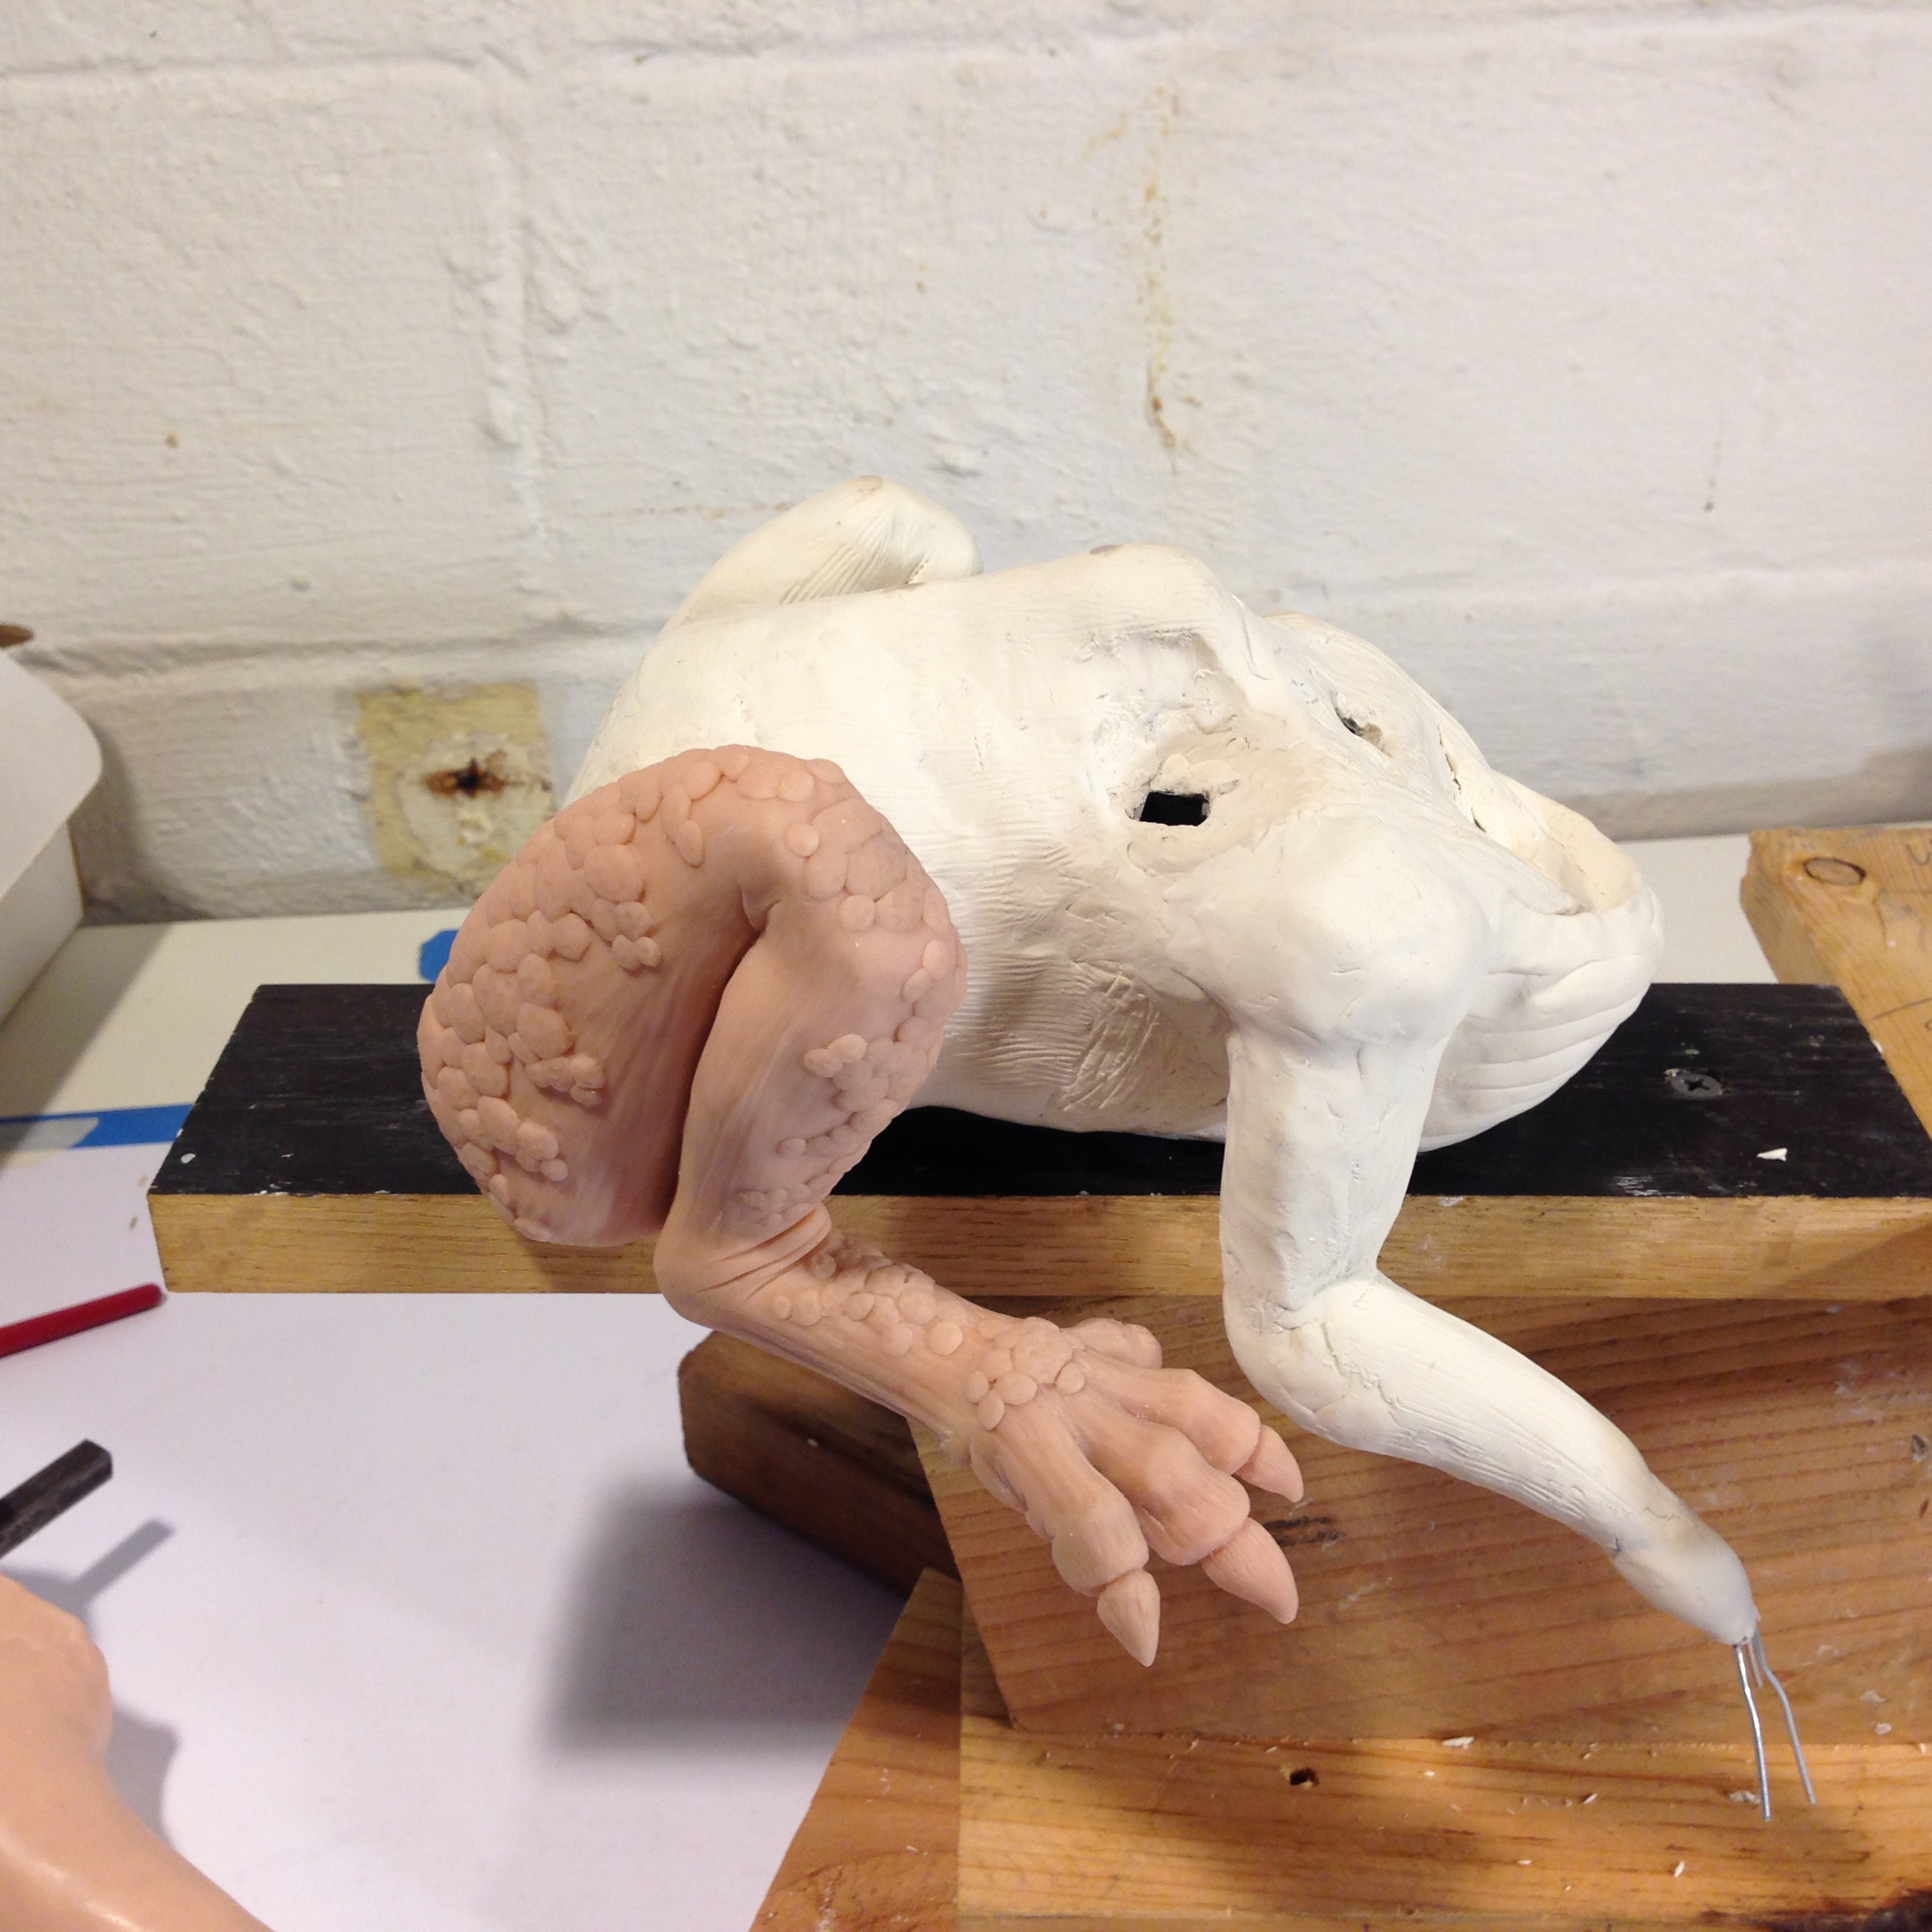
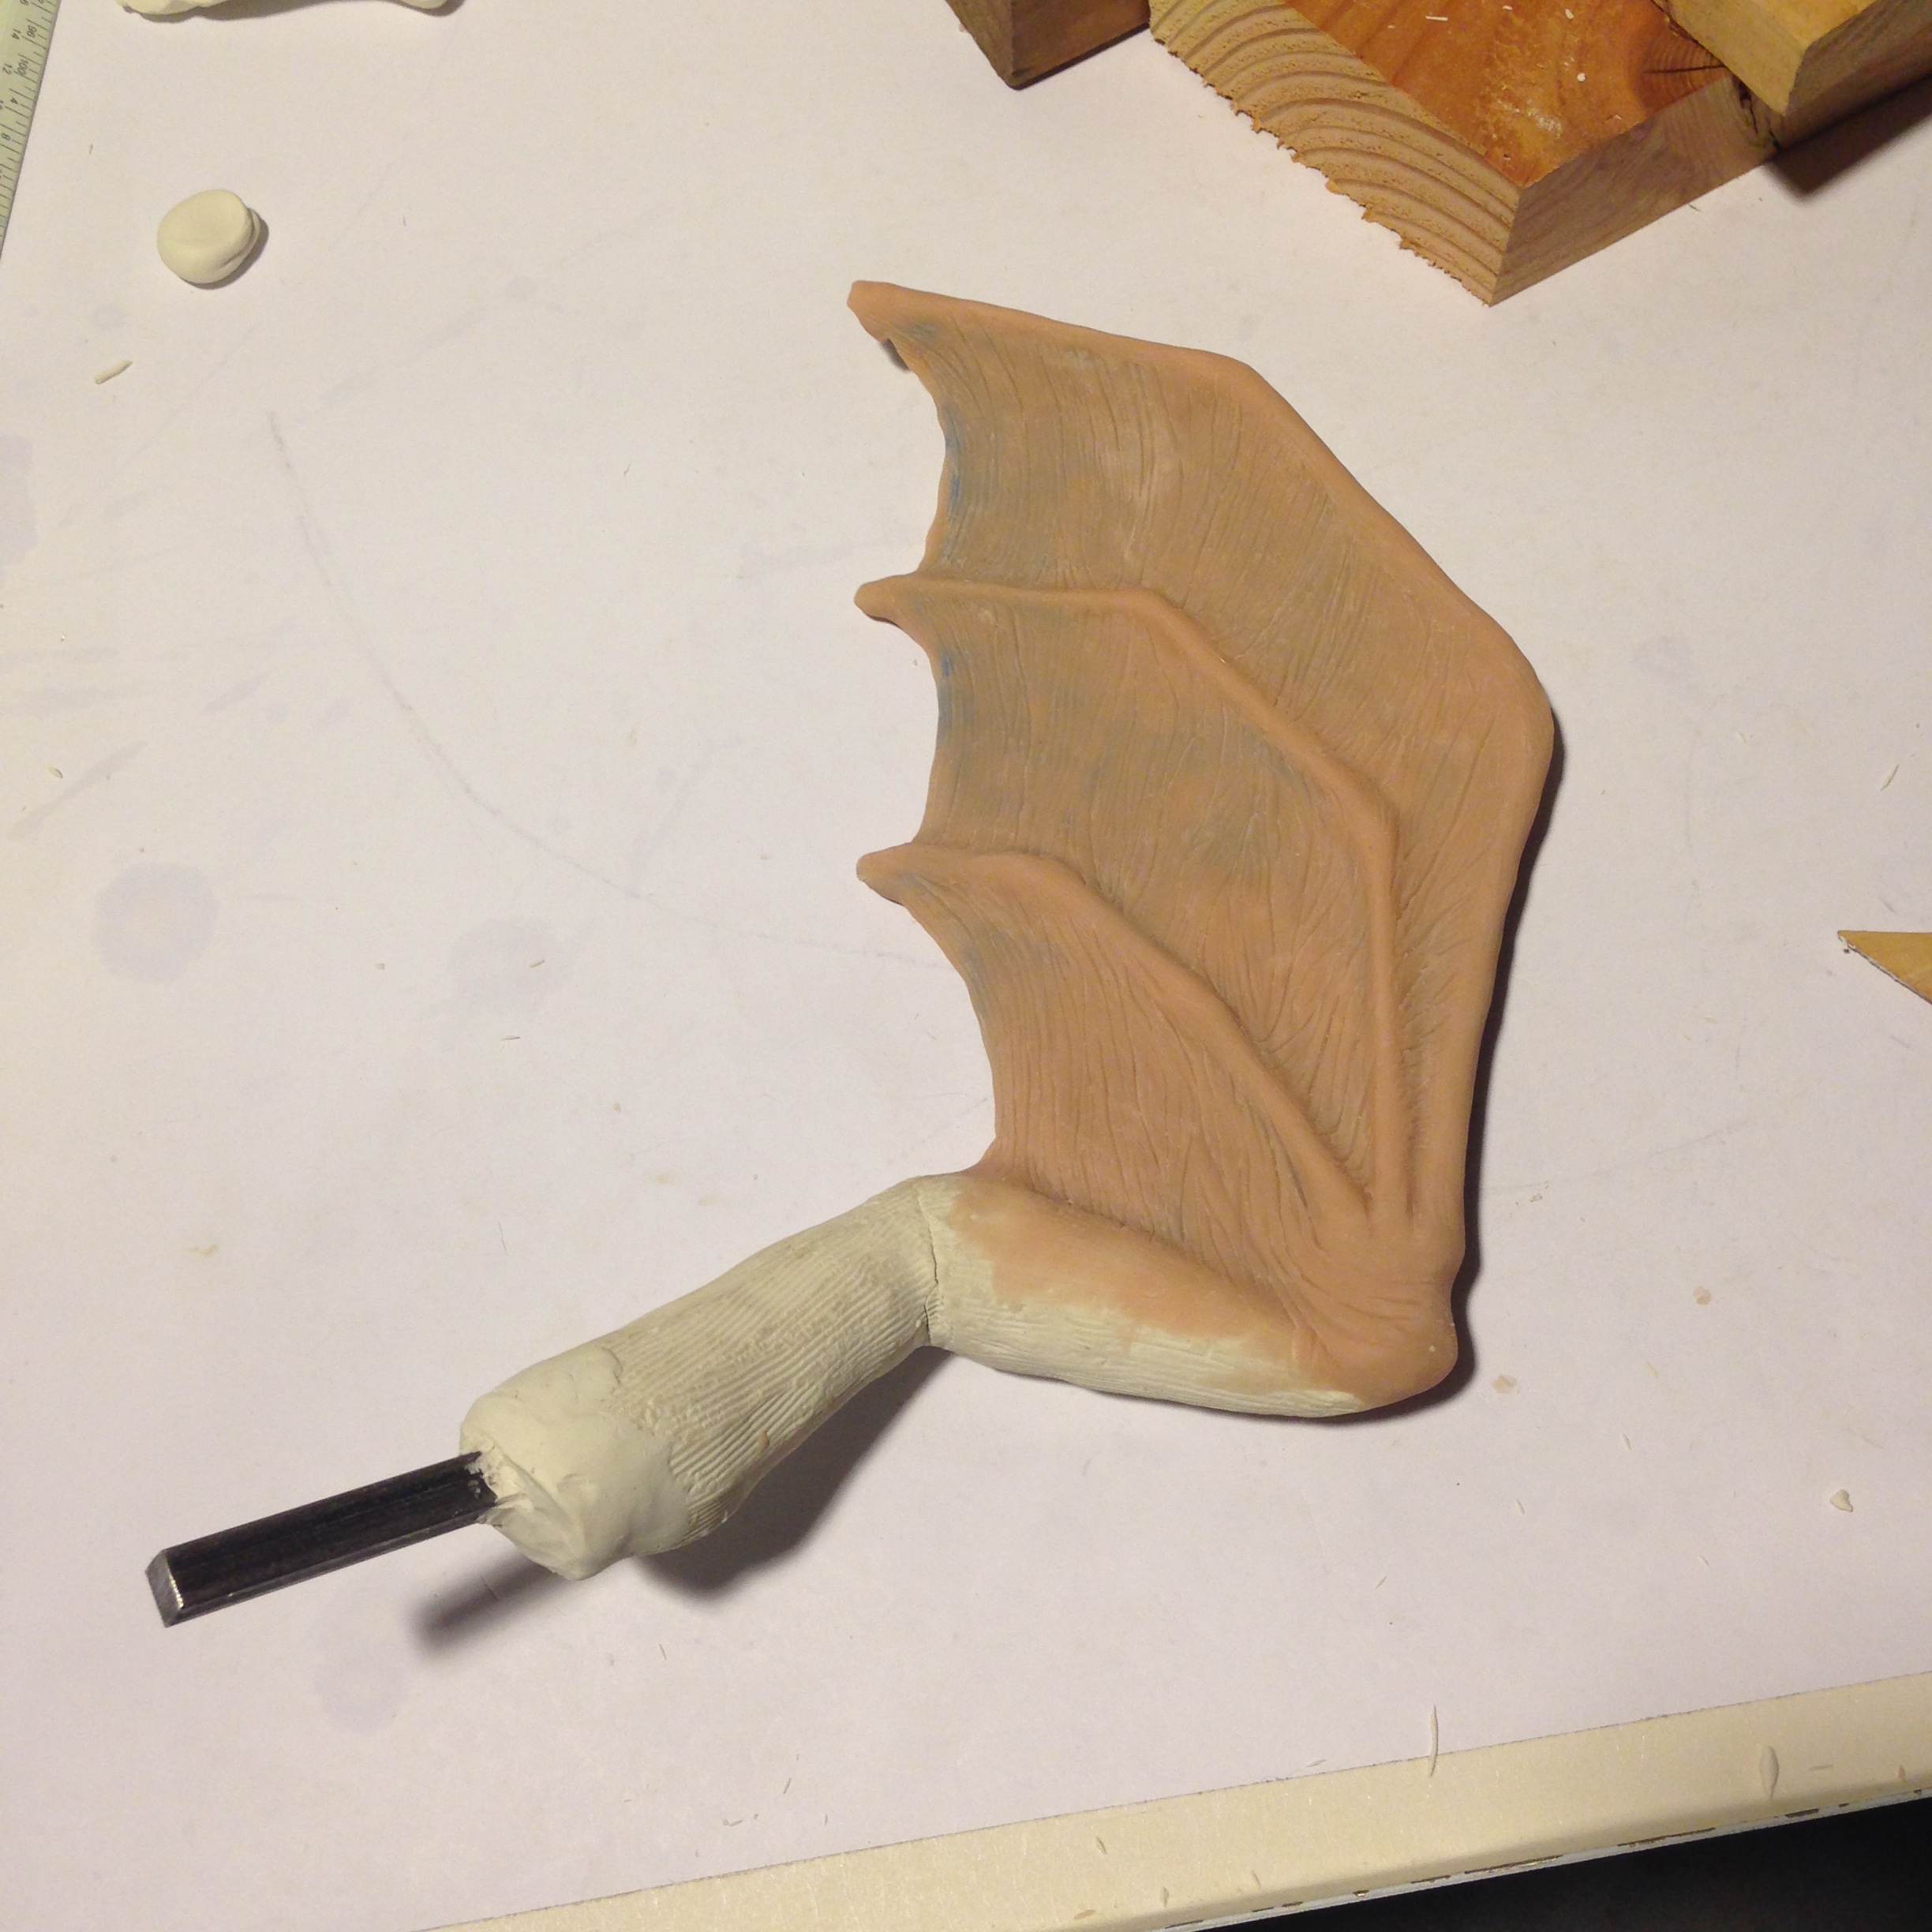
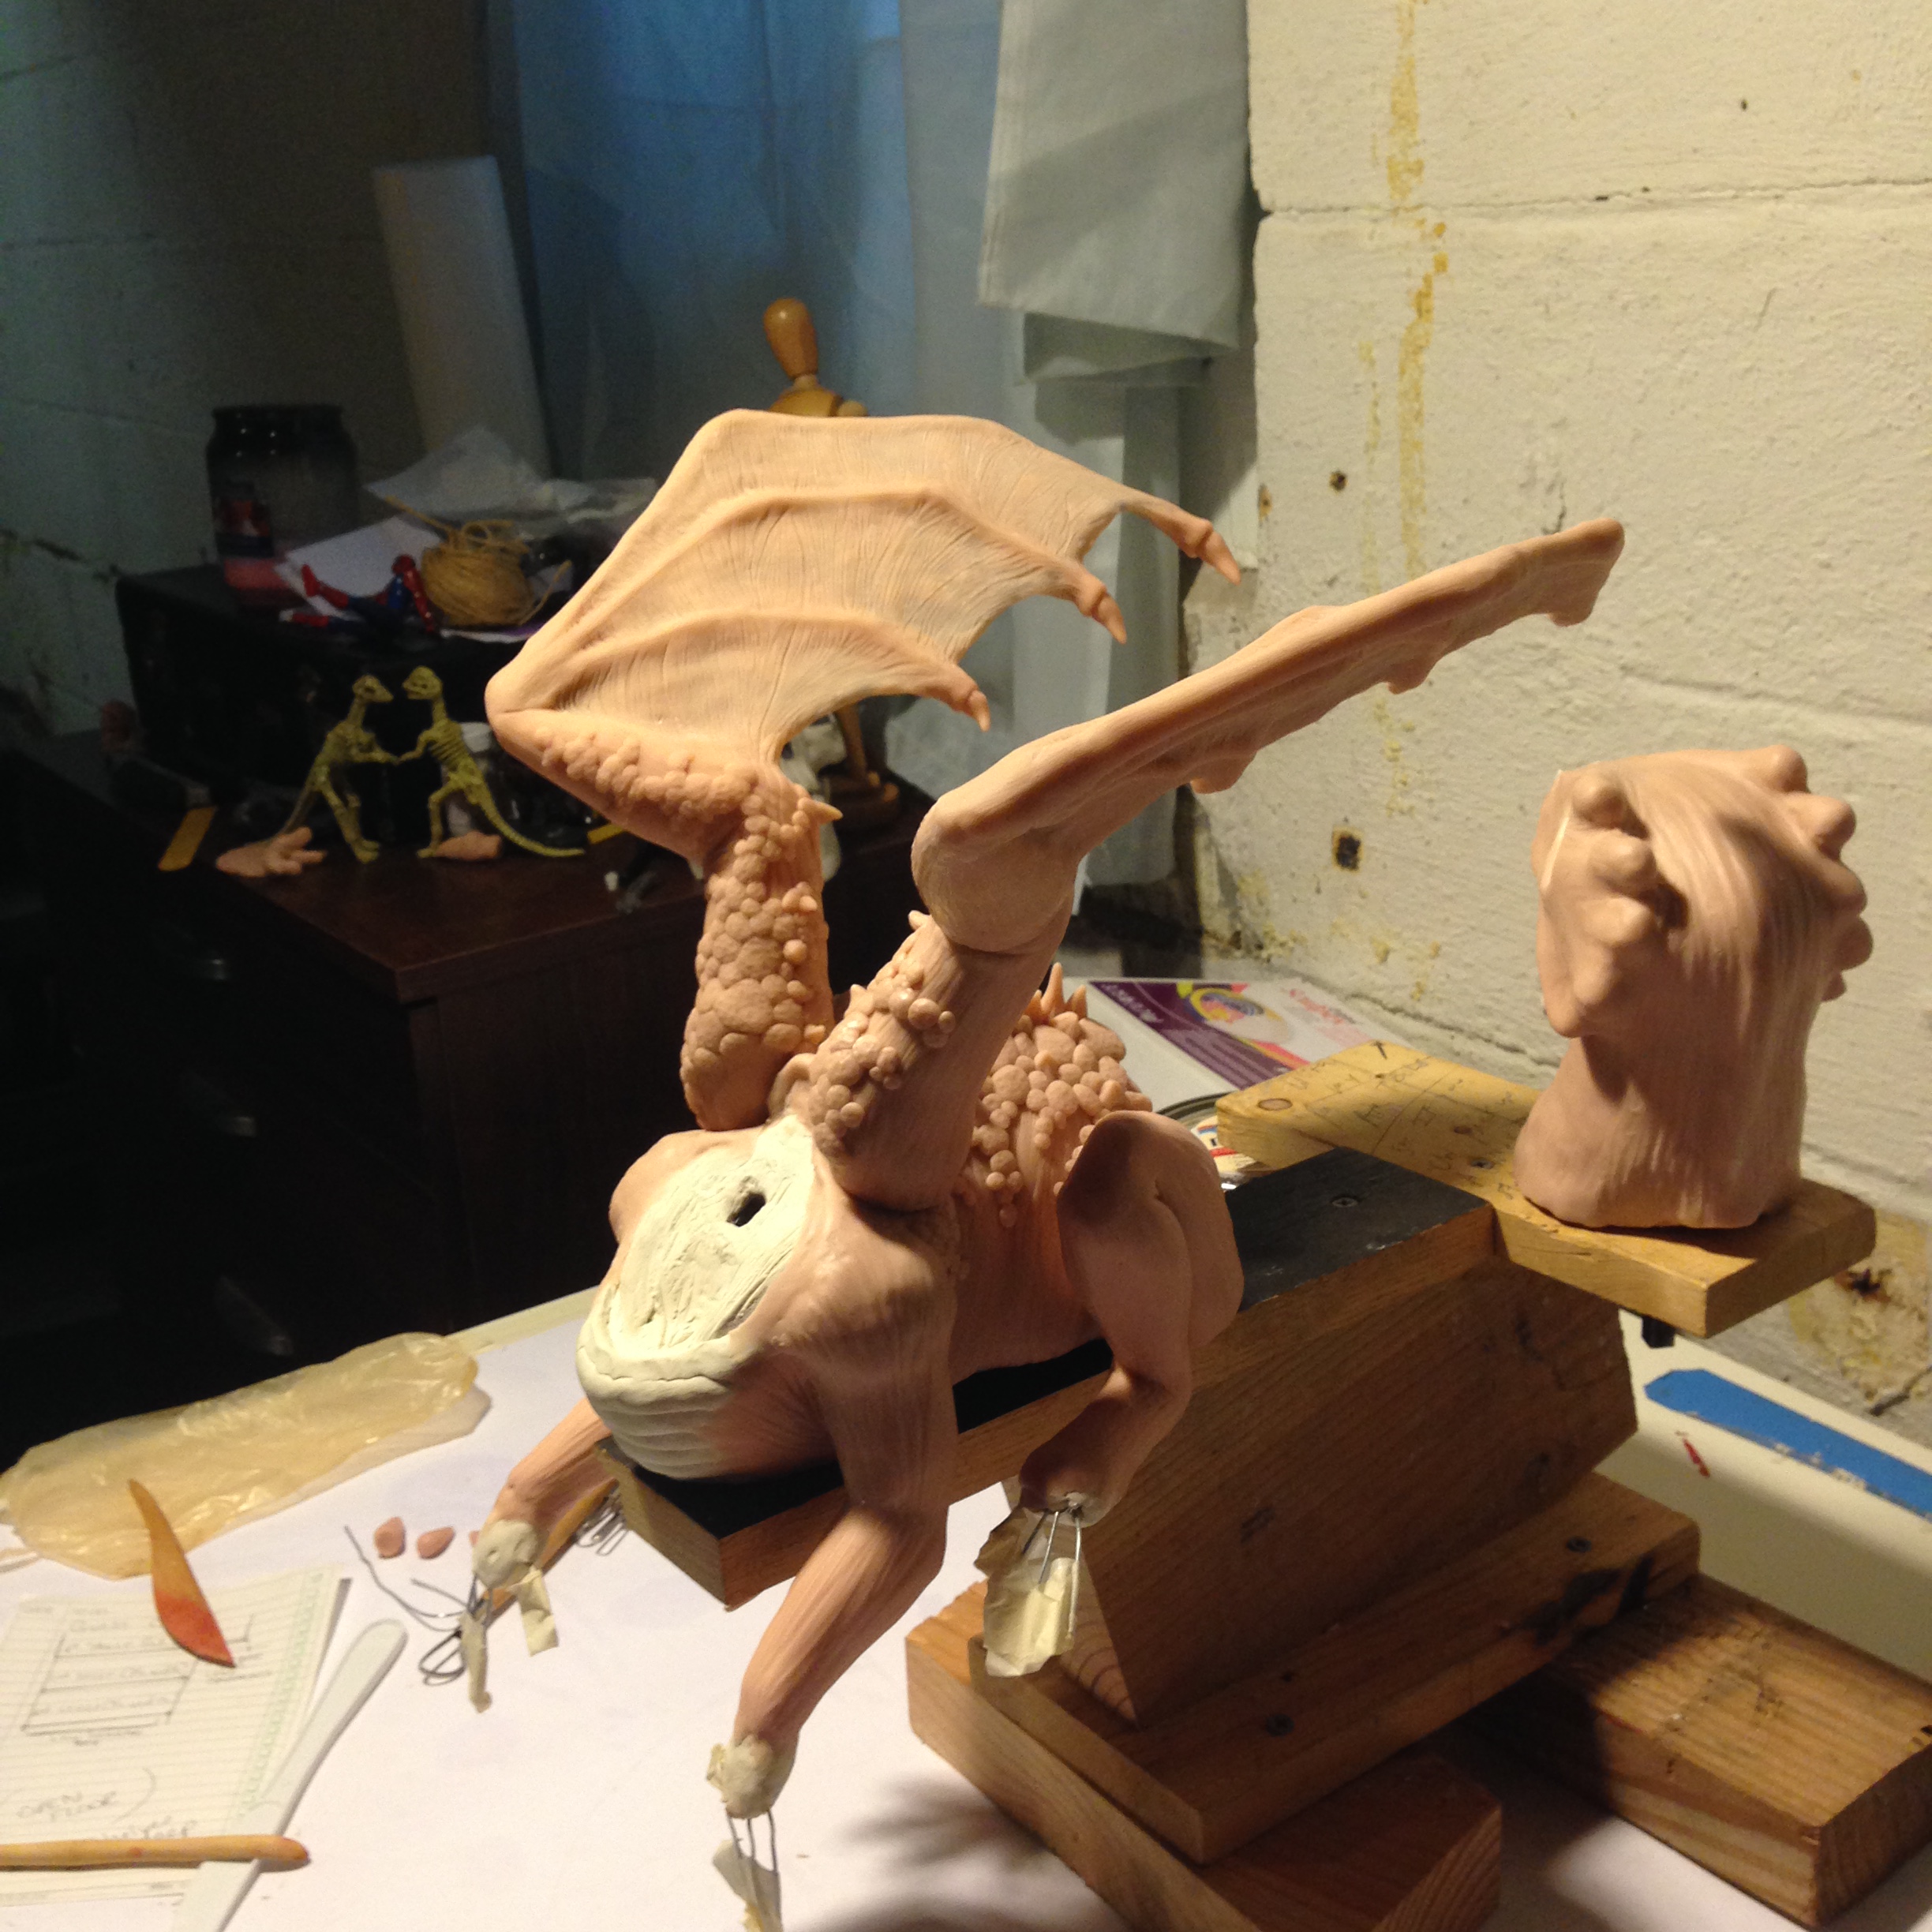
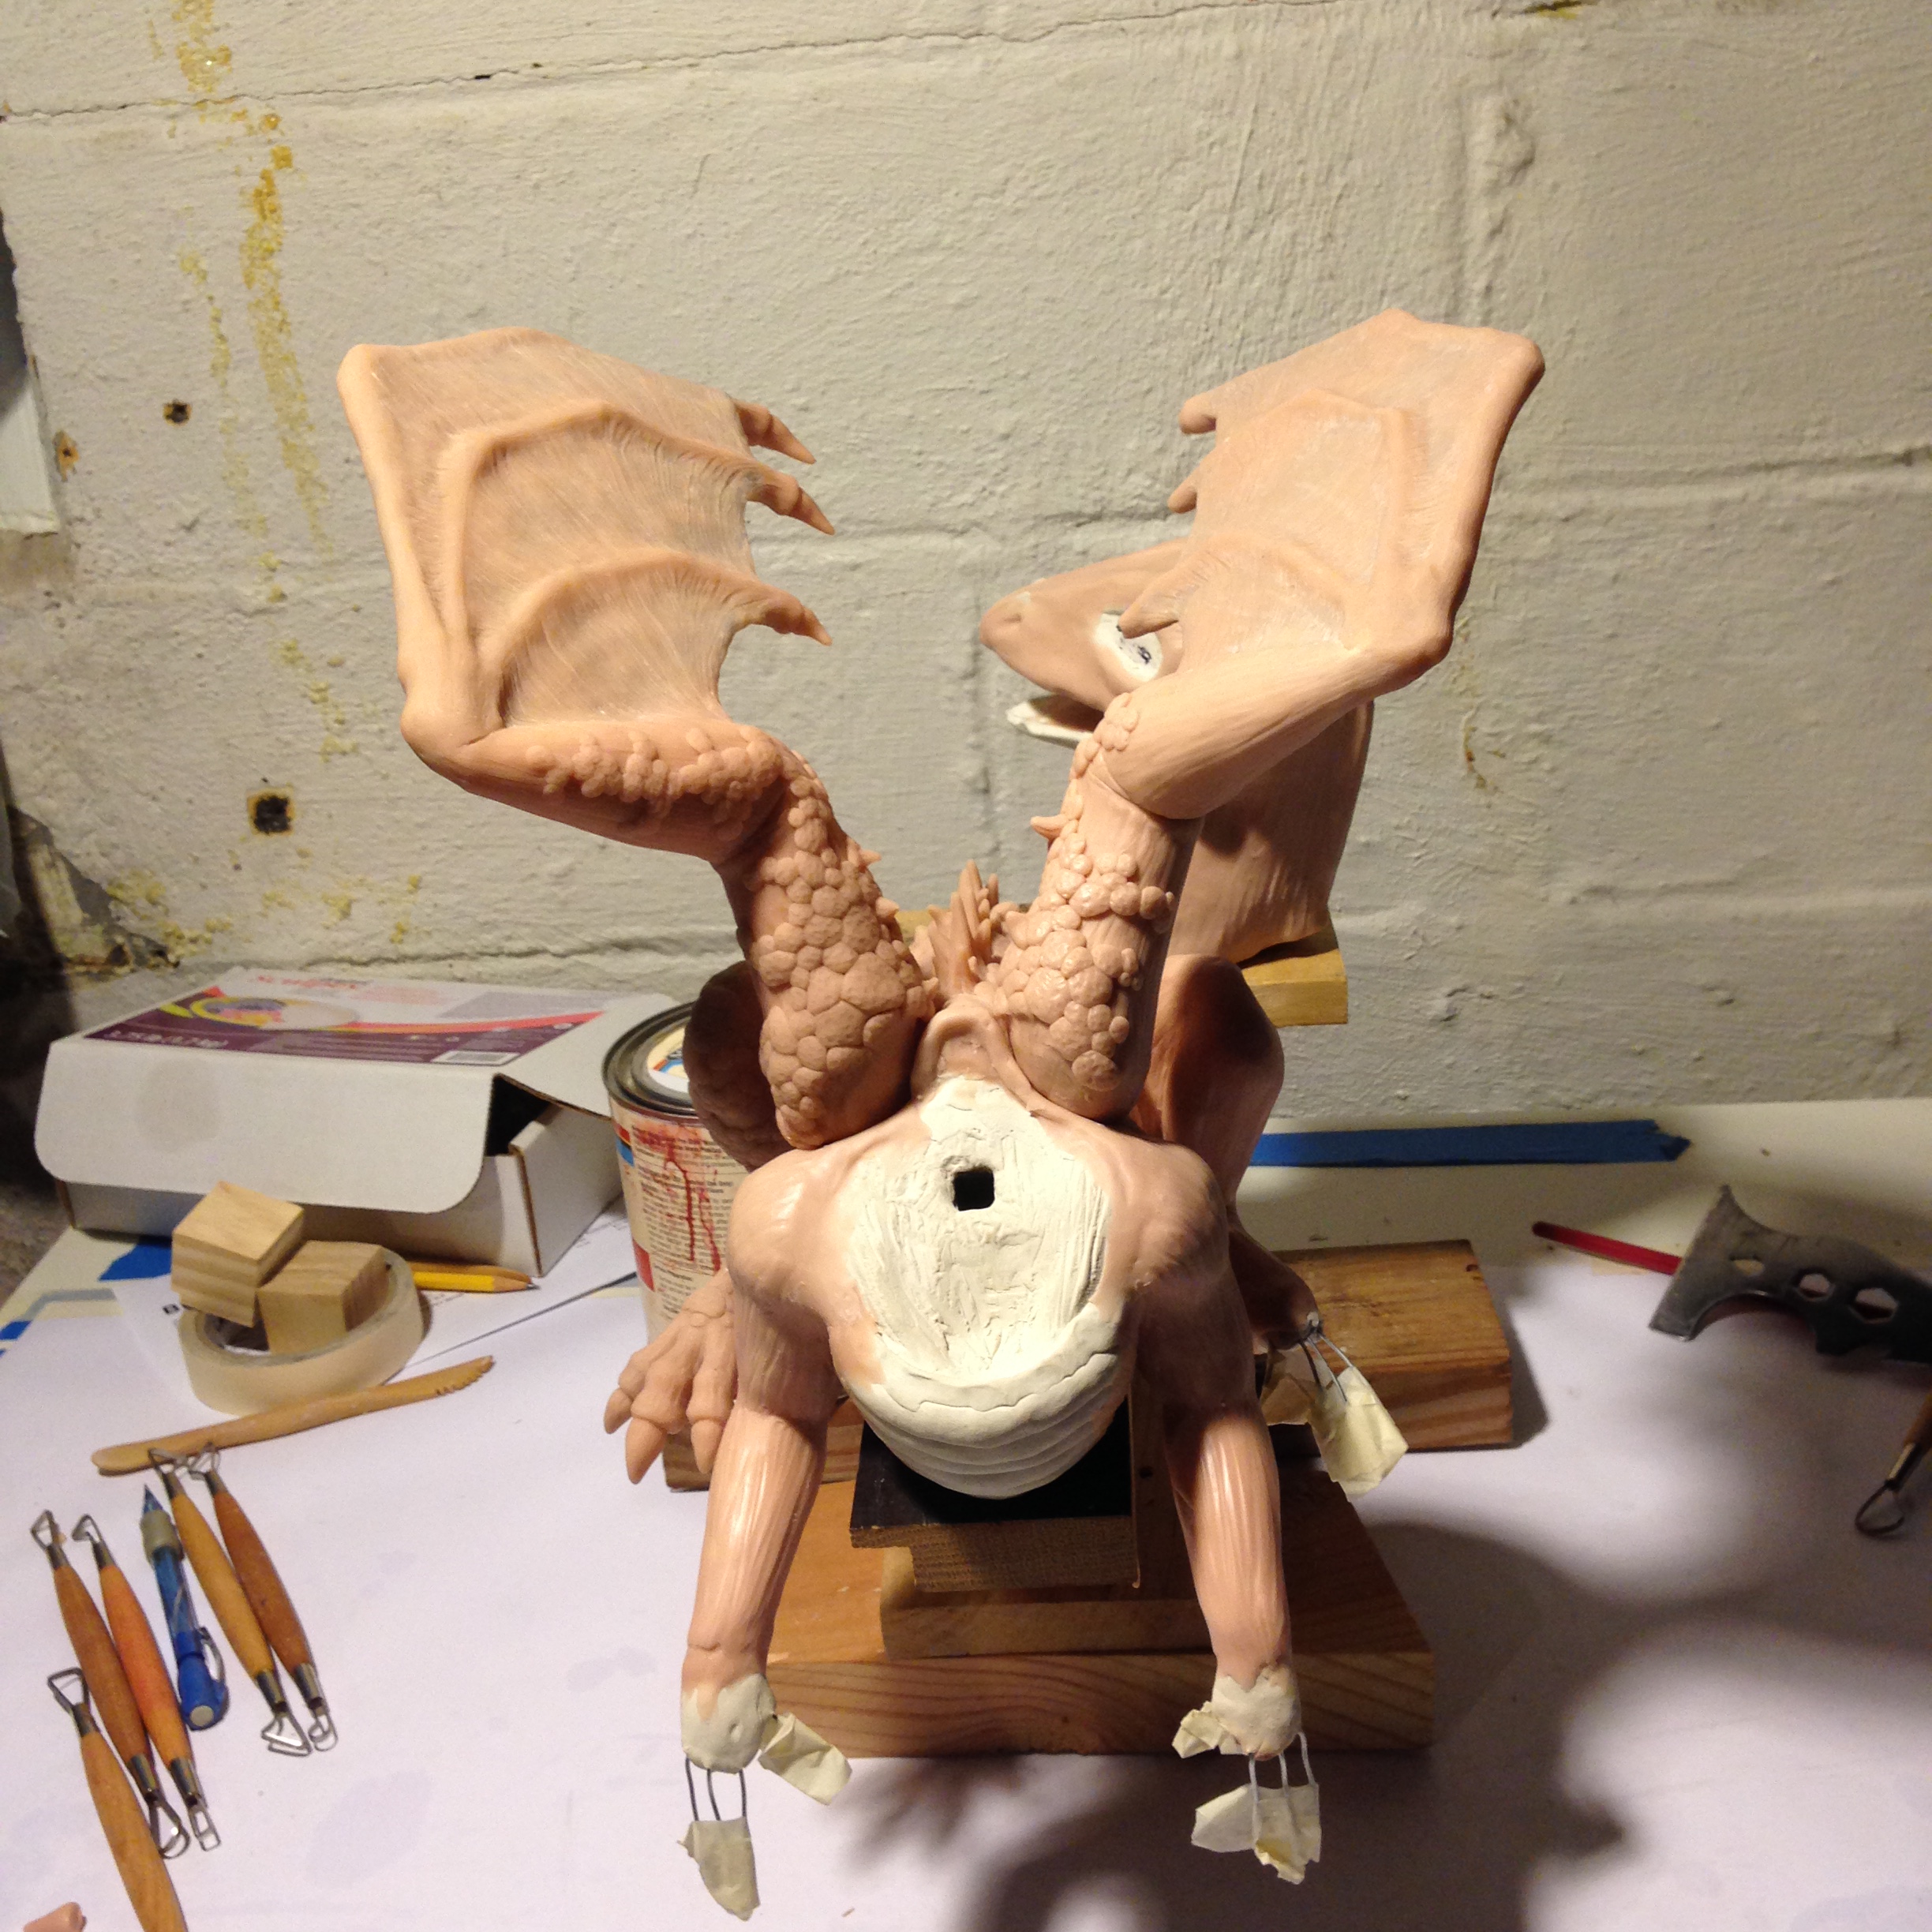
I then moved on to the wings, which I thought would be the next biggest challenge. I like to get the hard stuff out of the way. I was hoping to achieve something bat-like.
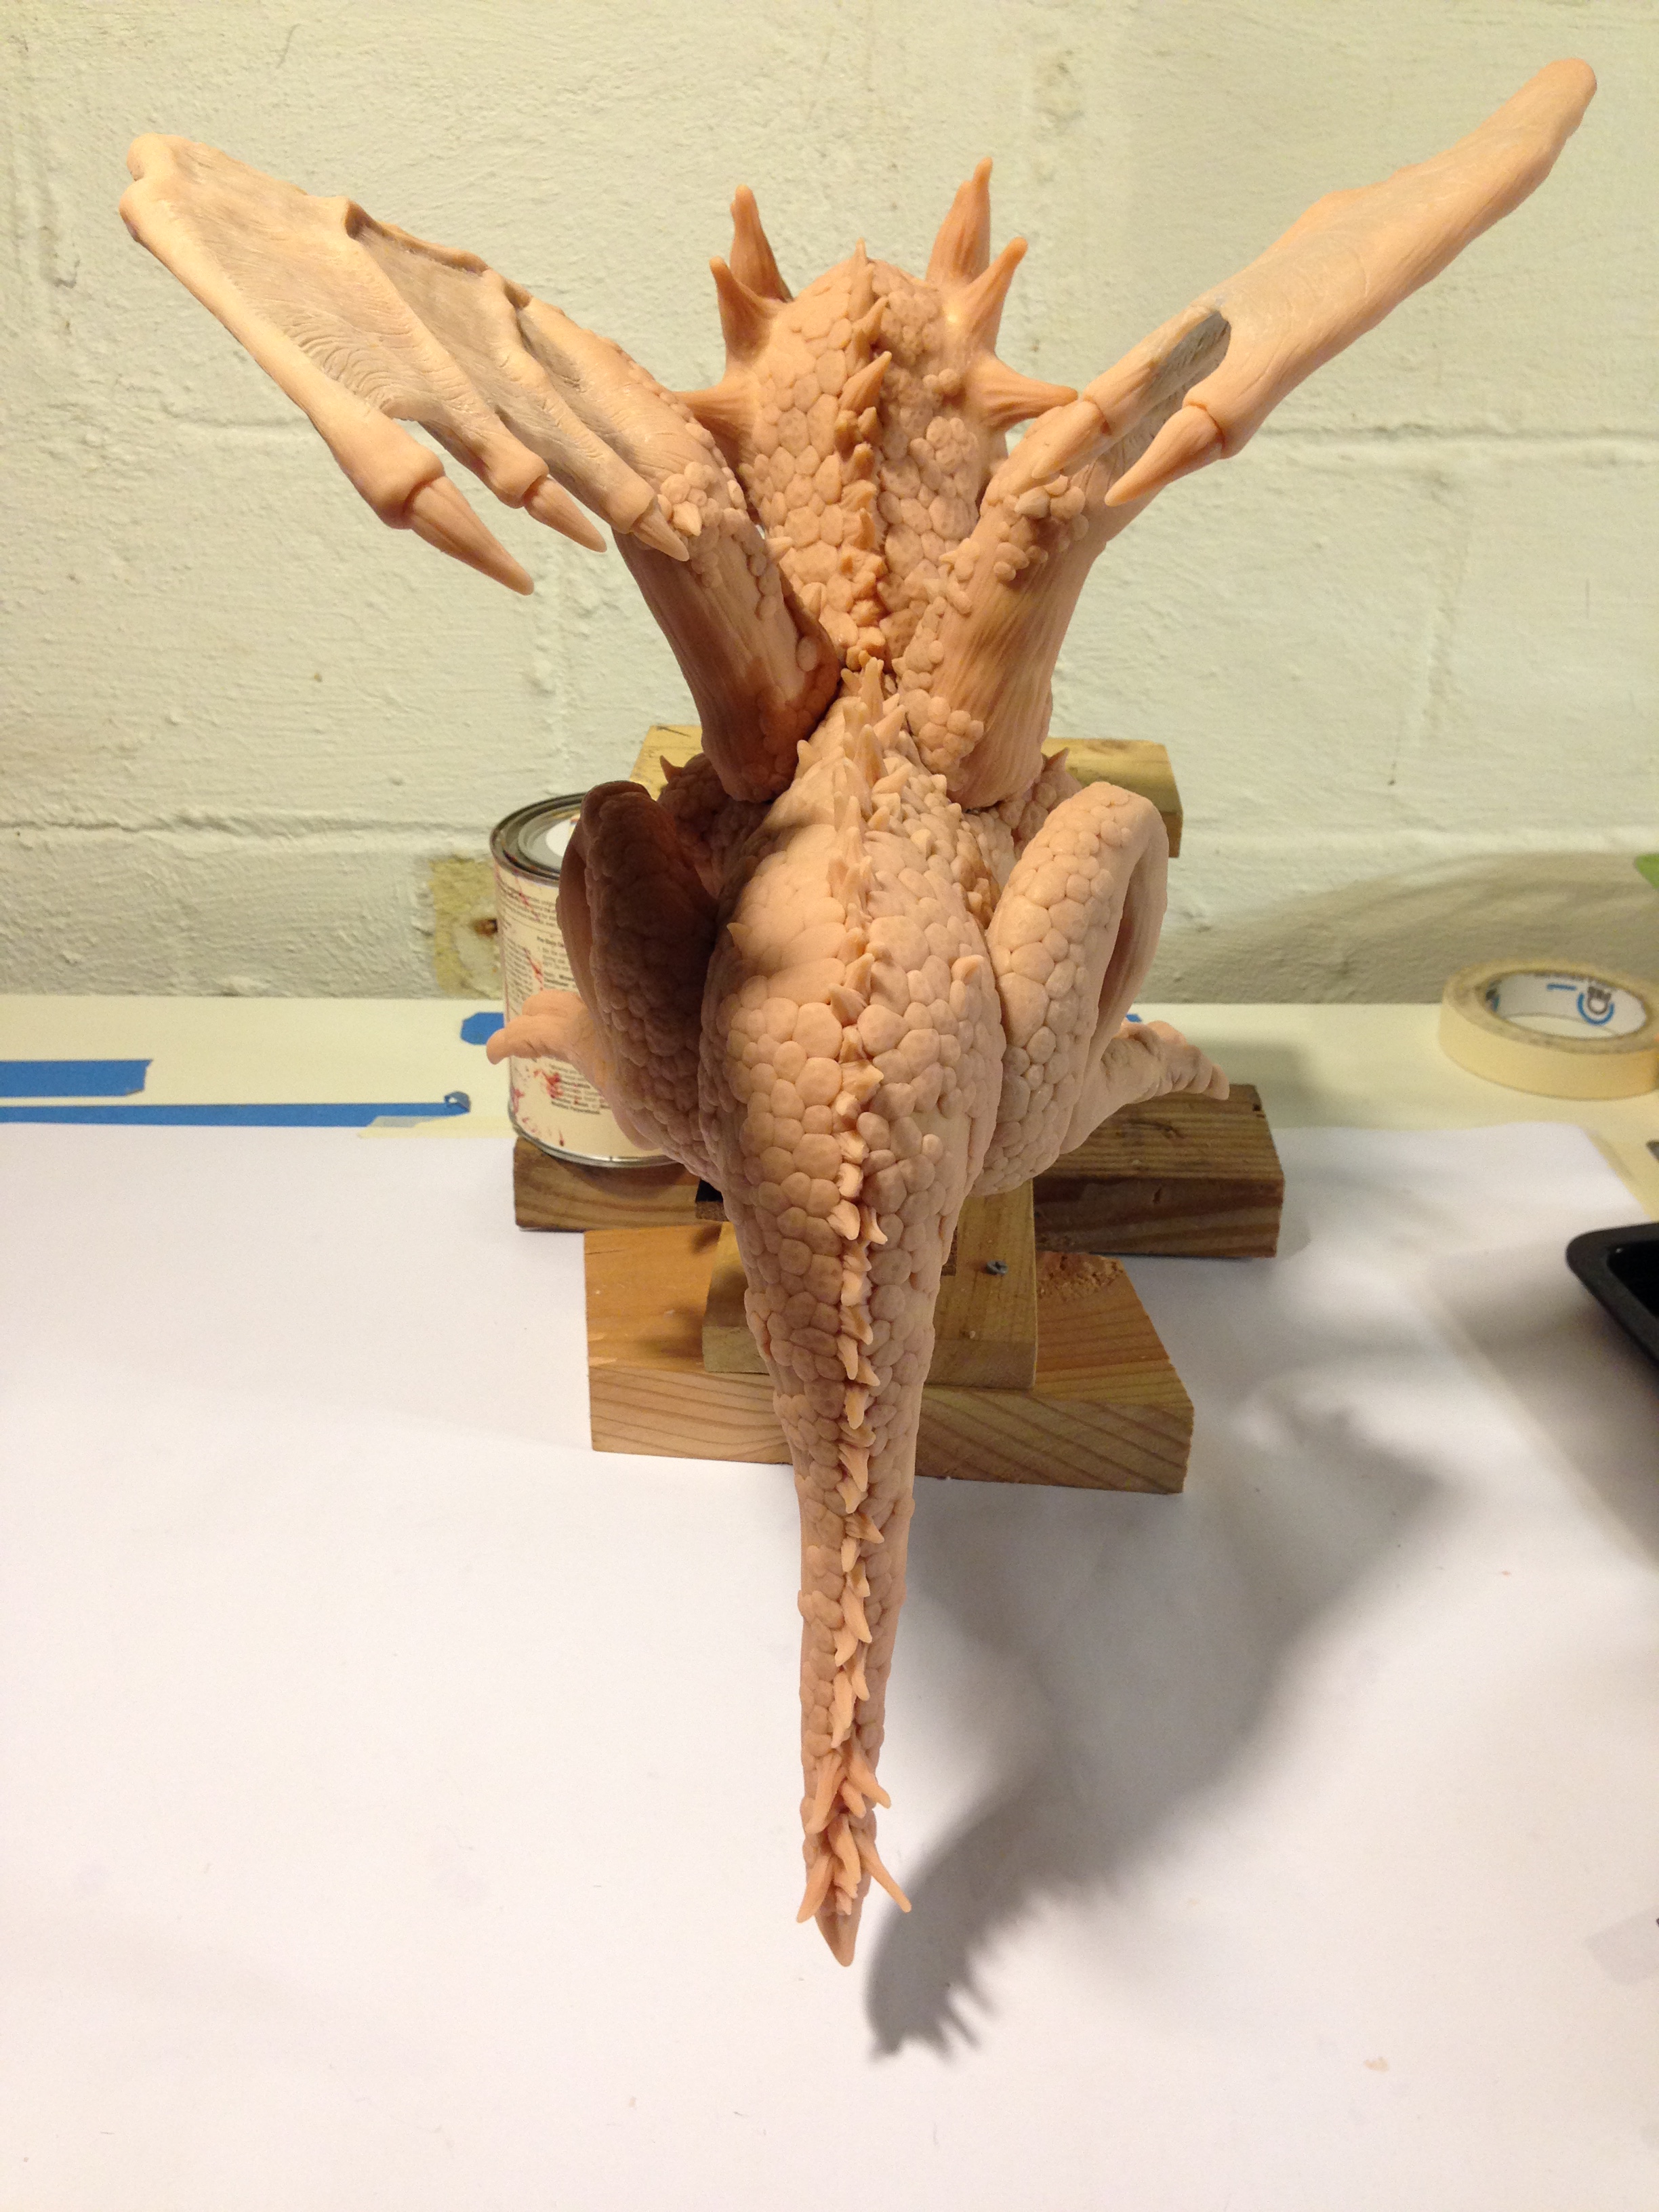
It was a long process adding the scales, which were basically just little balls of clay, in various sizes, flattened out on the smoothed skin below.
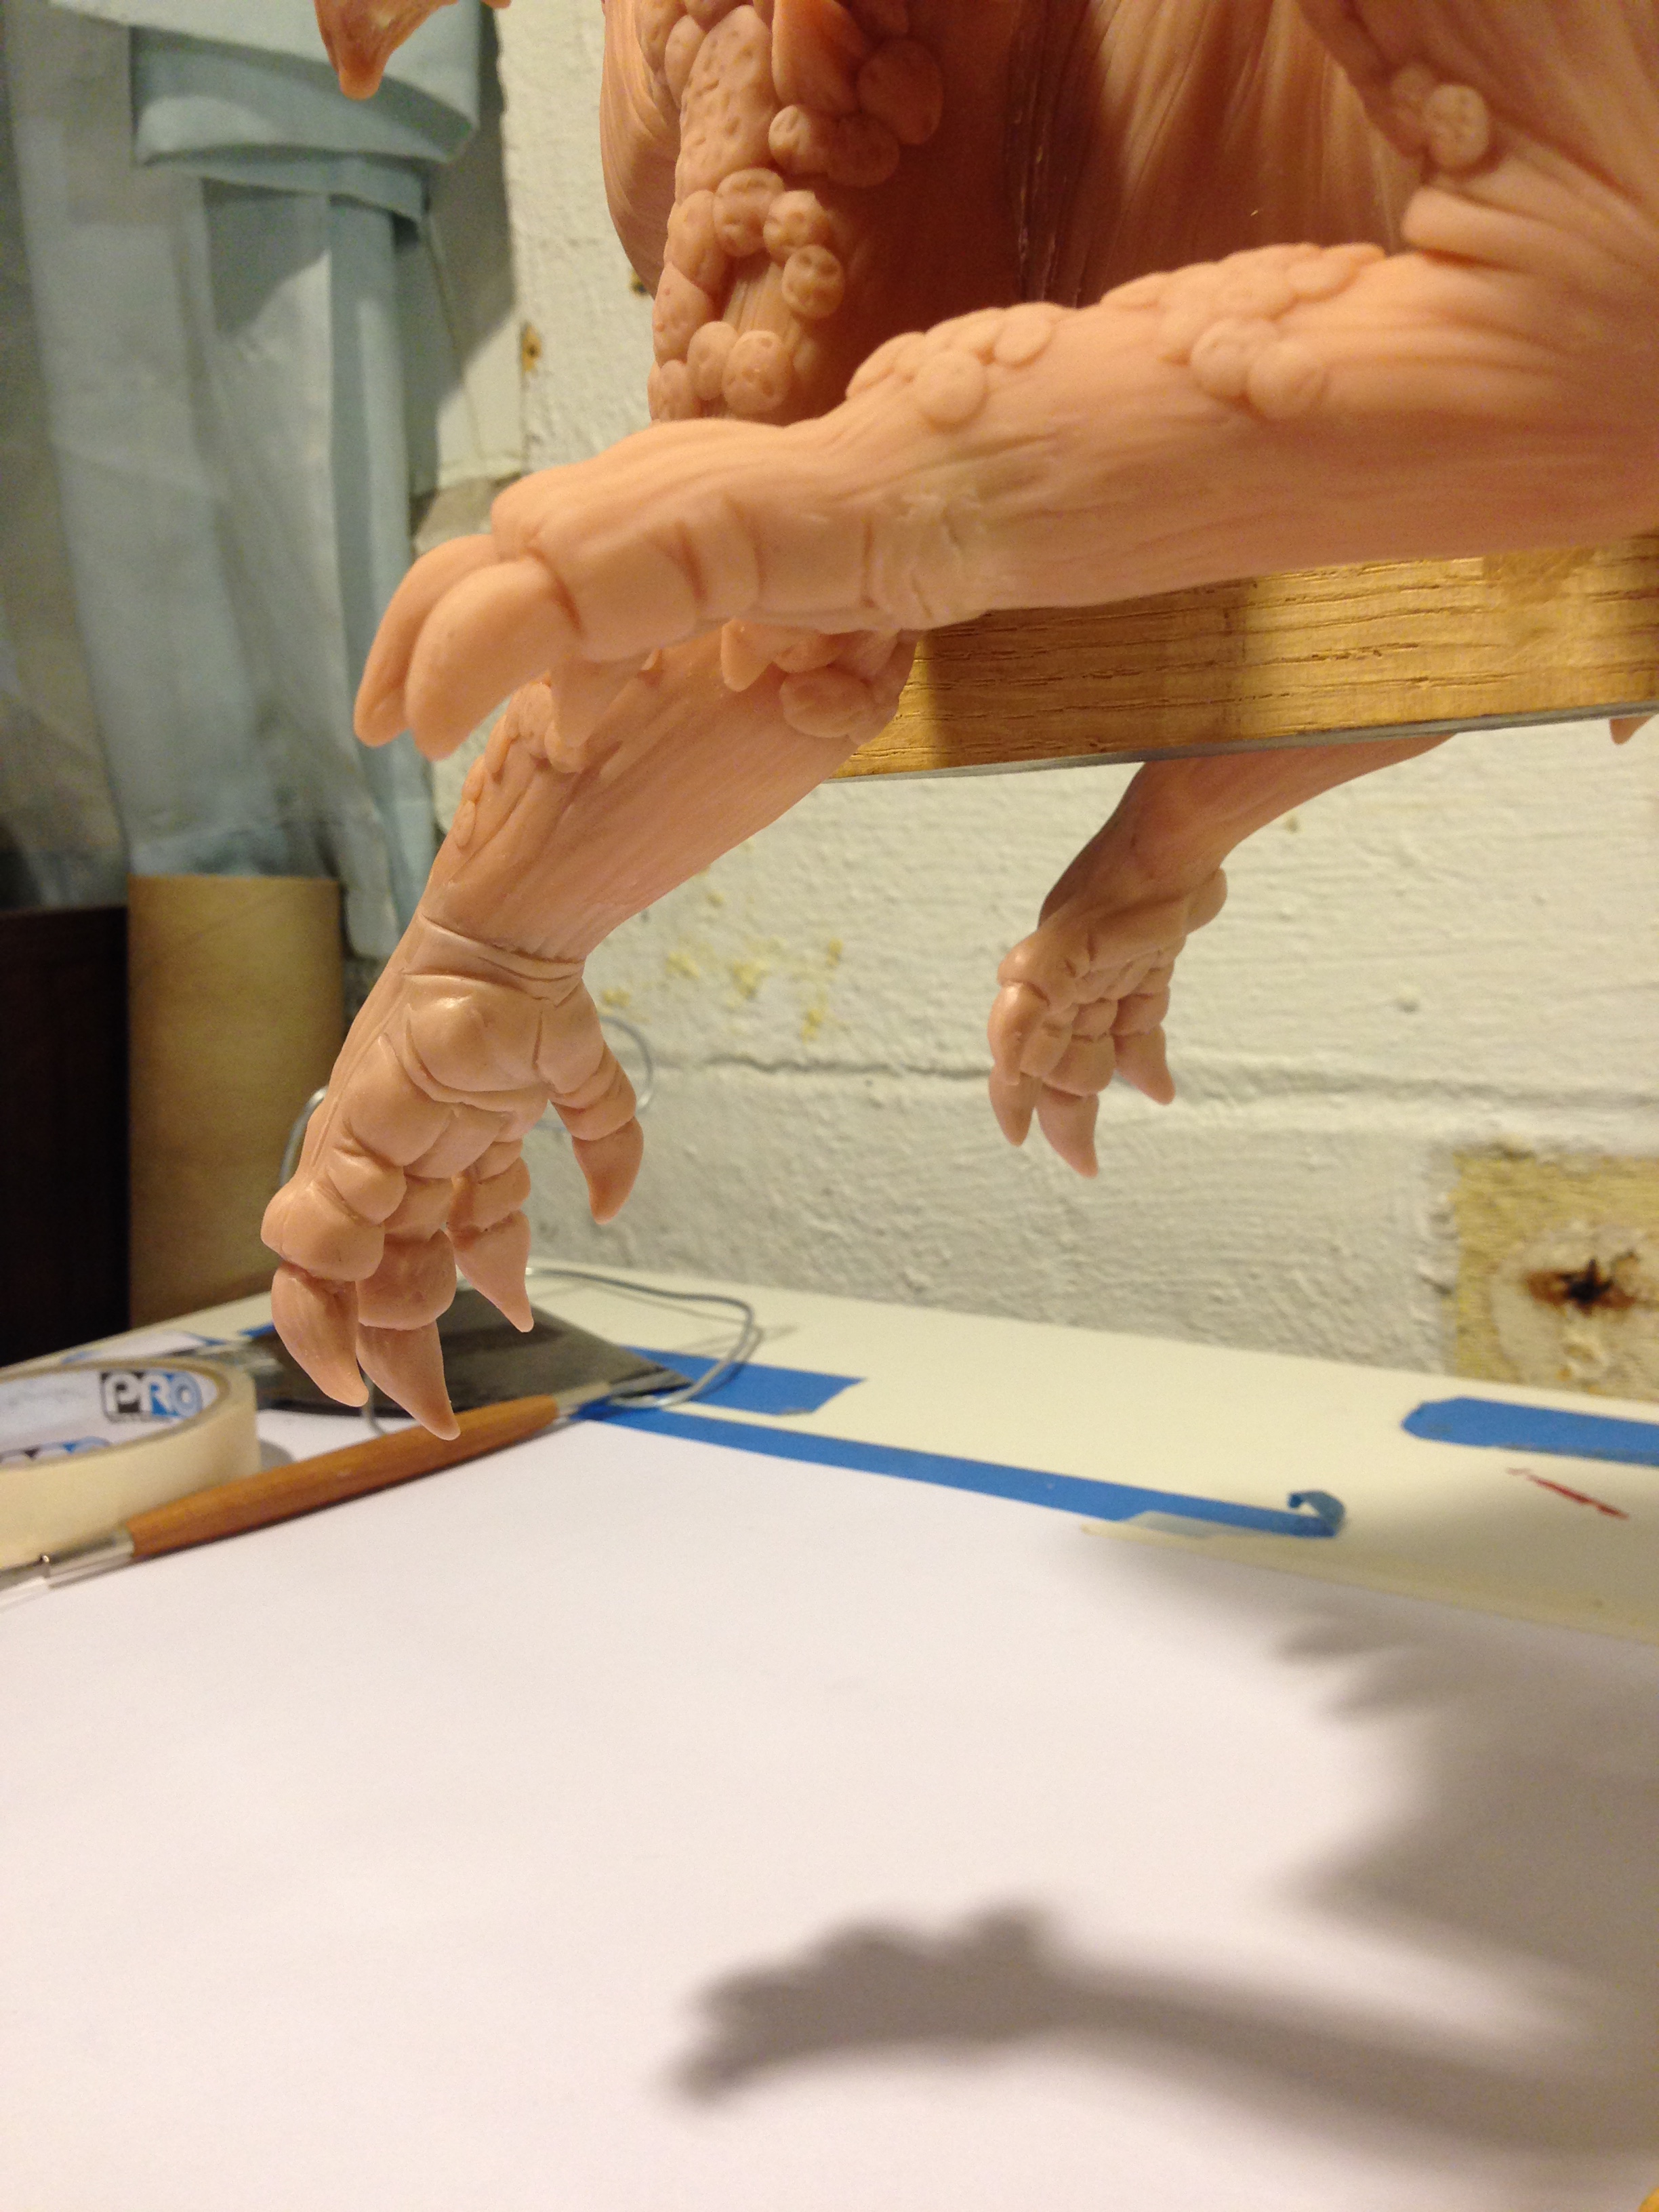
Sharp wires covered with Claw protectors.
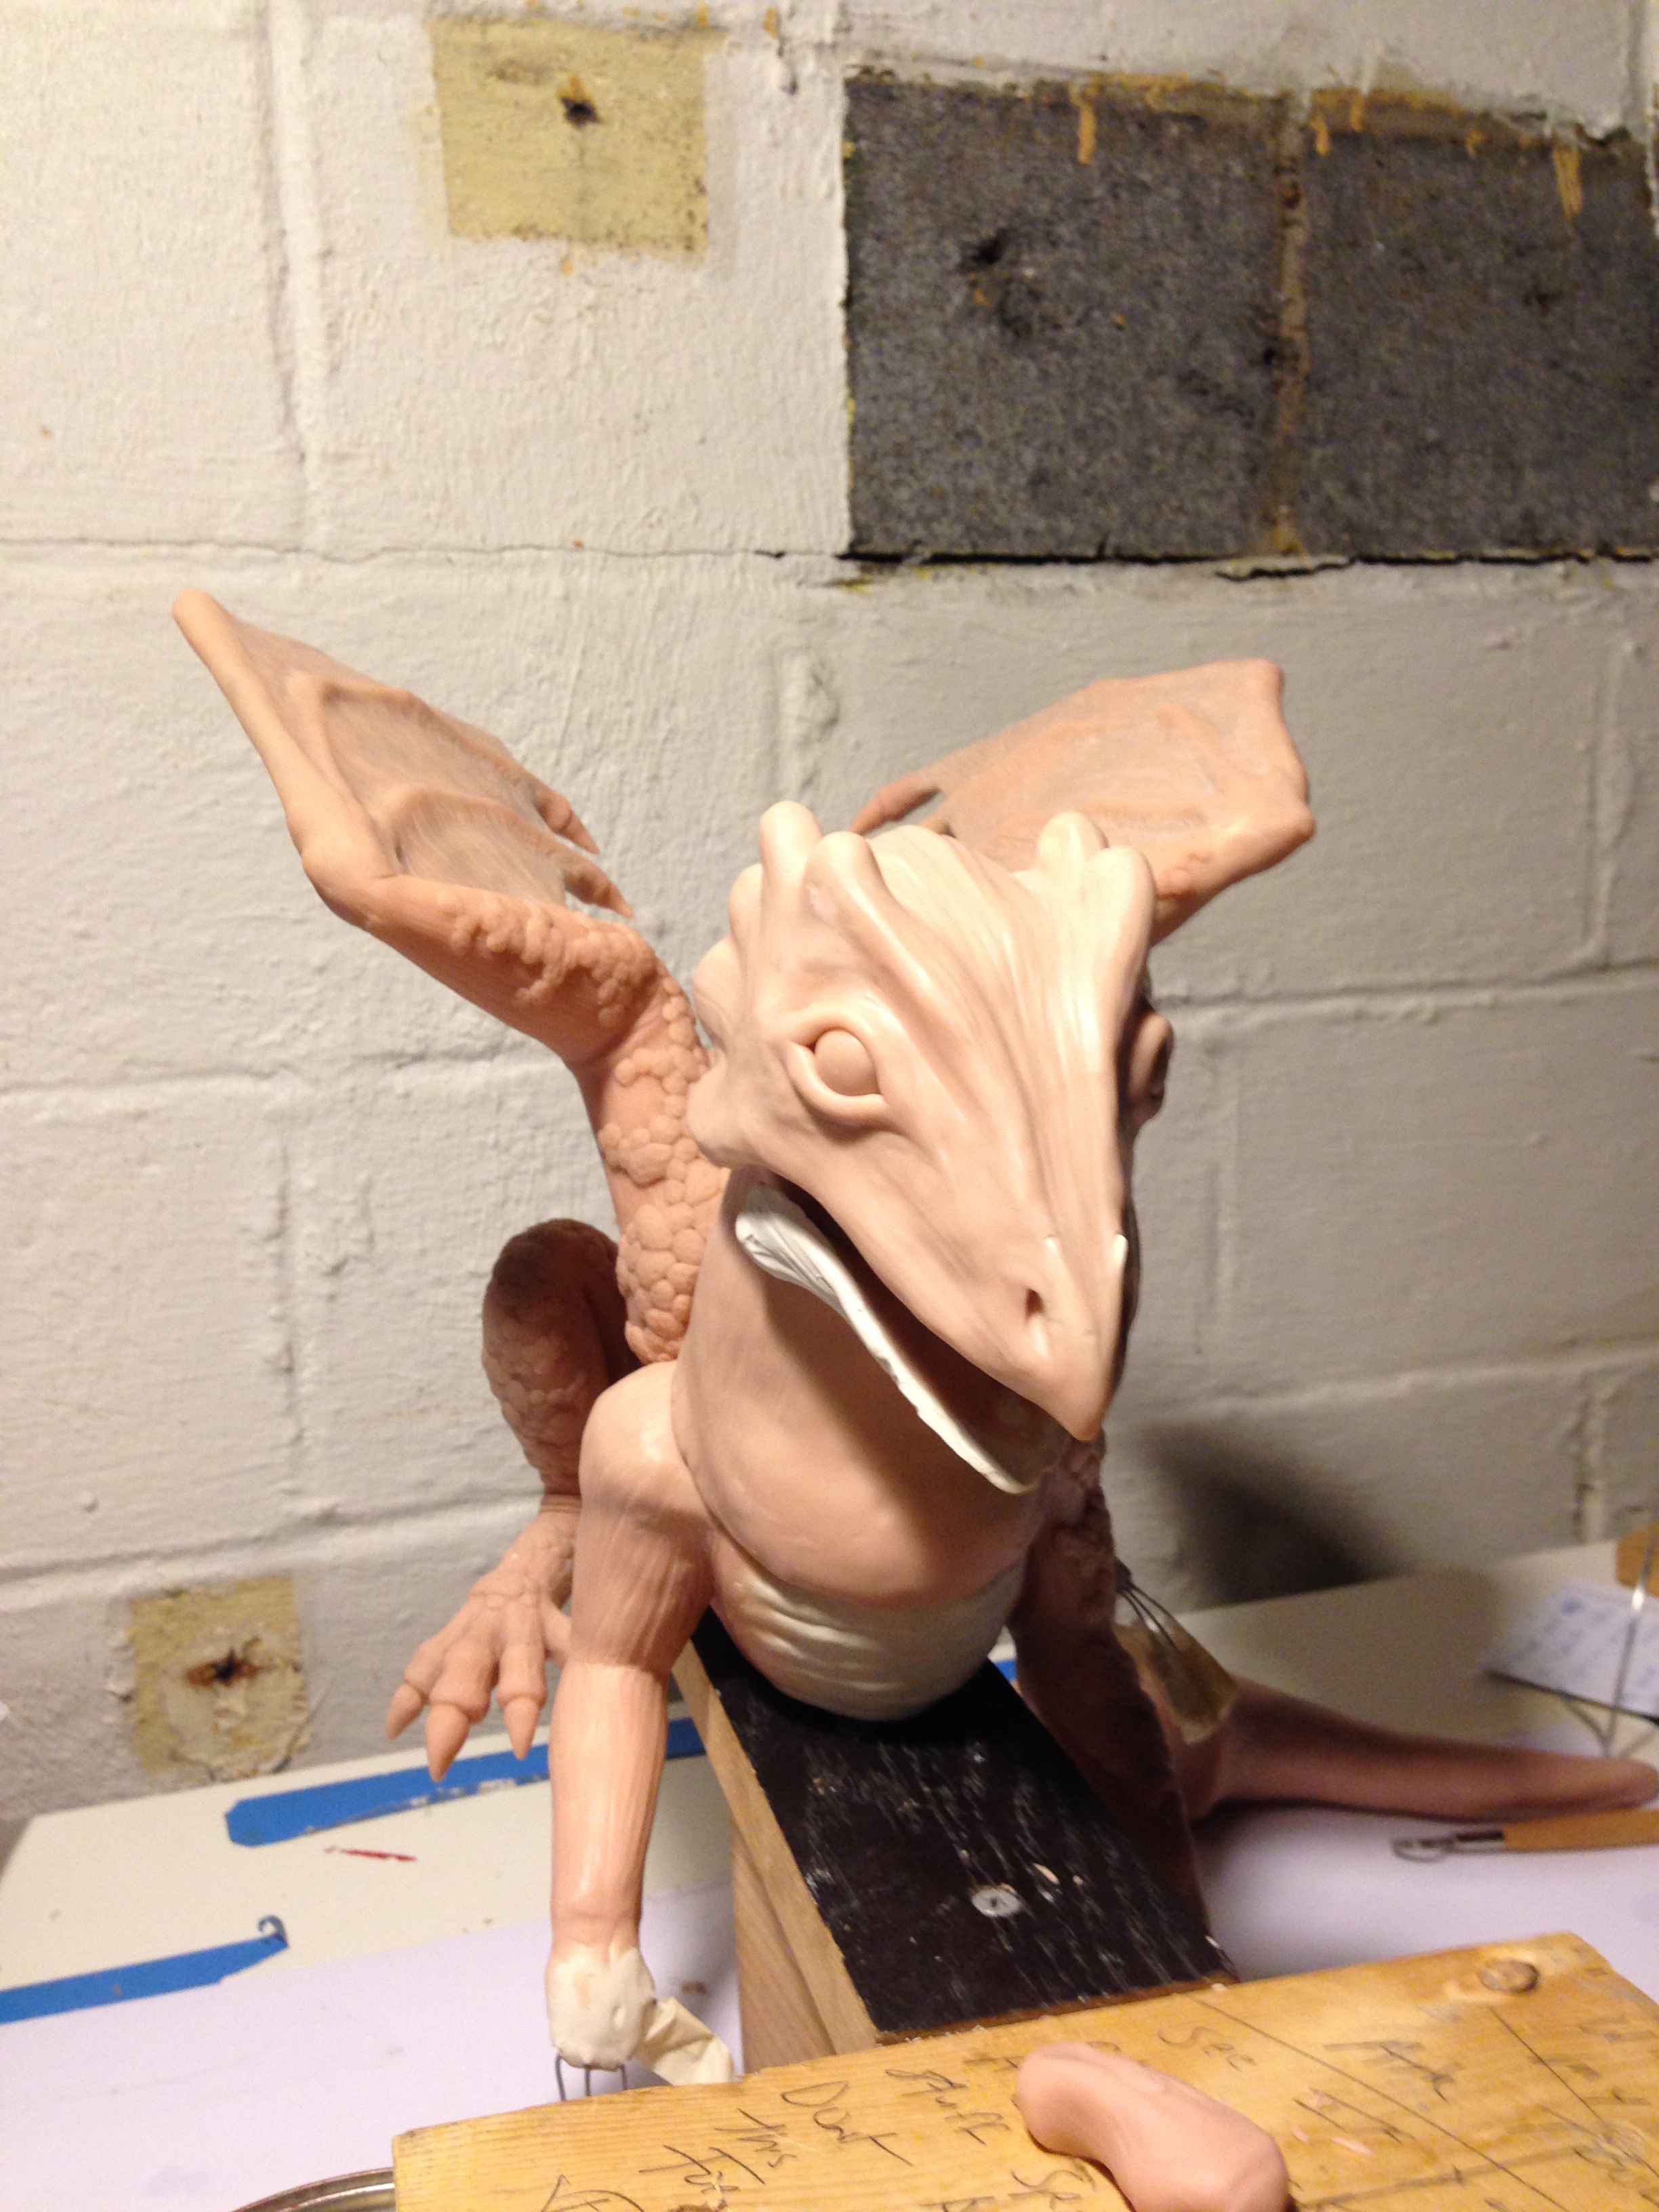
You can see my first attempt at the dragon’s head wasn’t moving in the right direction. I had to step away for the night and come back to it with fresh eyes.
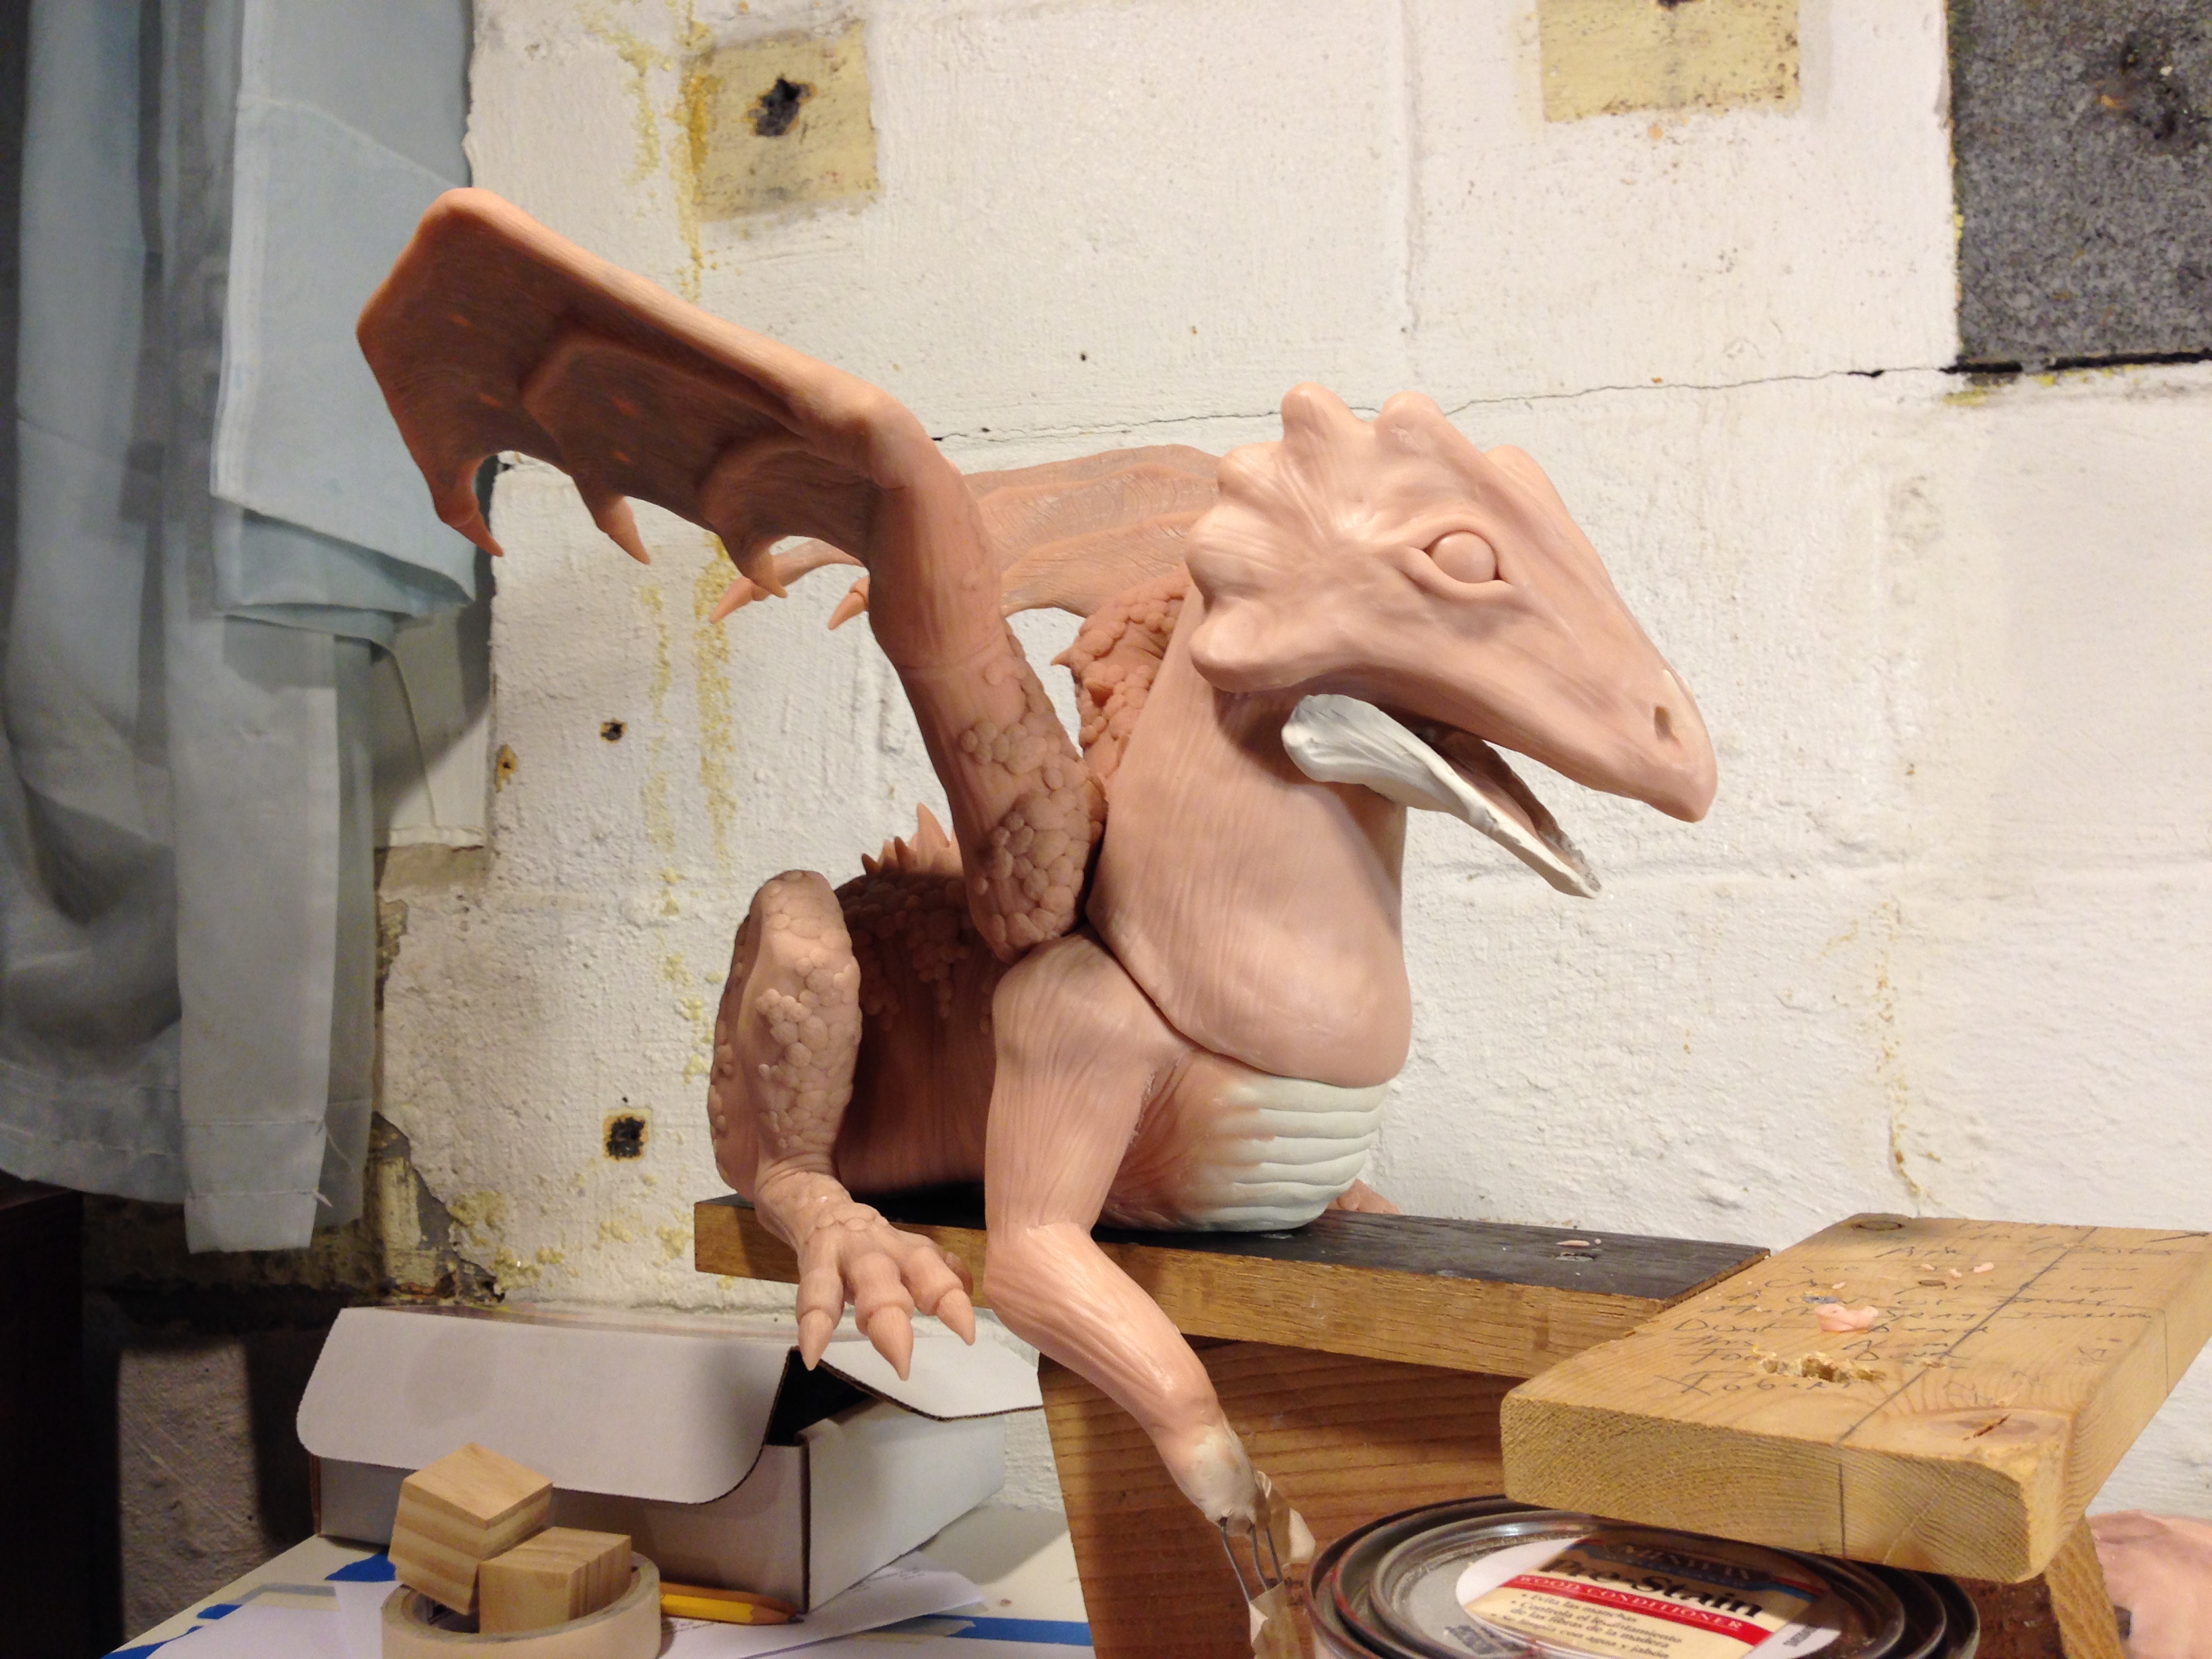
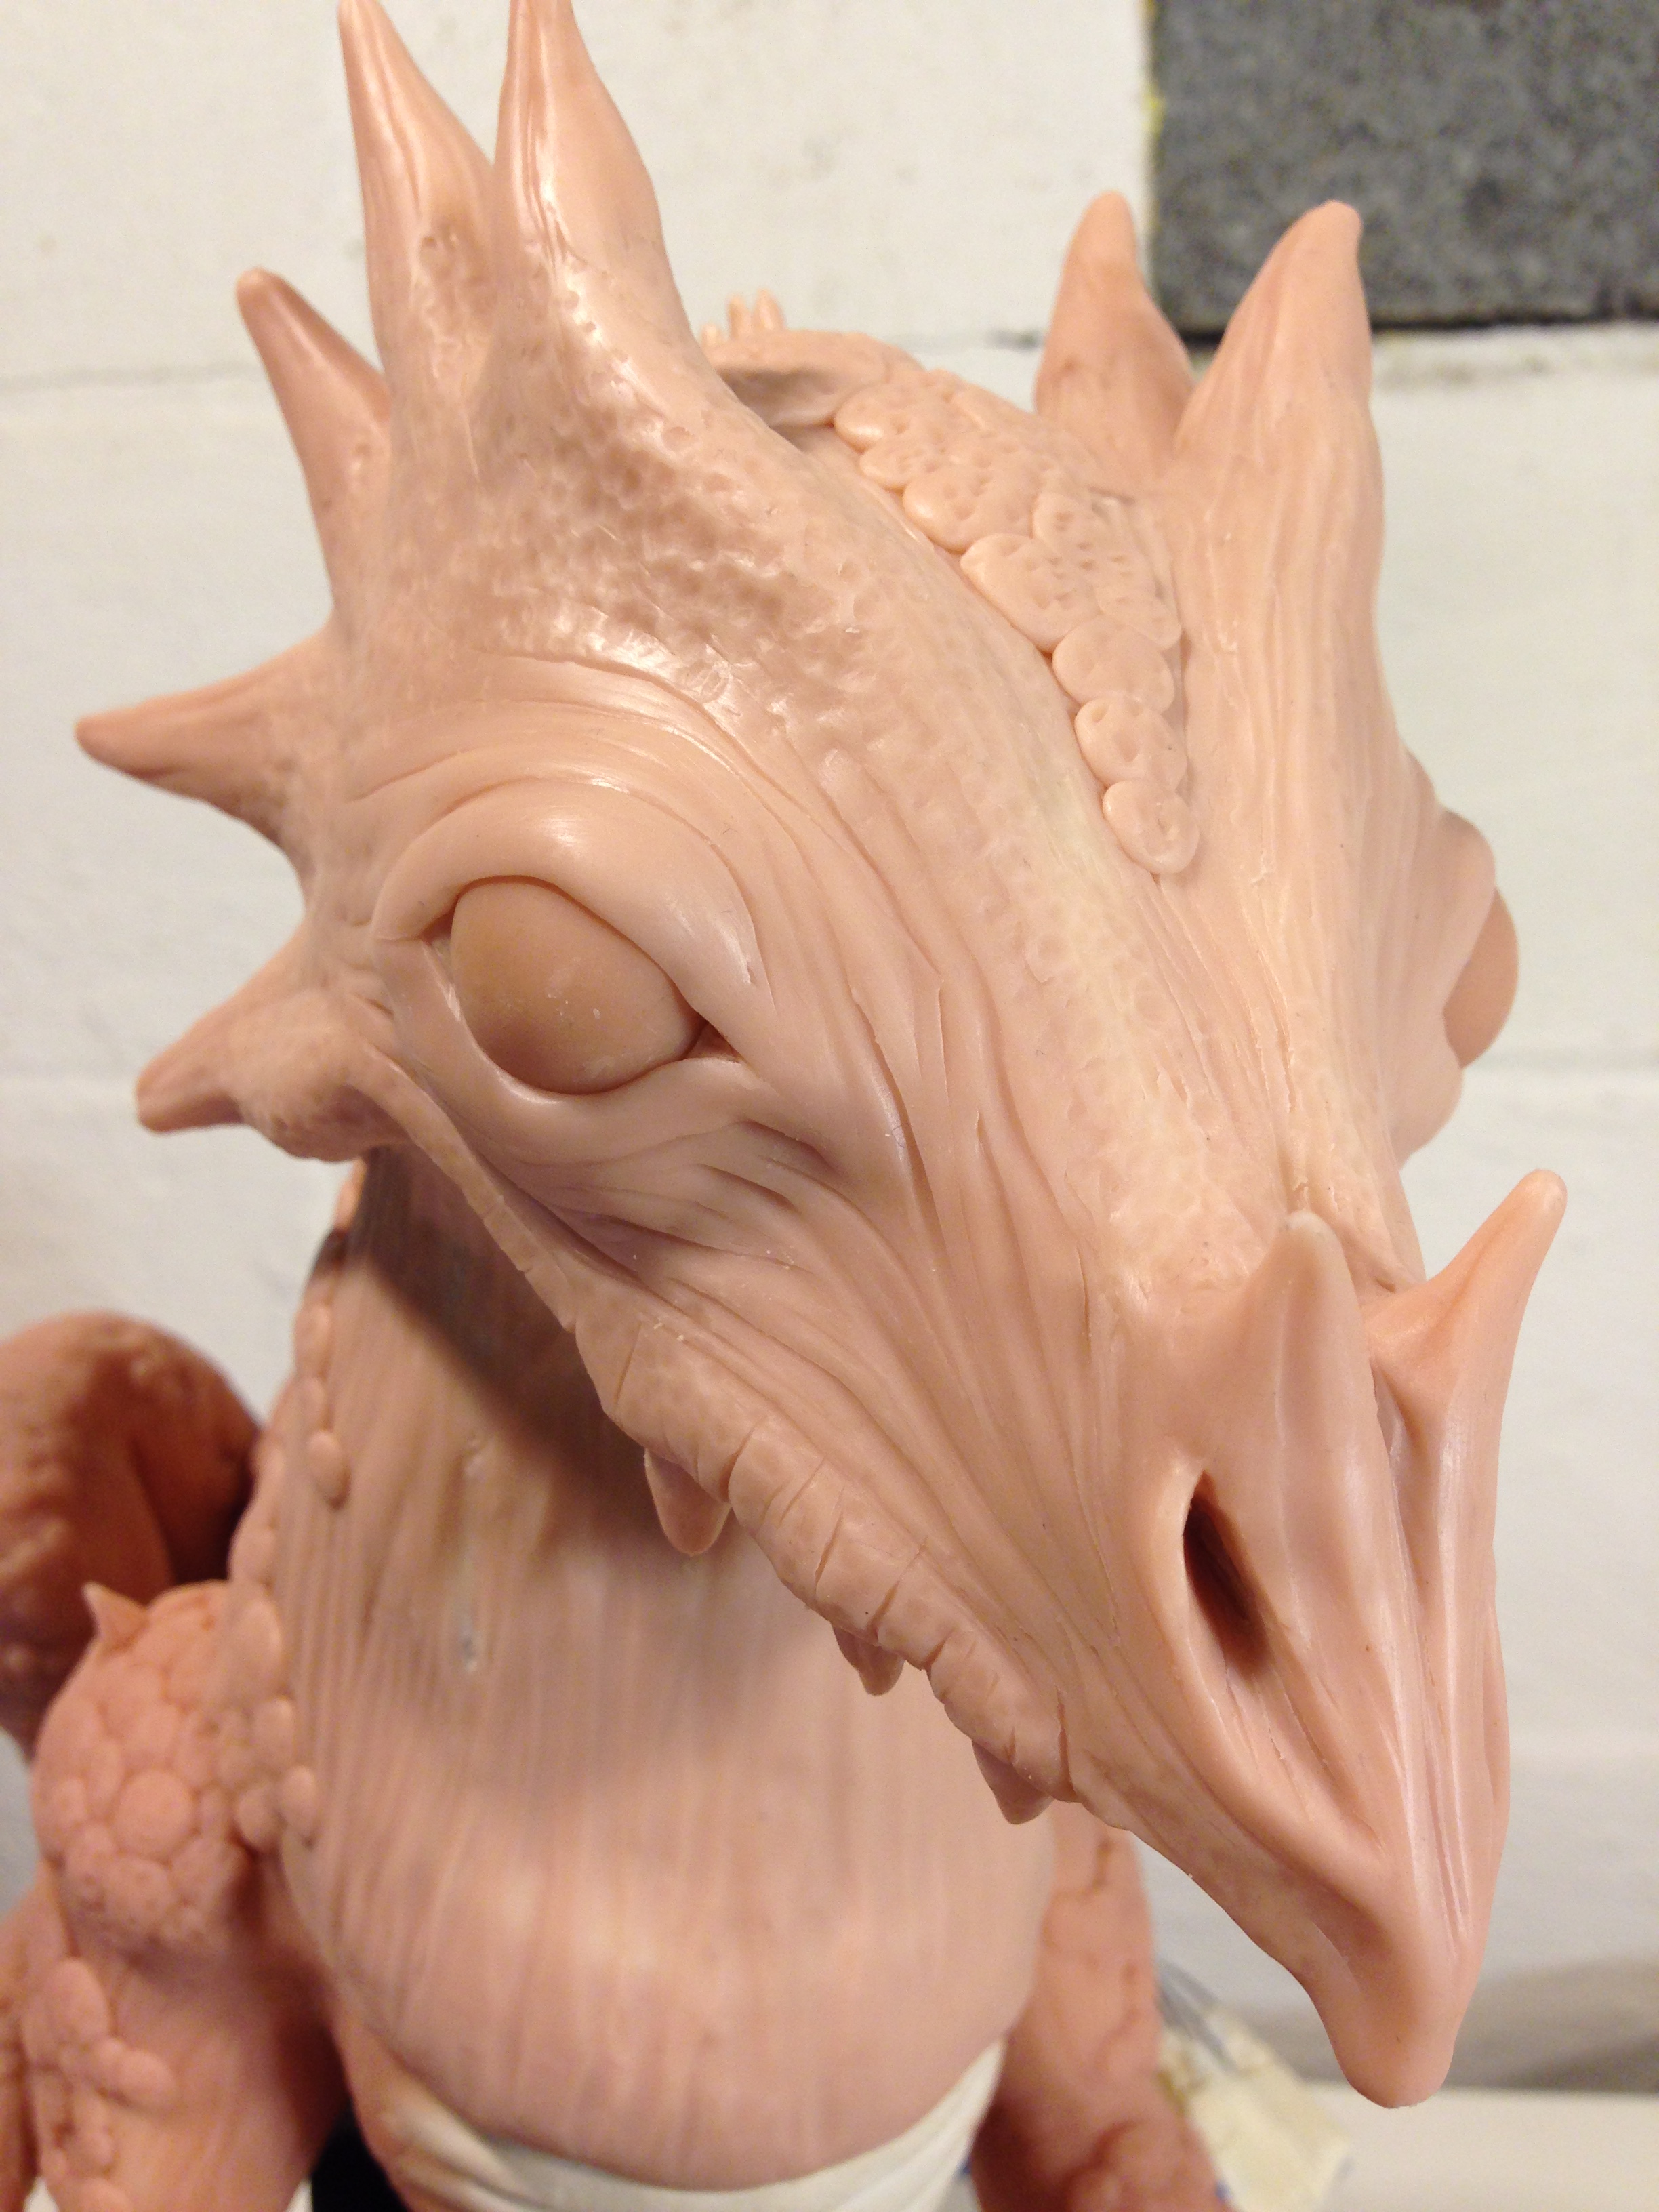
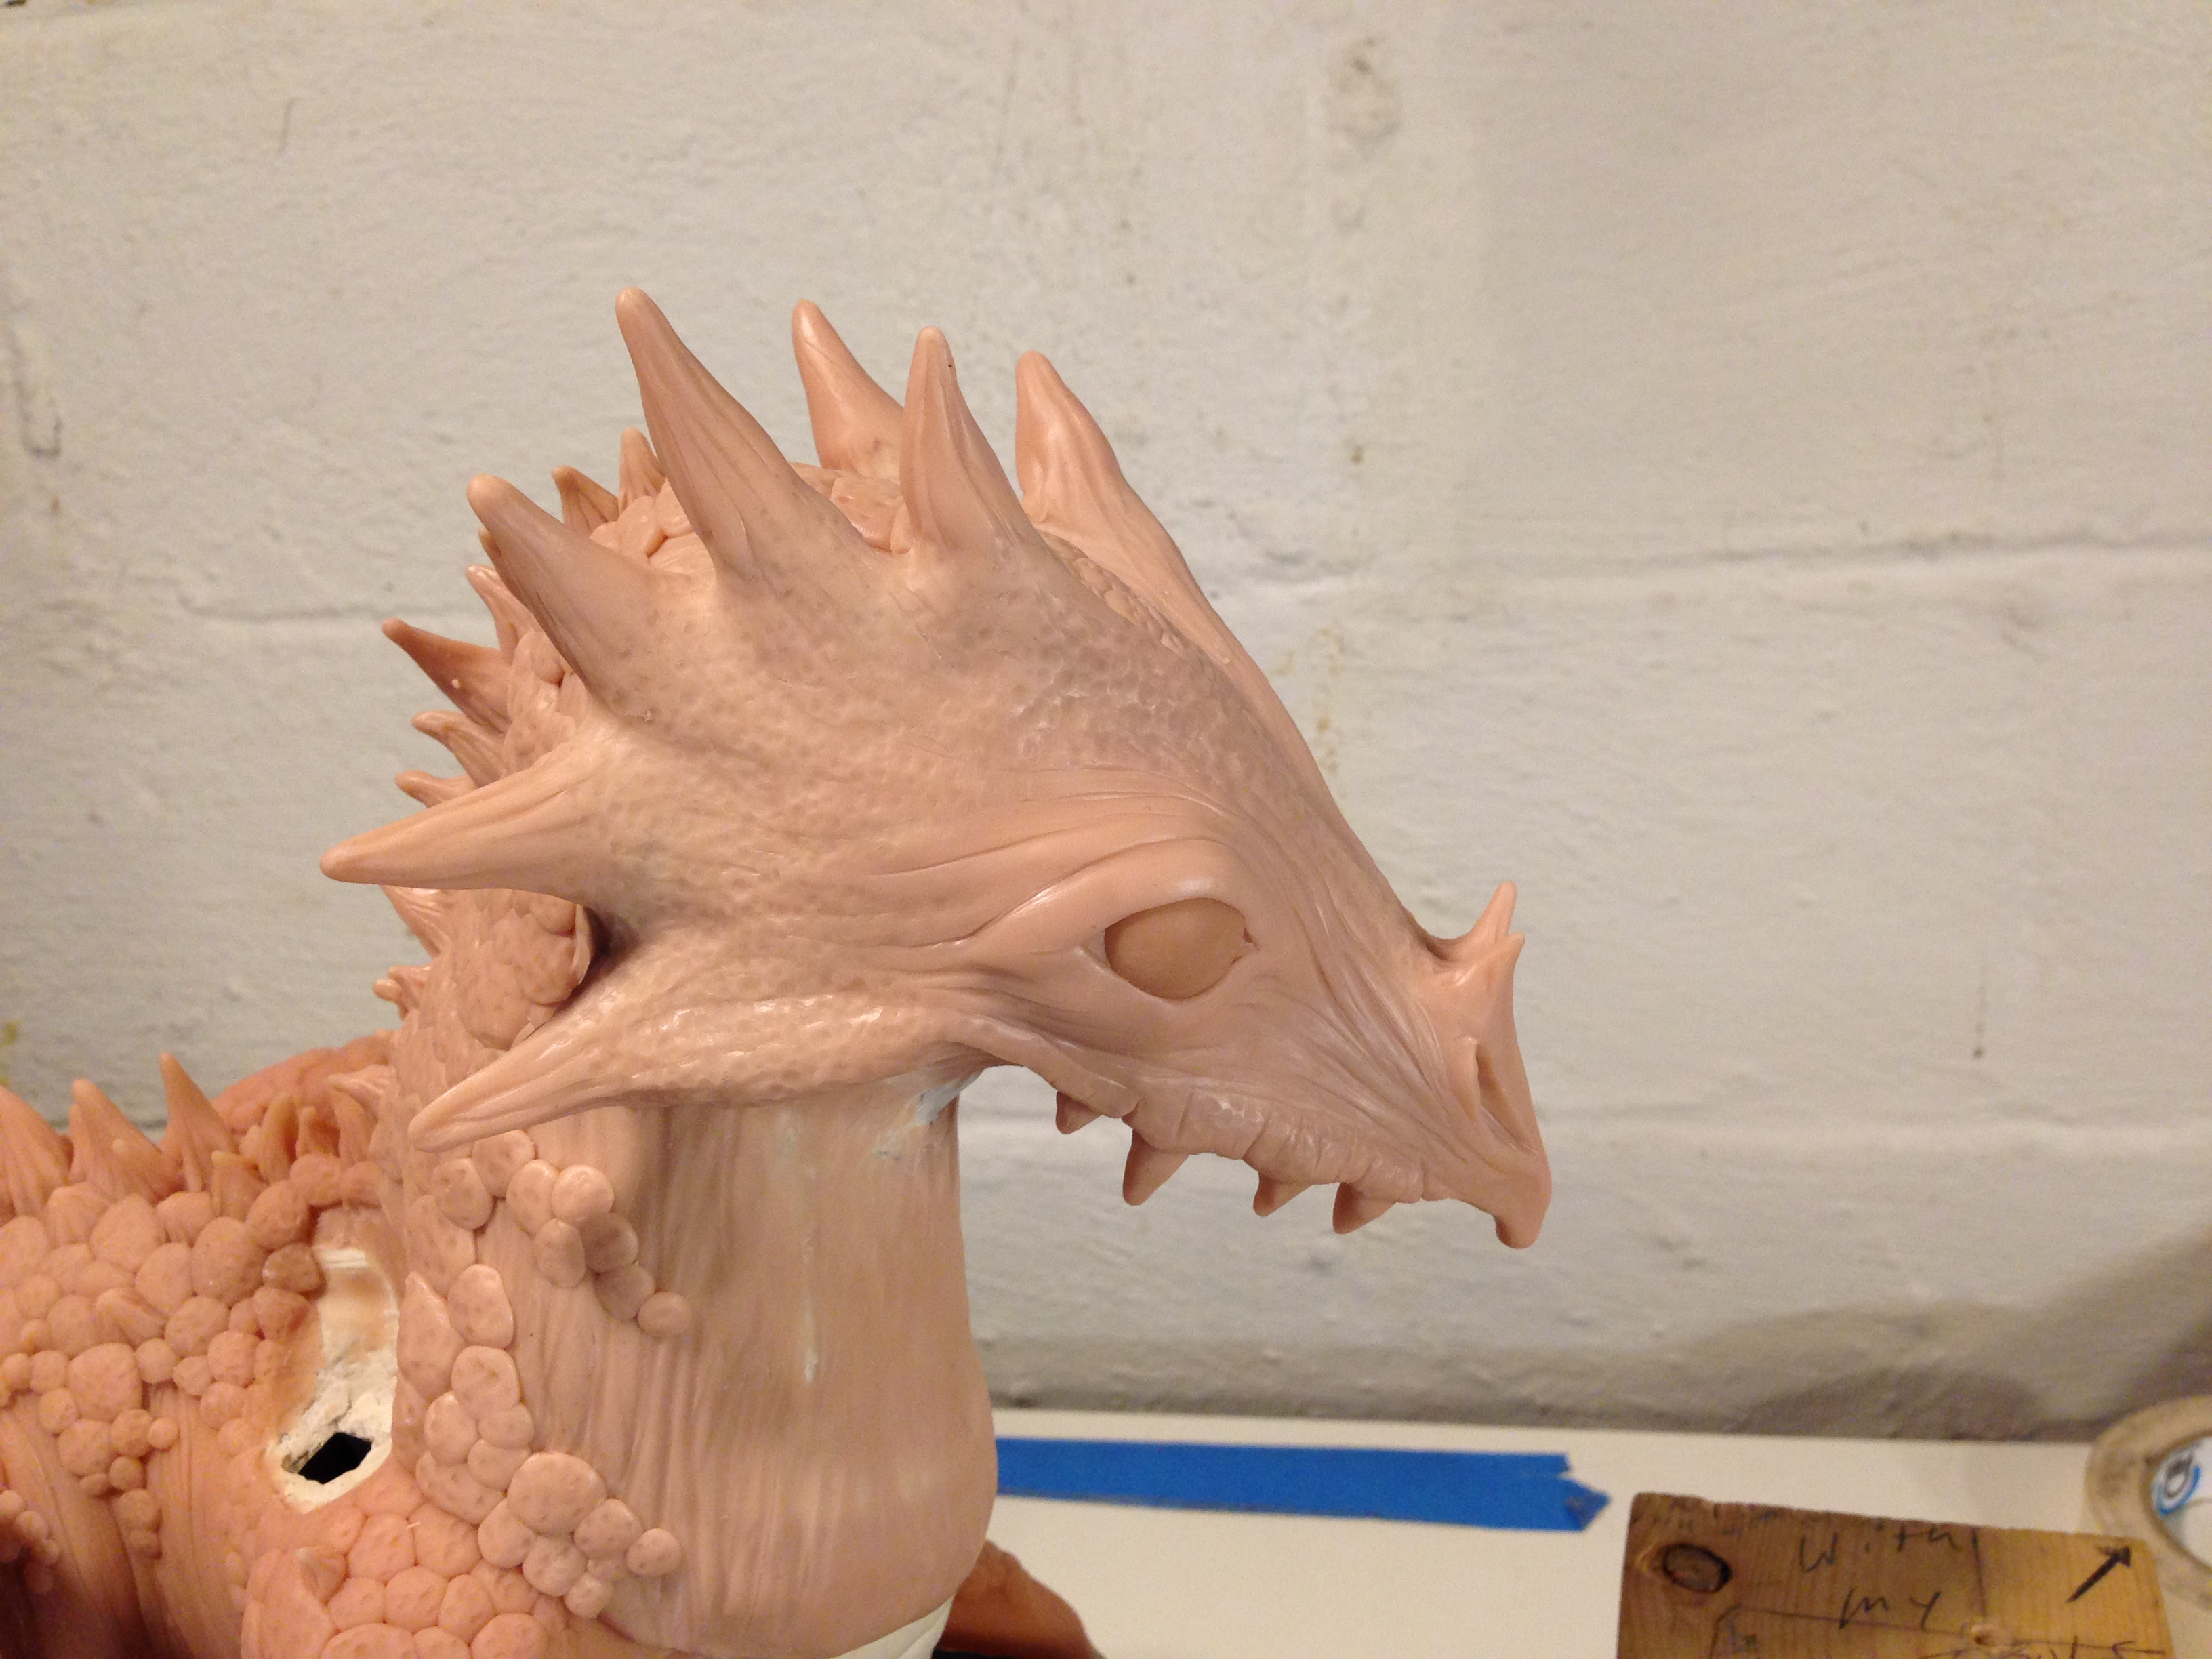
Coming back to it, I realized that I need to replace the eyes and shave off a bit of clay. I then added some teeth, added some spikes, some texture, and he looked a lot better.
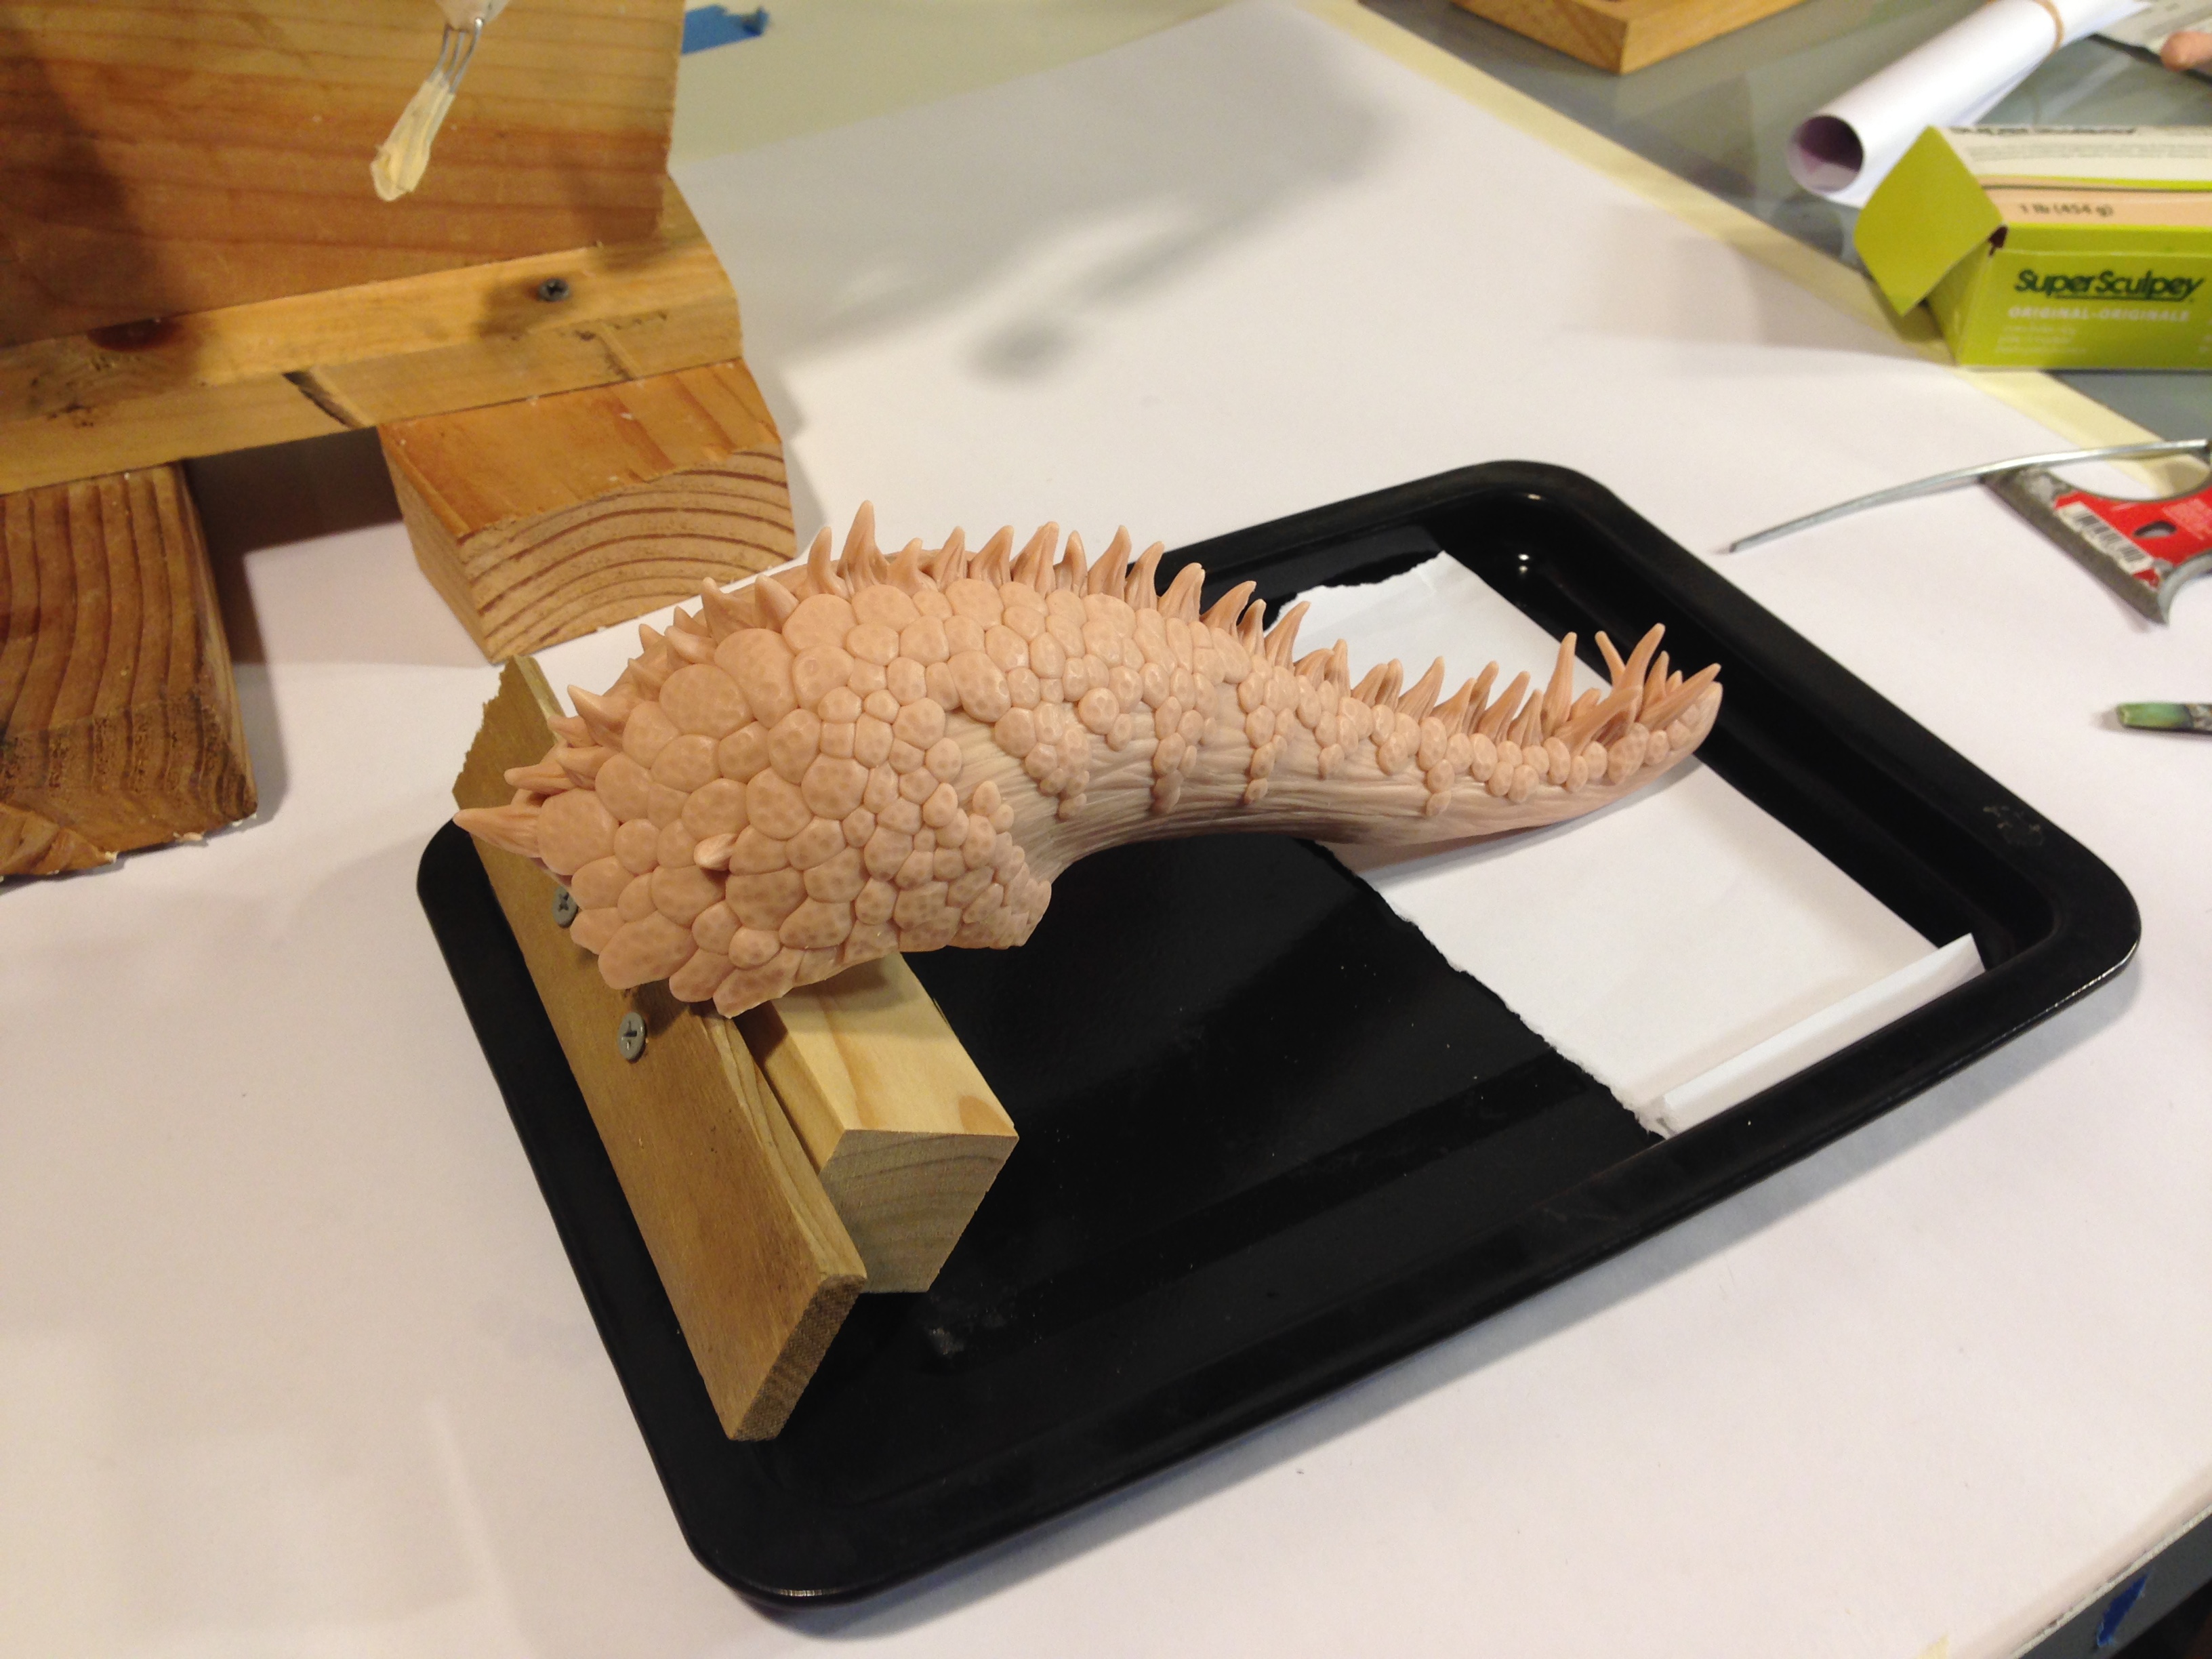
The tail prepped for baking on custom stand.
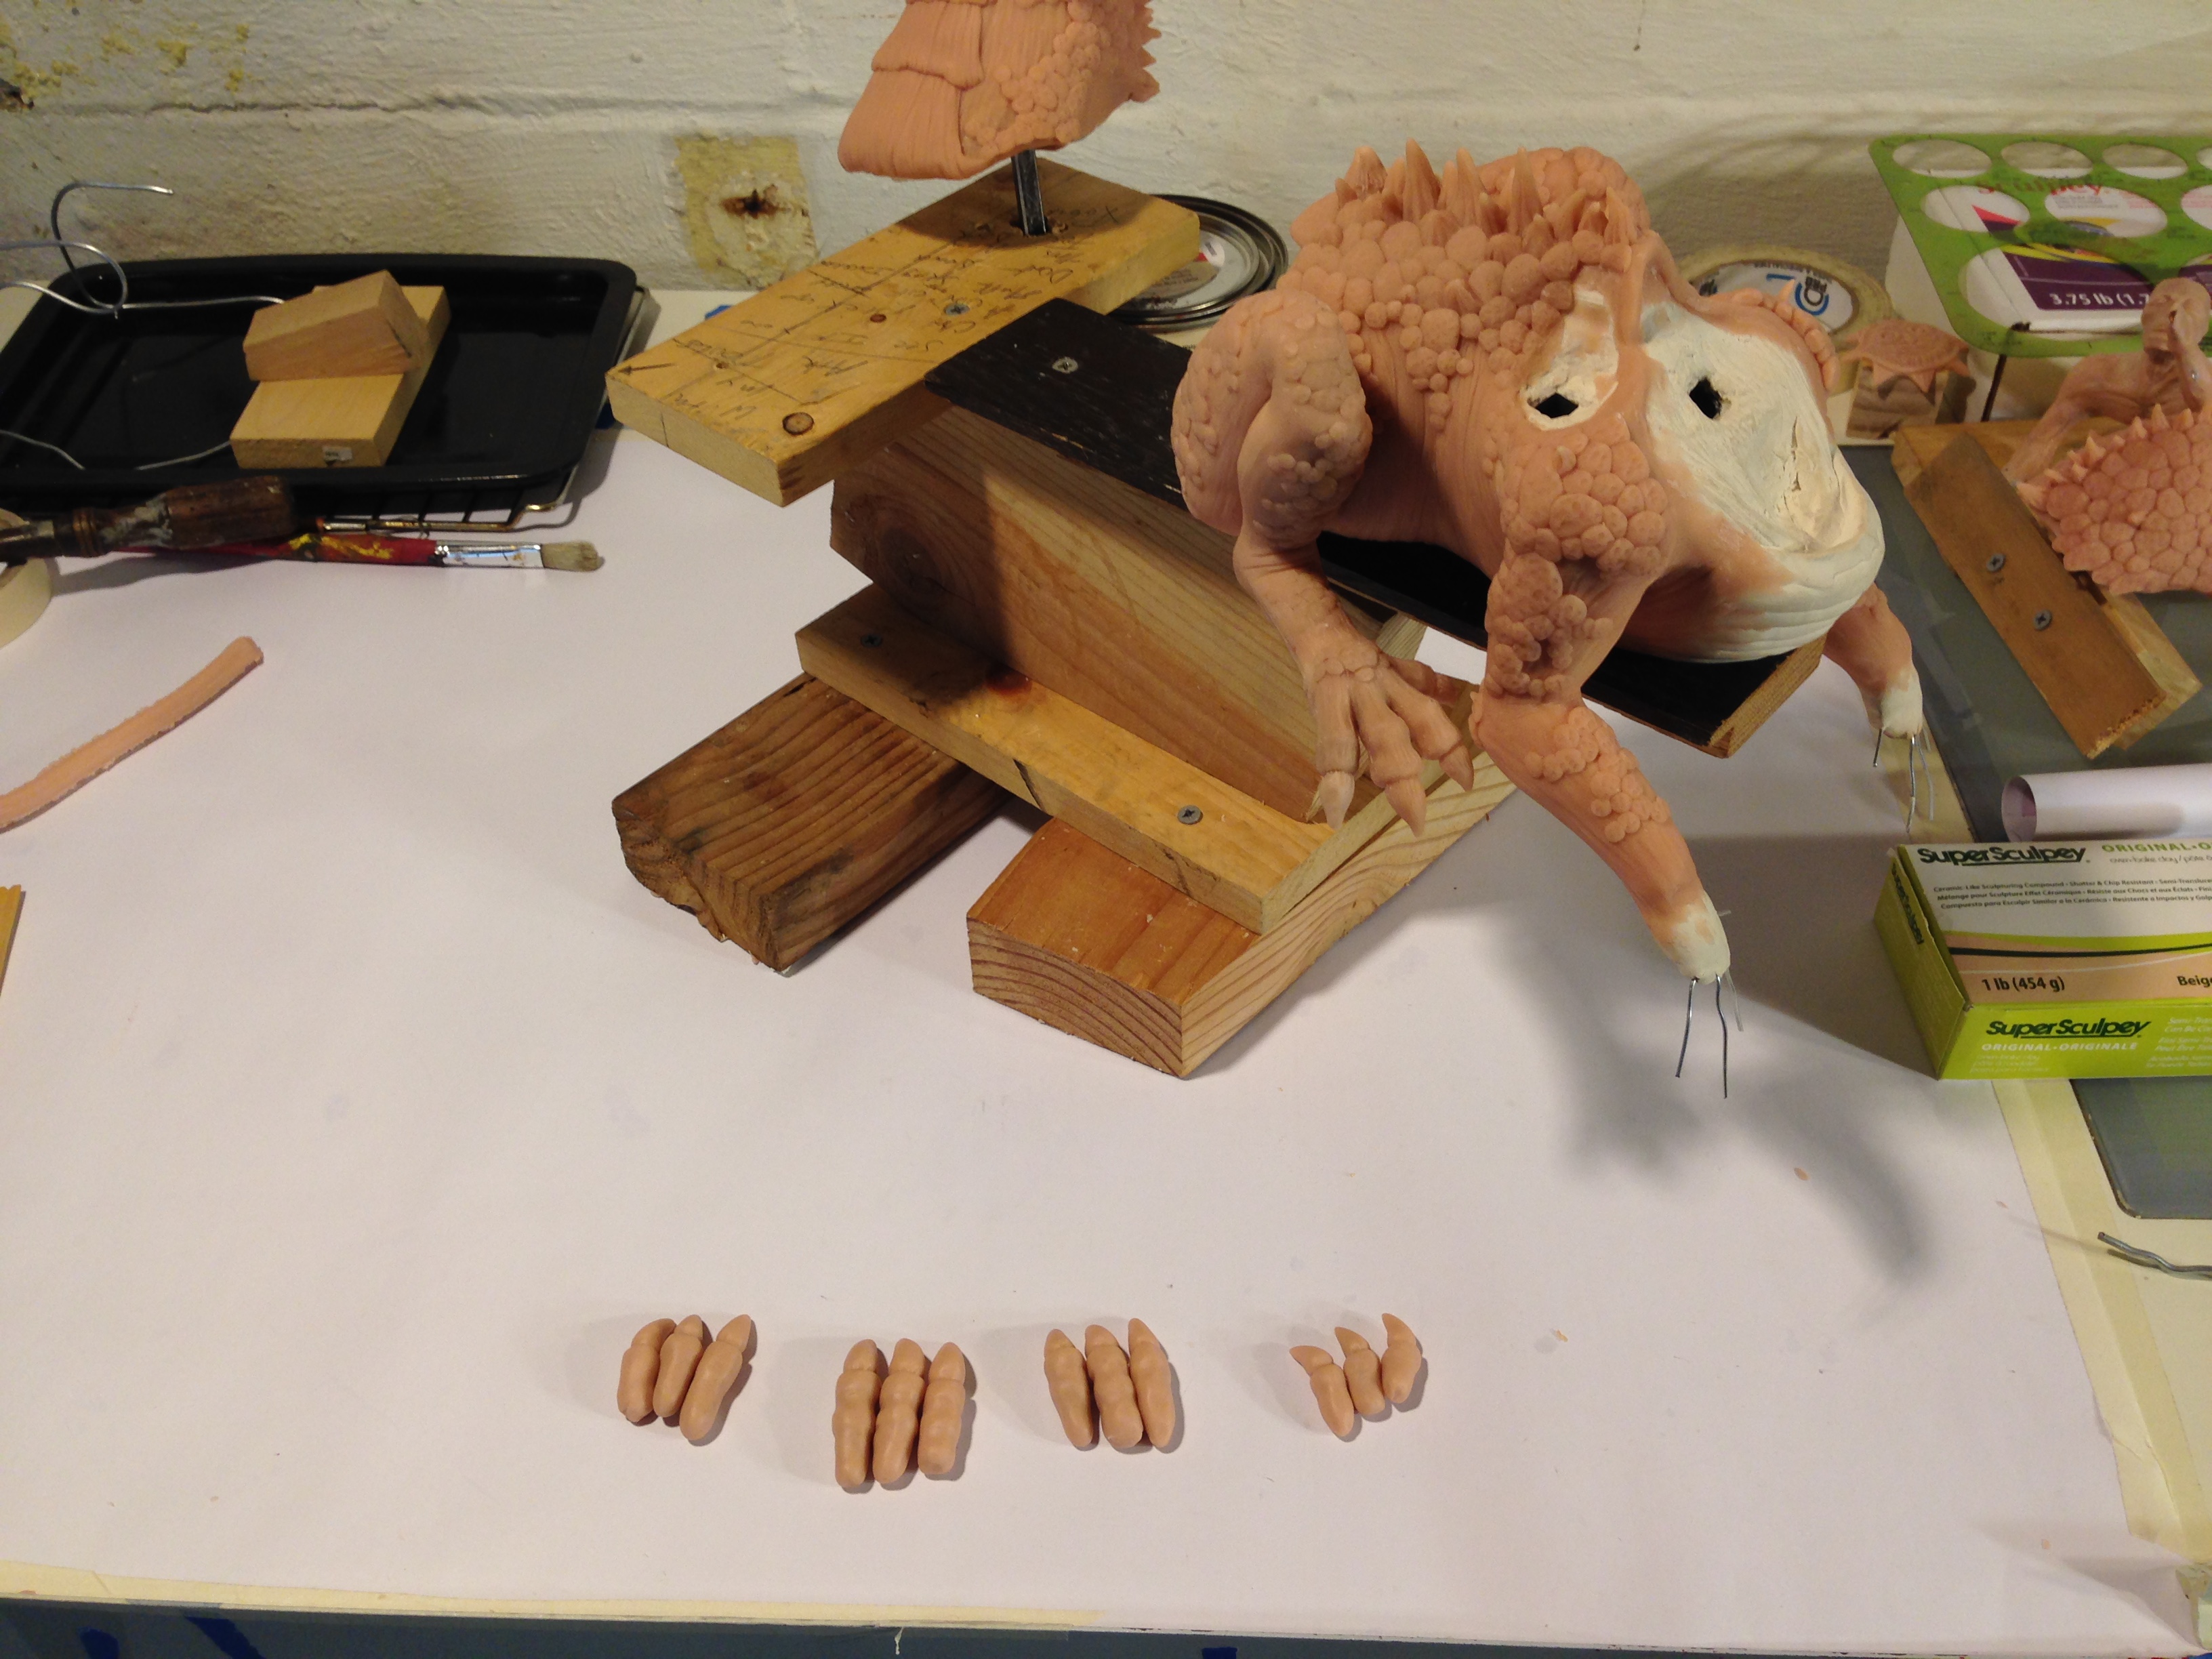
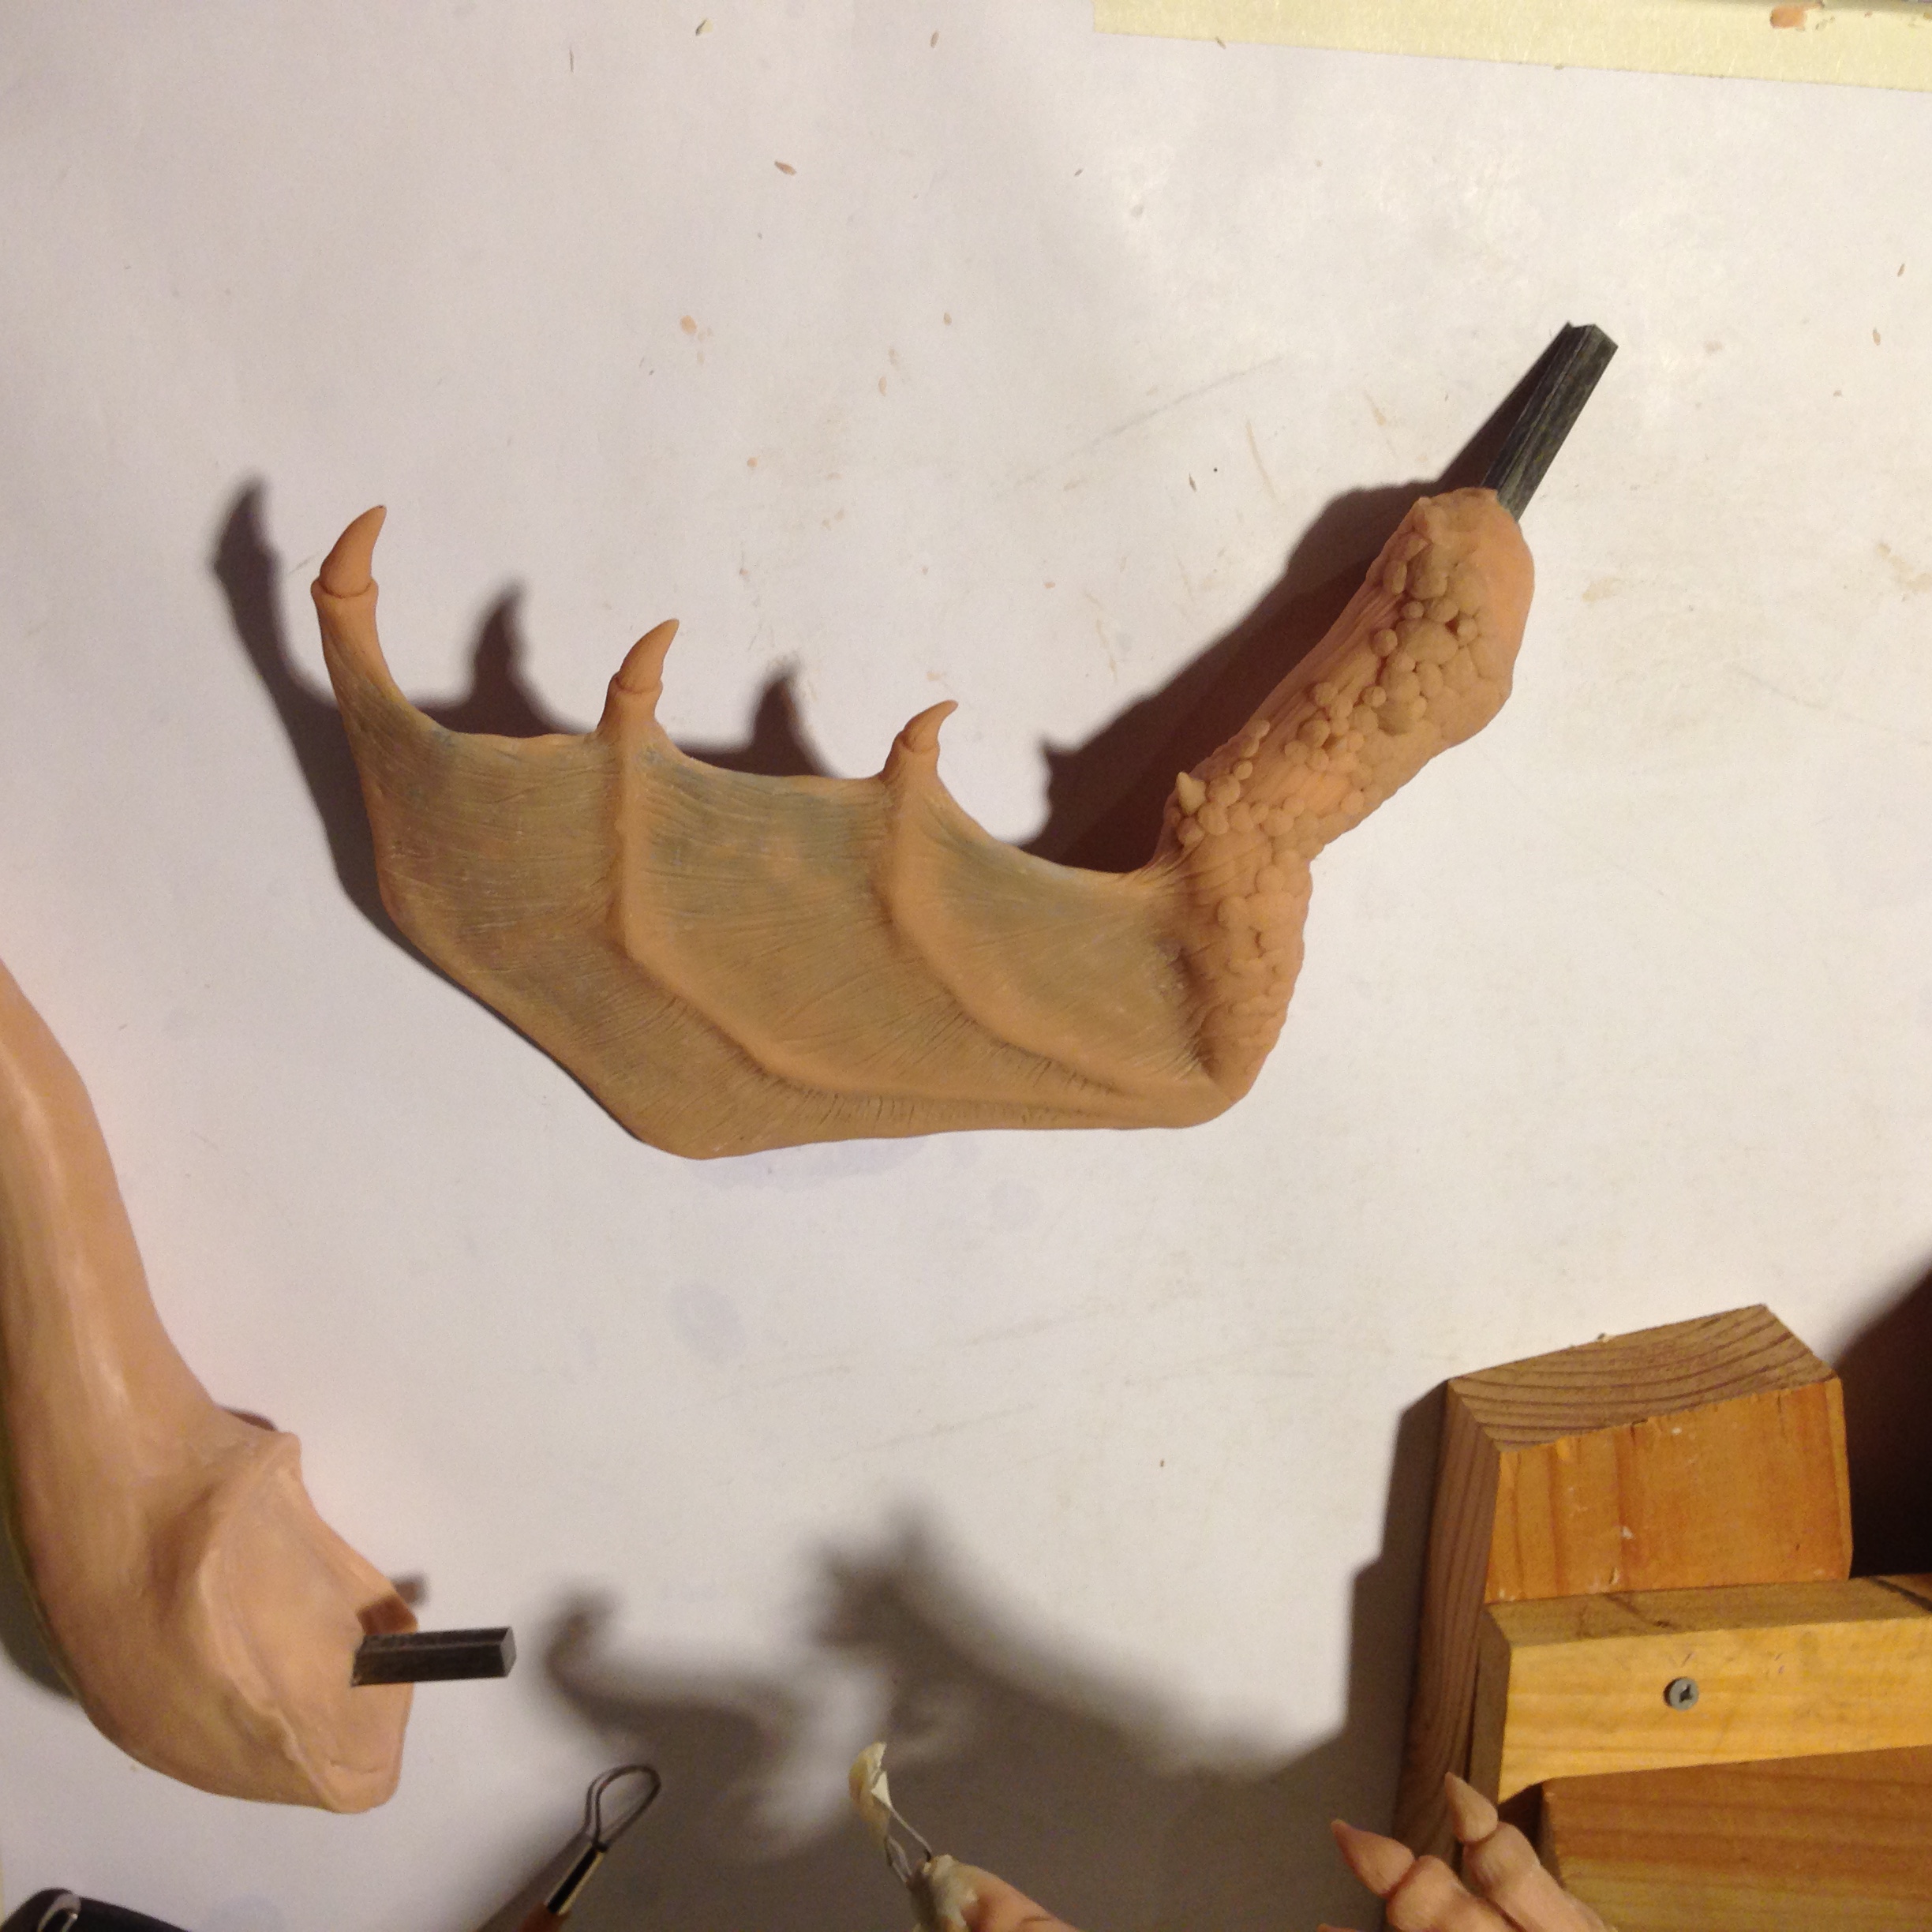
Claws ready to be attached.
5. Baking the Clay
Last, I baked the various pieces of the dragon sculpture according to Sculpey’s directions. I did this in a used toaster oven I found at the local thrift store. I highly recommend thrift stores by the way. Also make sure you have some ventilation when baking the polymer clay, the fumes can irritate your nose.
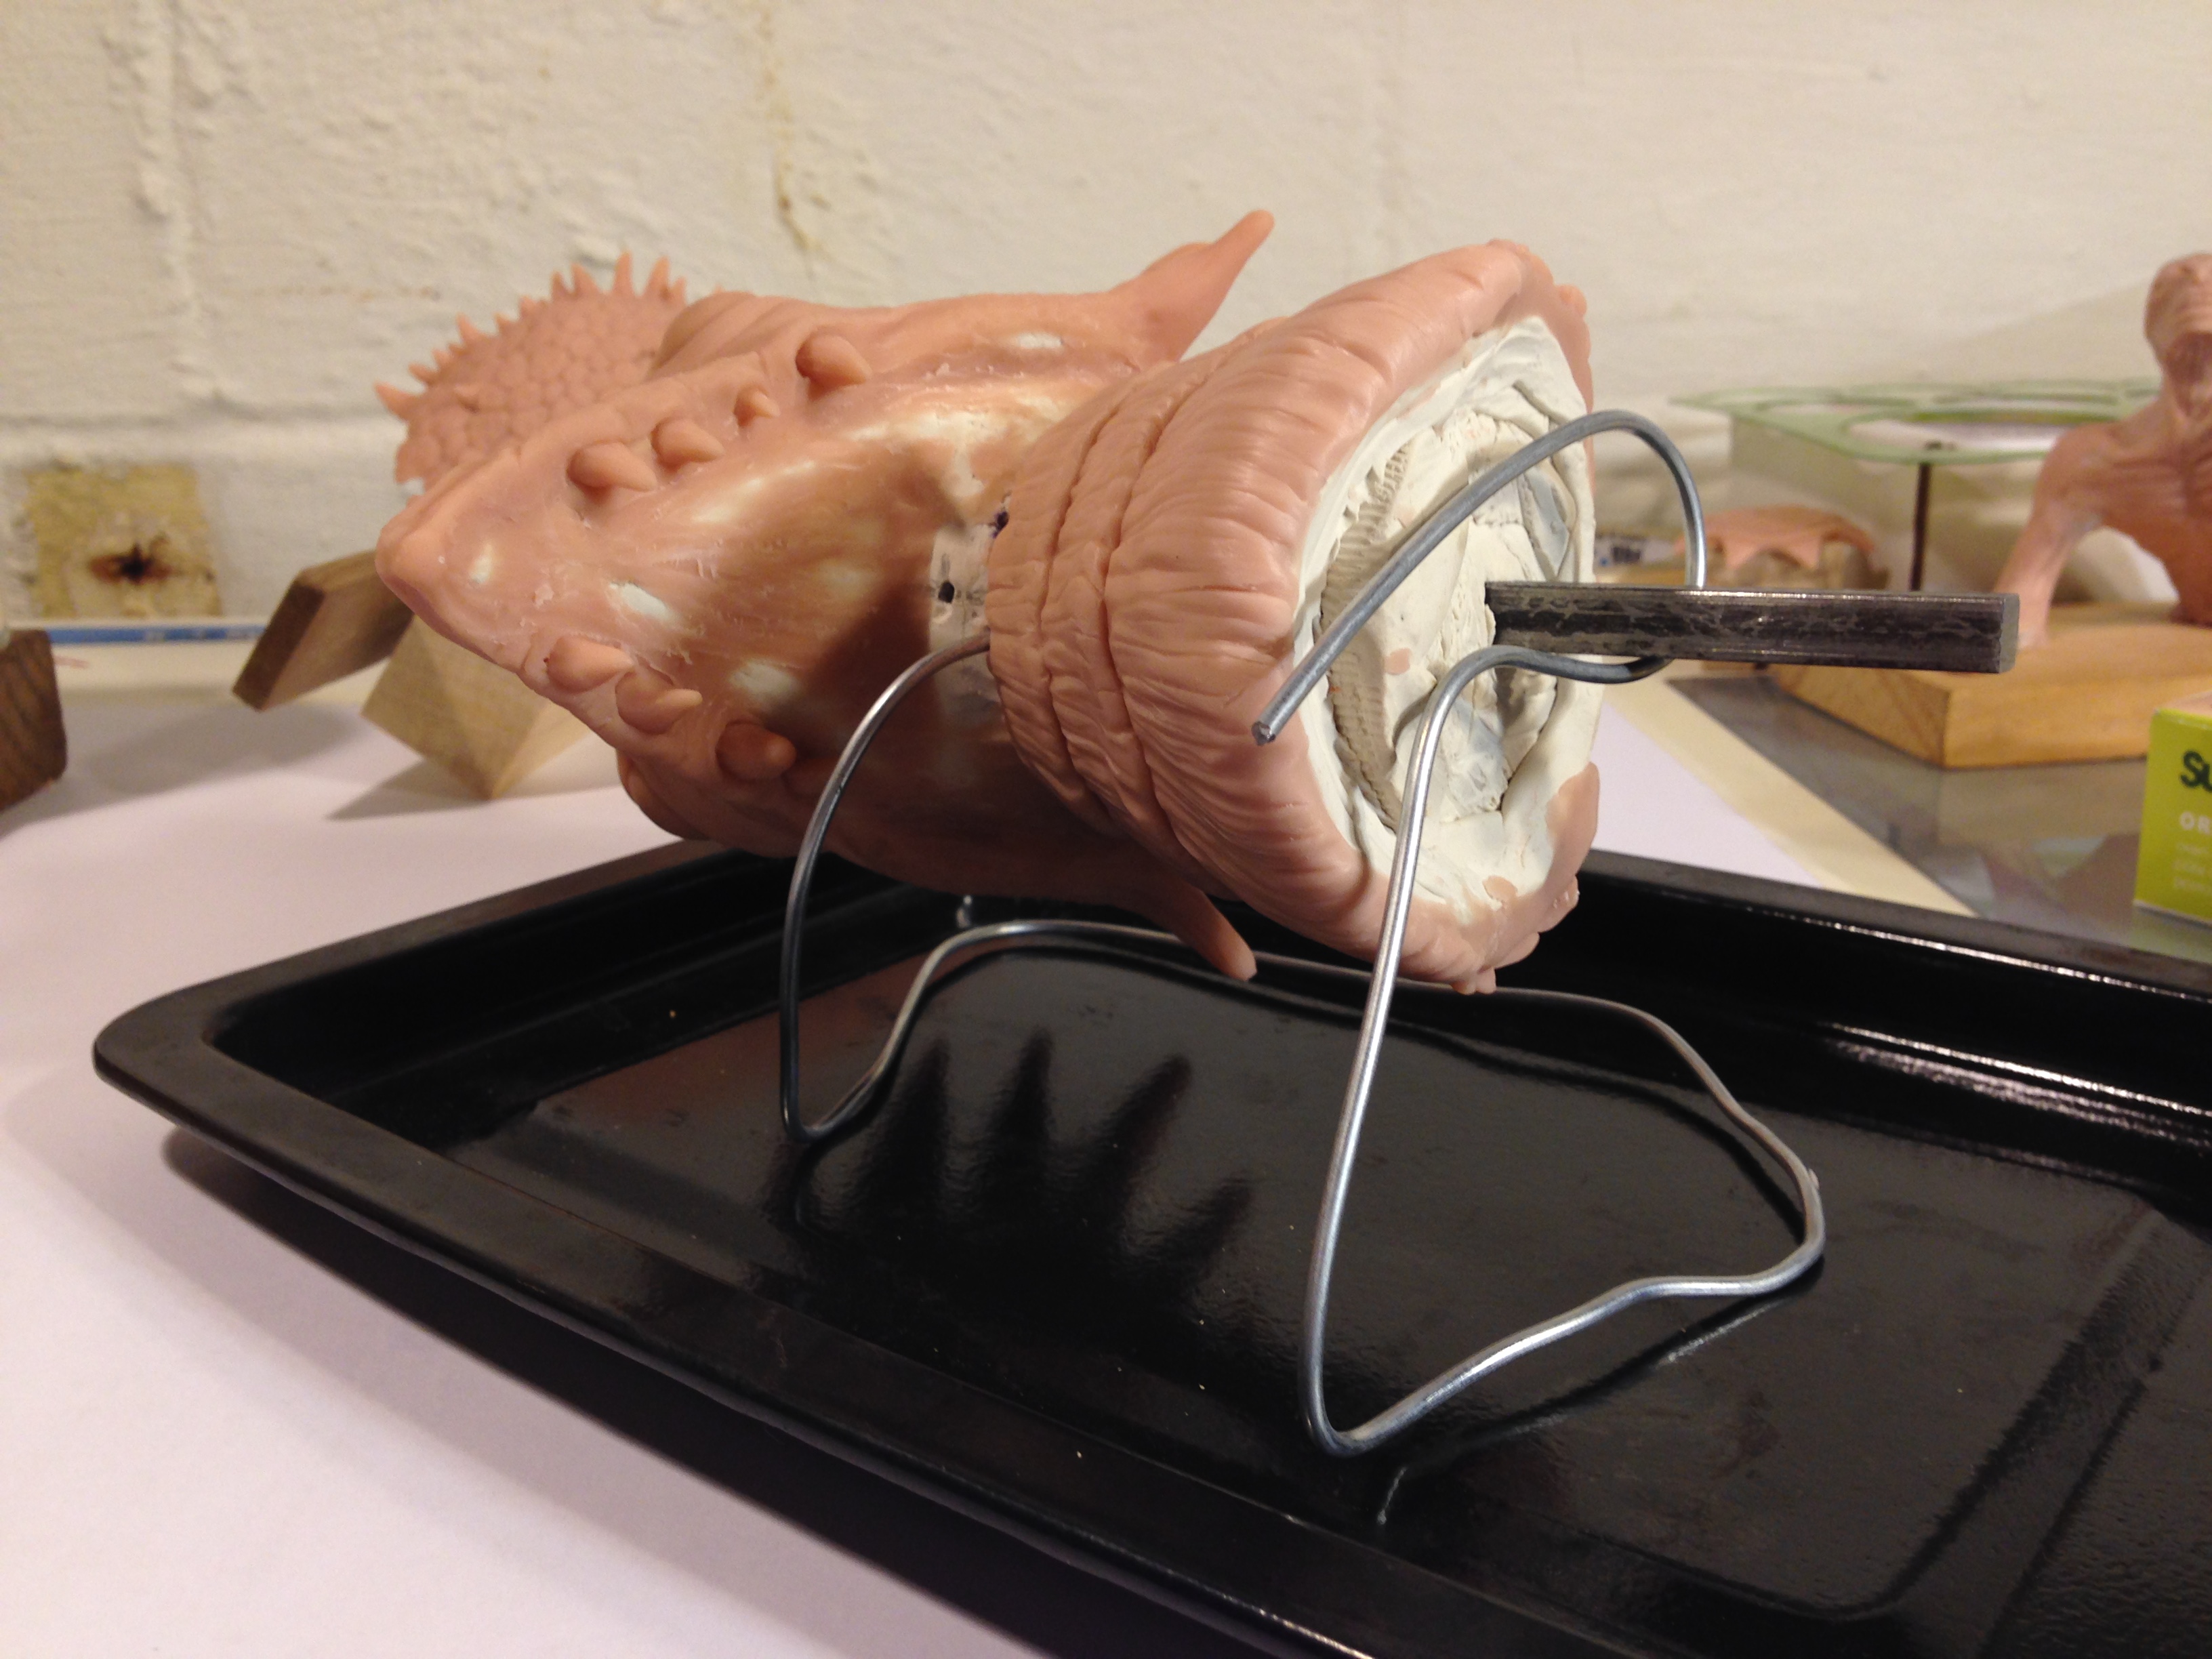
The head ready for baking on a custom wire stand.

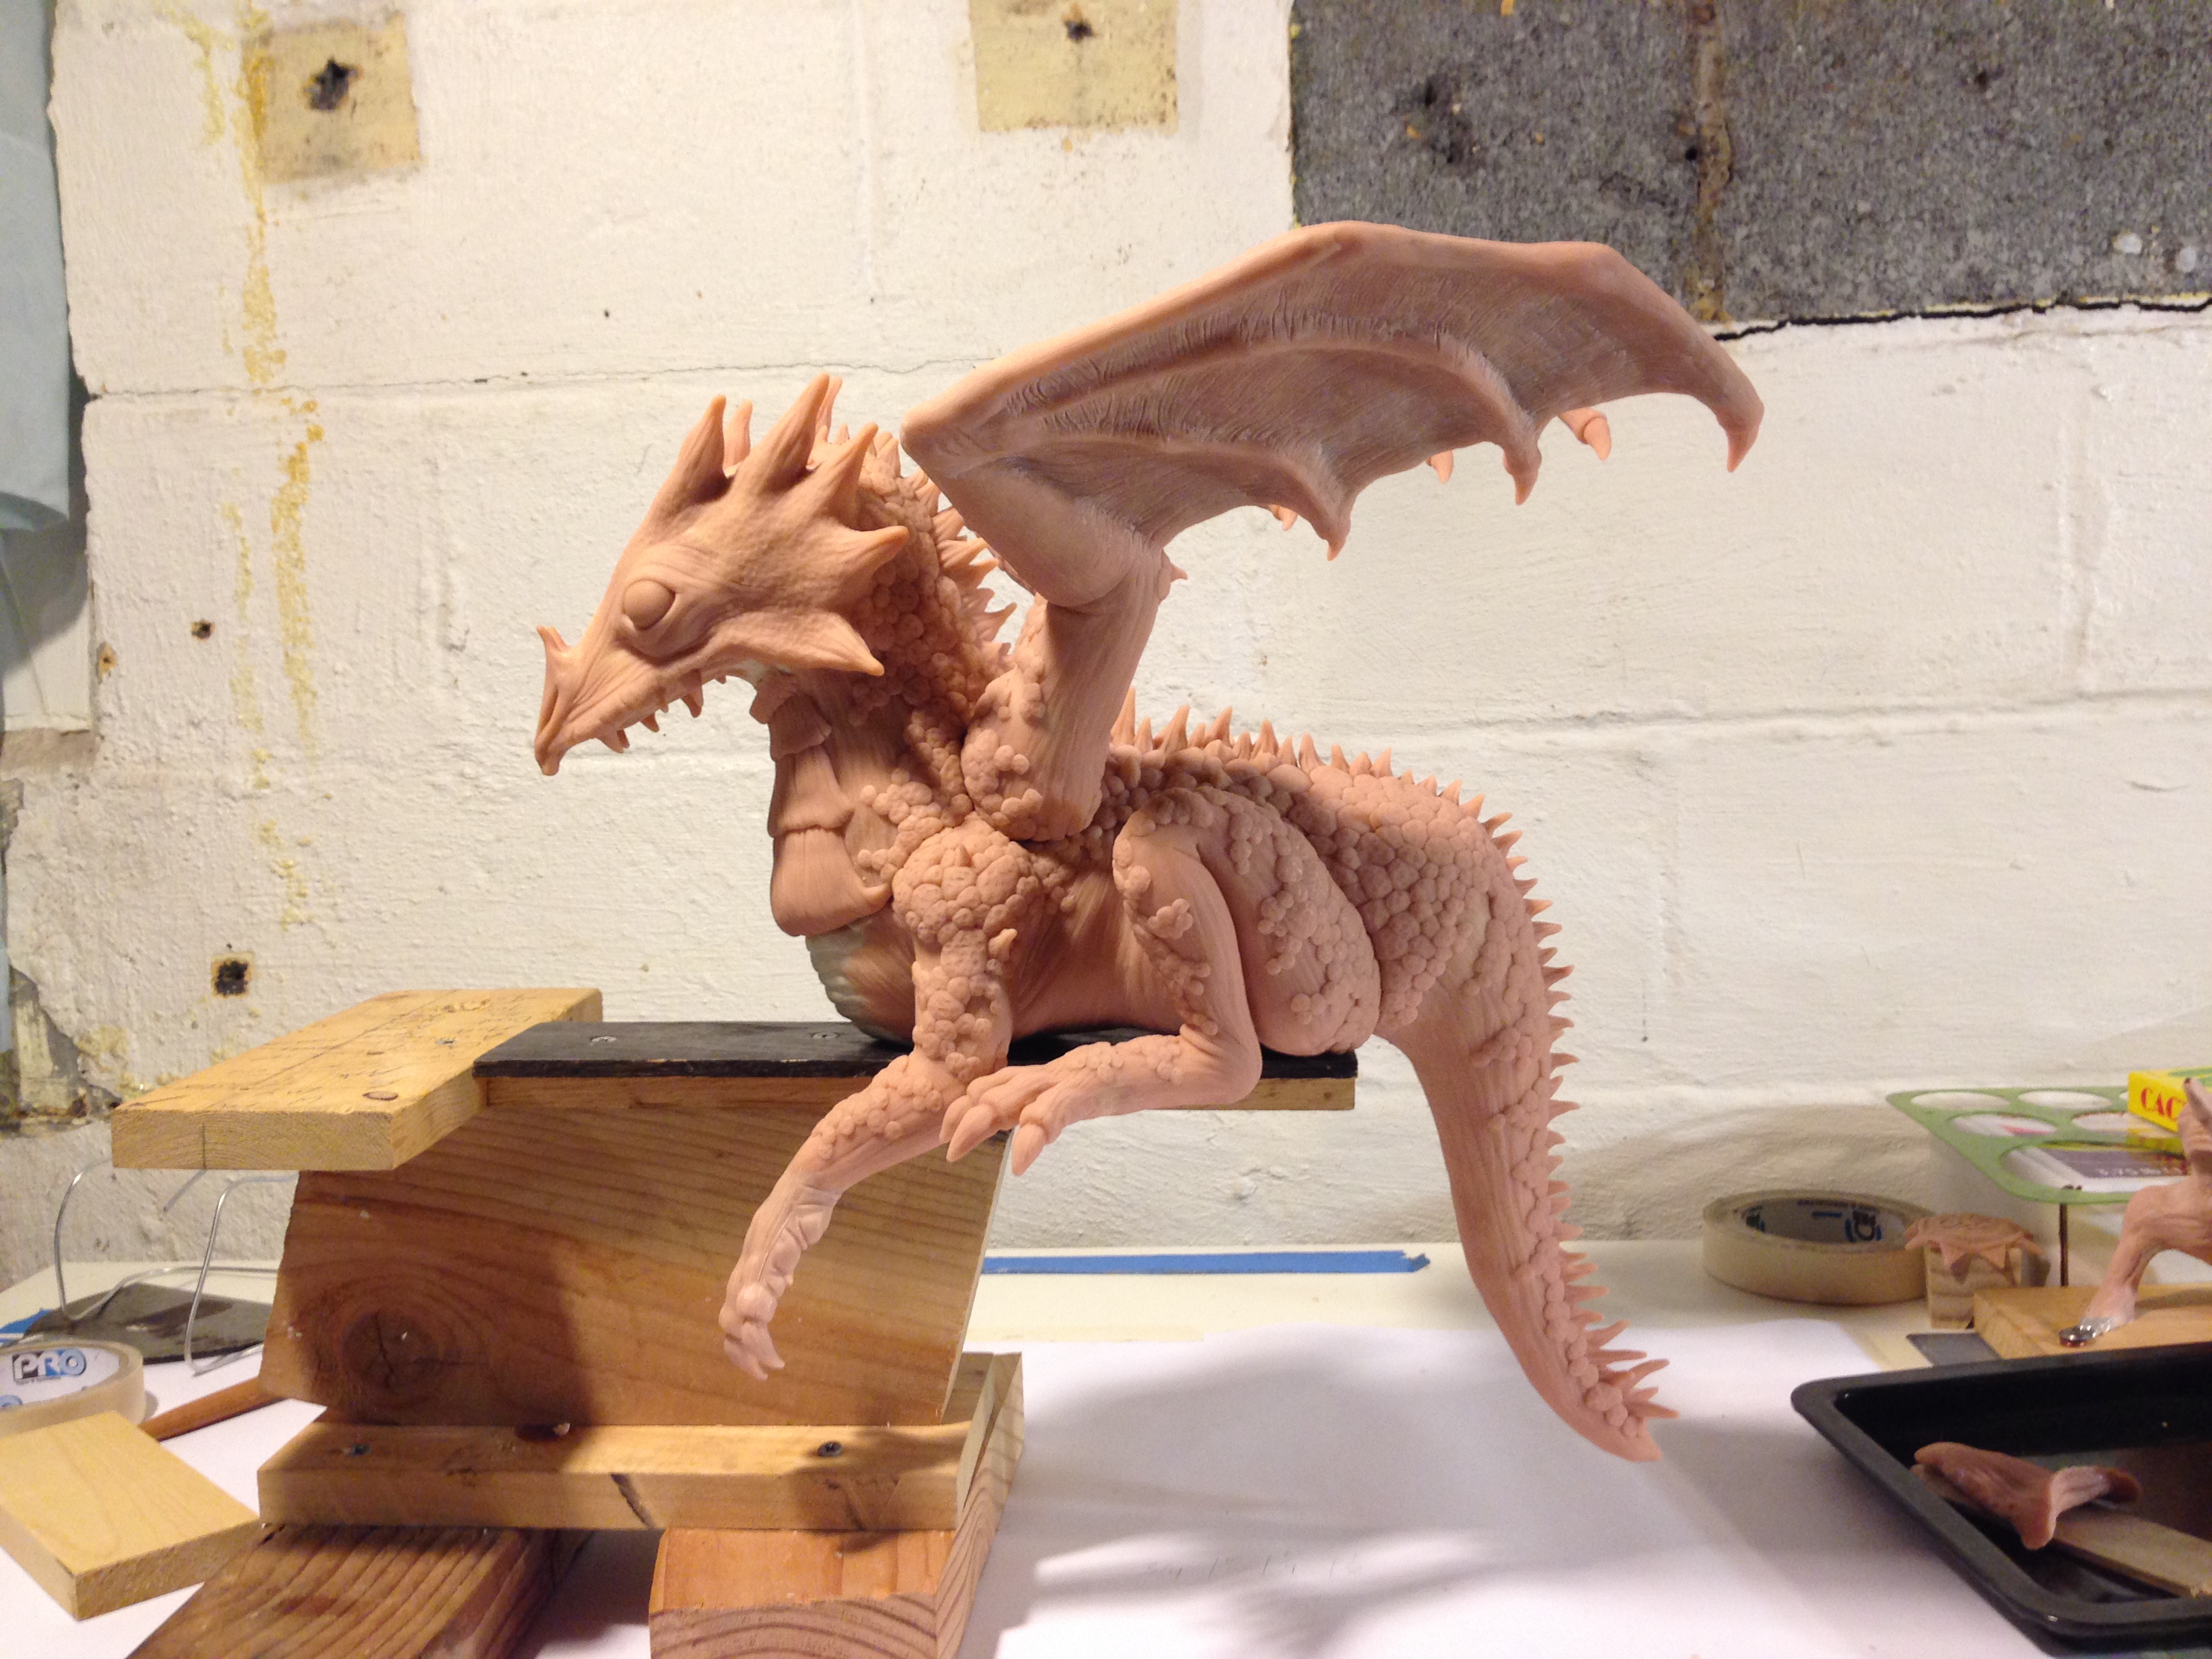
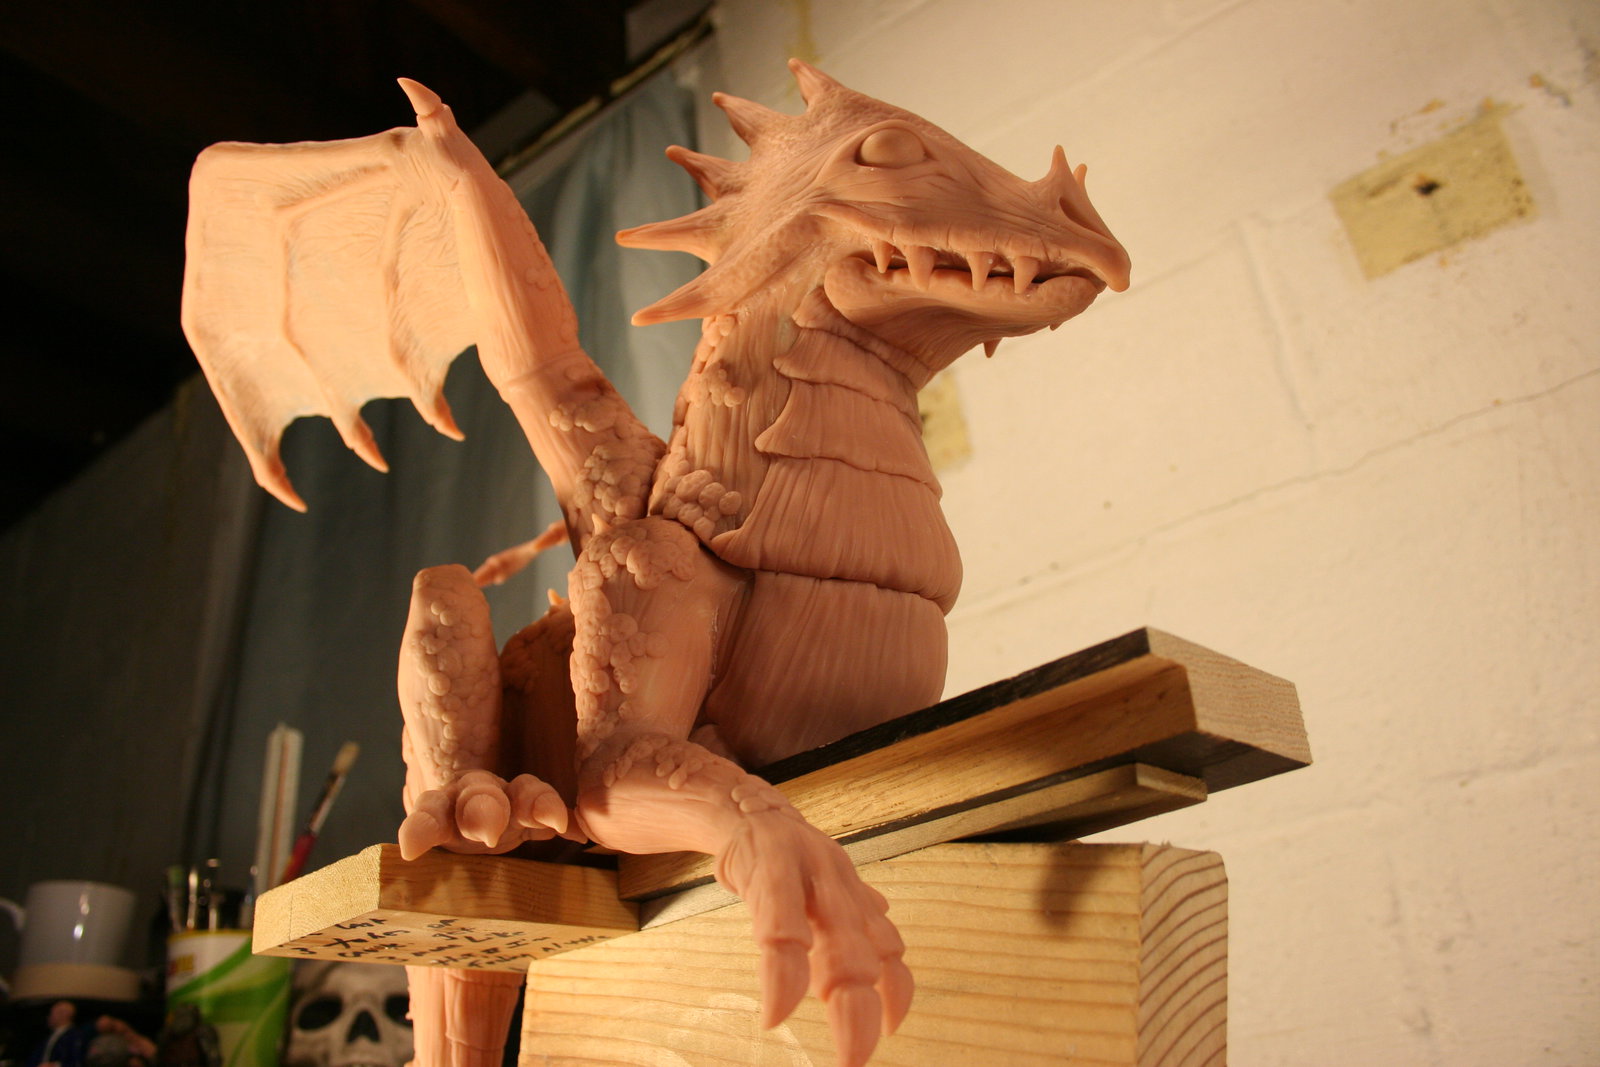
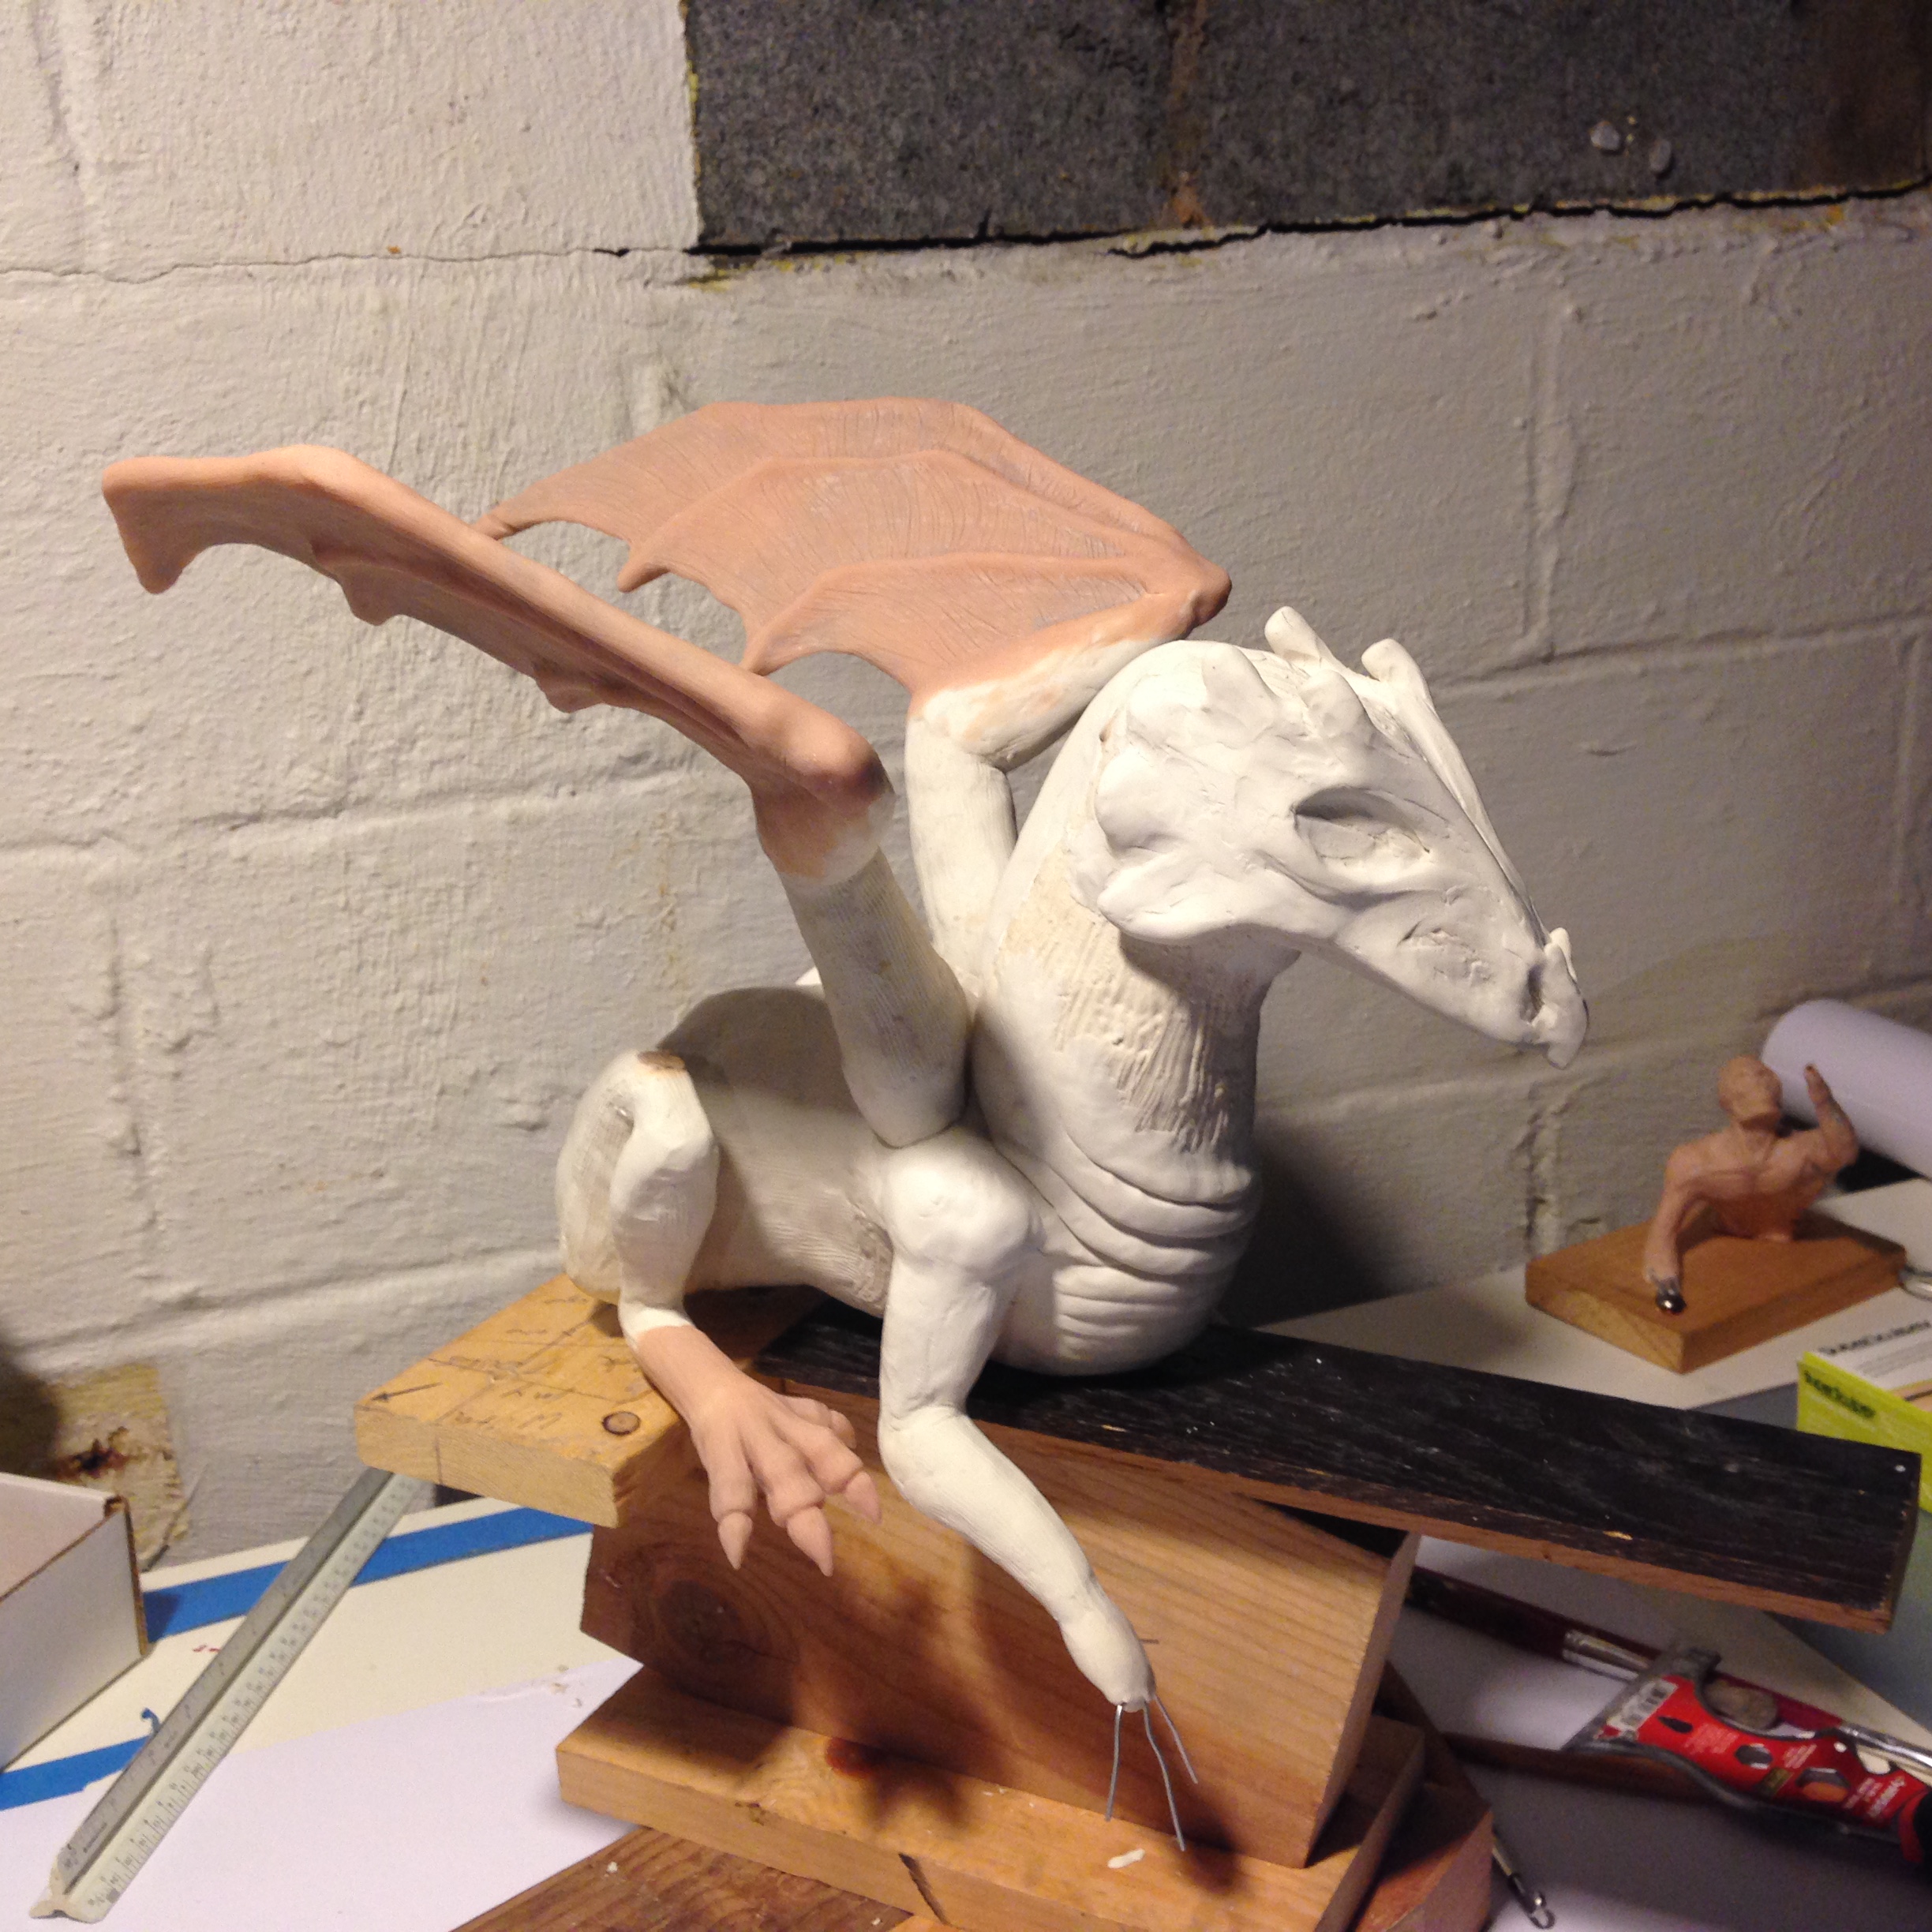
Nearly complete. He still needs a lower jaw and his underbelly plating.
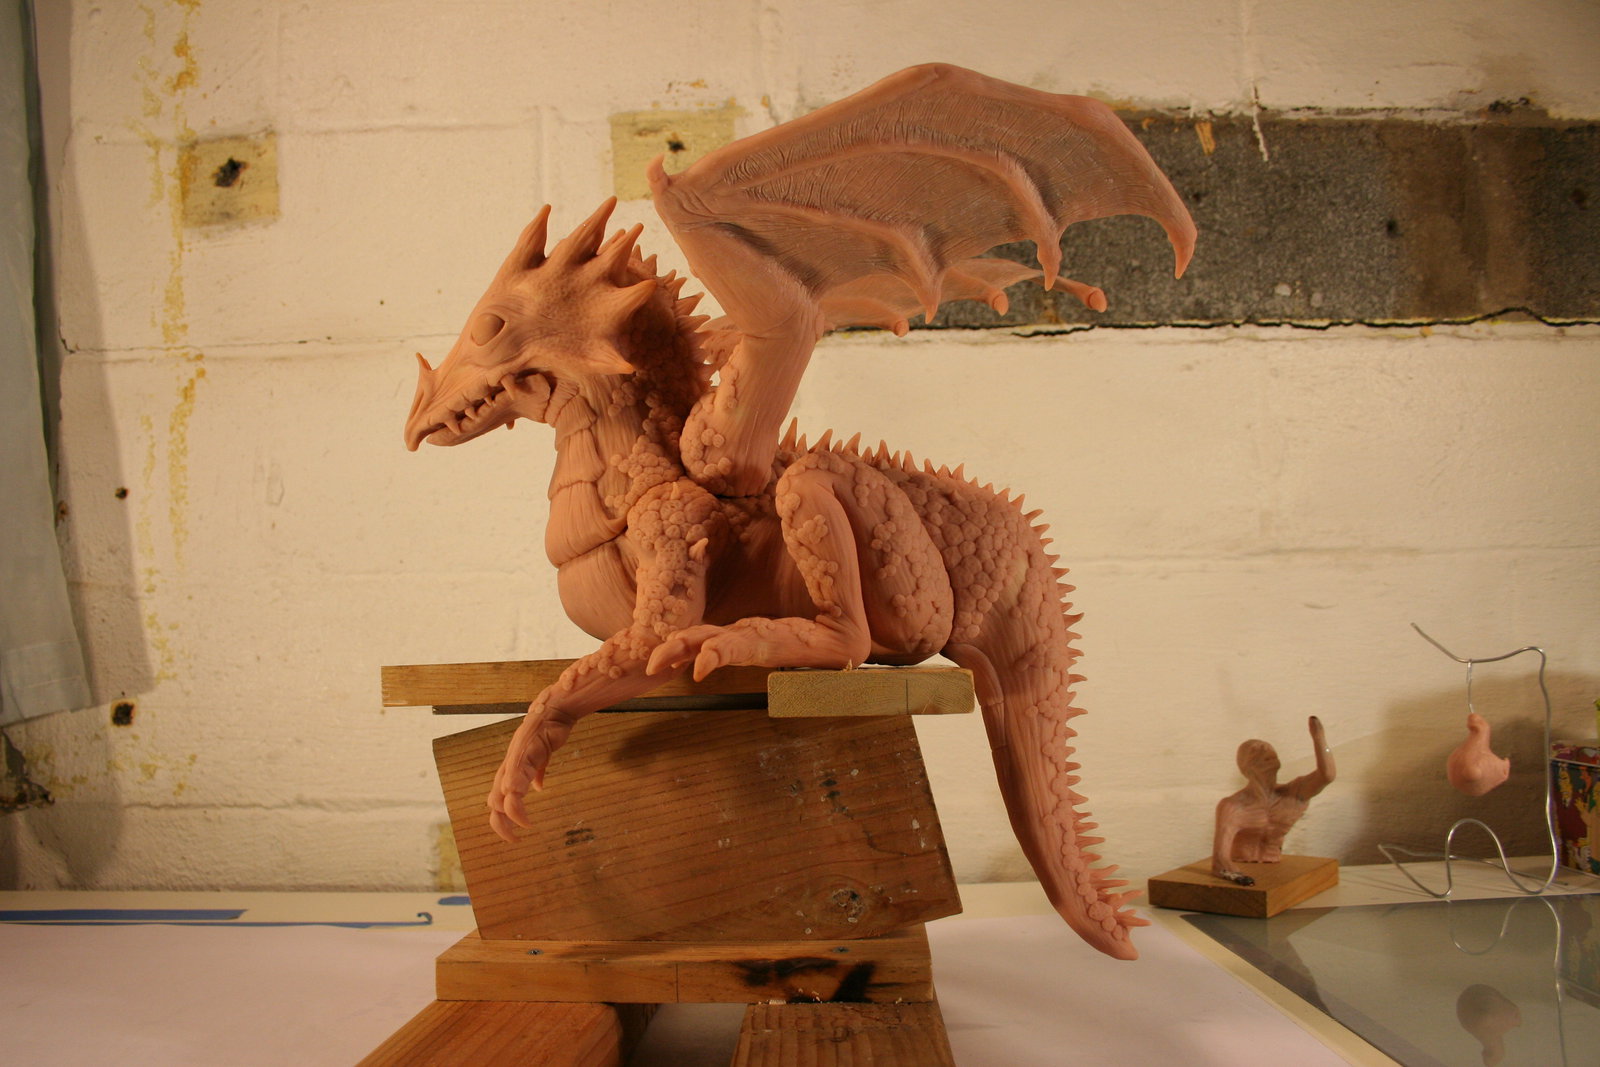
After two months working nights and weekends, the dragon is complete!
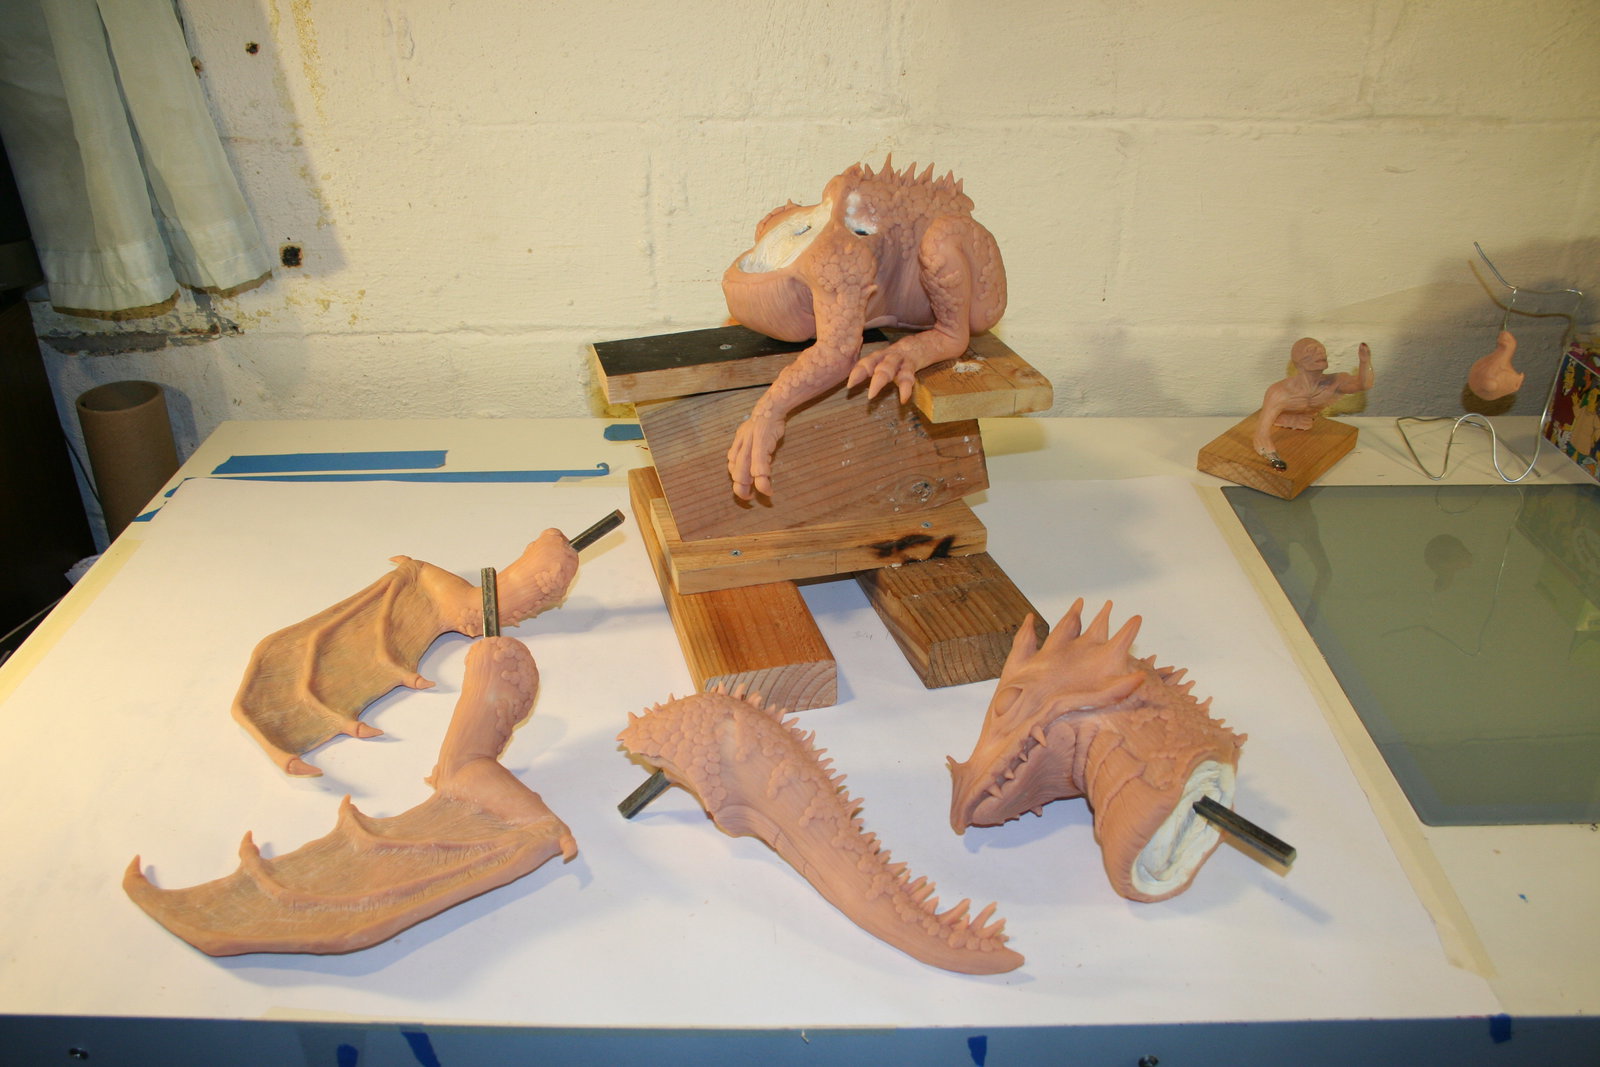
Here is the dragon disassembled.
The next step will be molding and casting. I will add updates as this project moves ahead.
Update 7/23/2023: Due to issues of funding we were not able to complete this project. I still have the sculpture sitting on my shelf, maybe someday we’ll get to make this puppet a reality.
