
Introduction
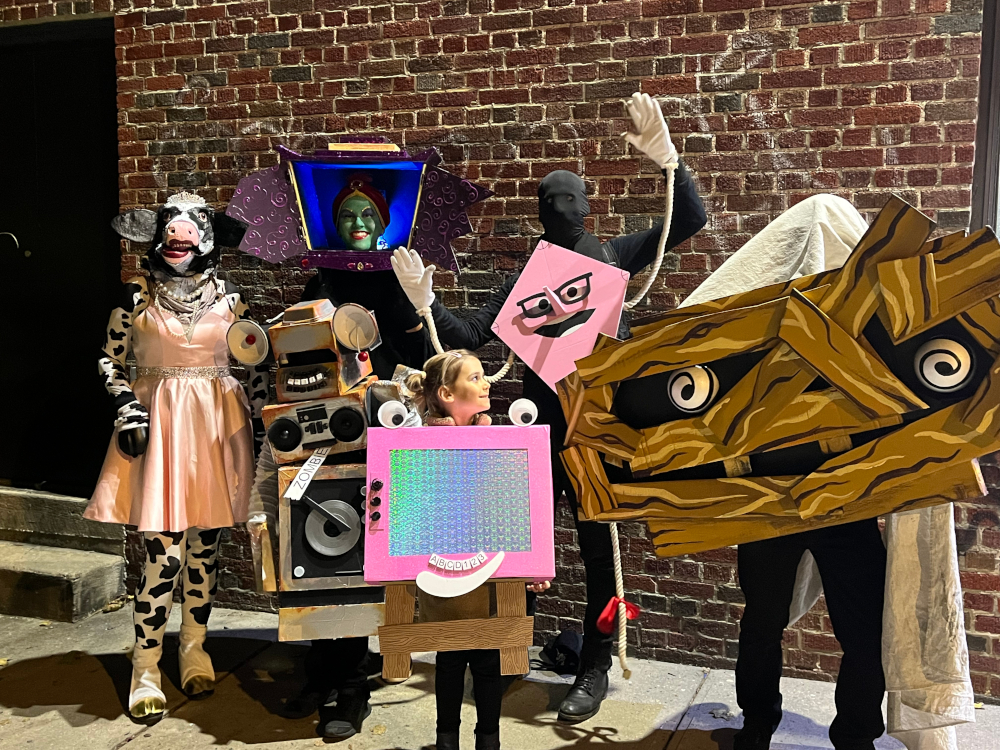
With the passing of Paul Reubens in 2023, our family decided to pay tribute to Pee-Wee’s Playhouse, one of our favorite TV shows from the 80s, by making our own Playhouse inspired Halloween costumes. To truly honor Pee-Wee, we each chose a supporting character to portray.
In this quick tutorial, I will show you how I put together my DIY Floory puppet/costume using household items.
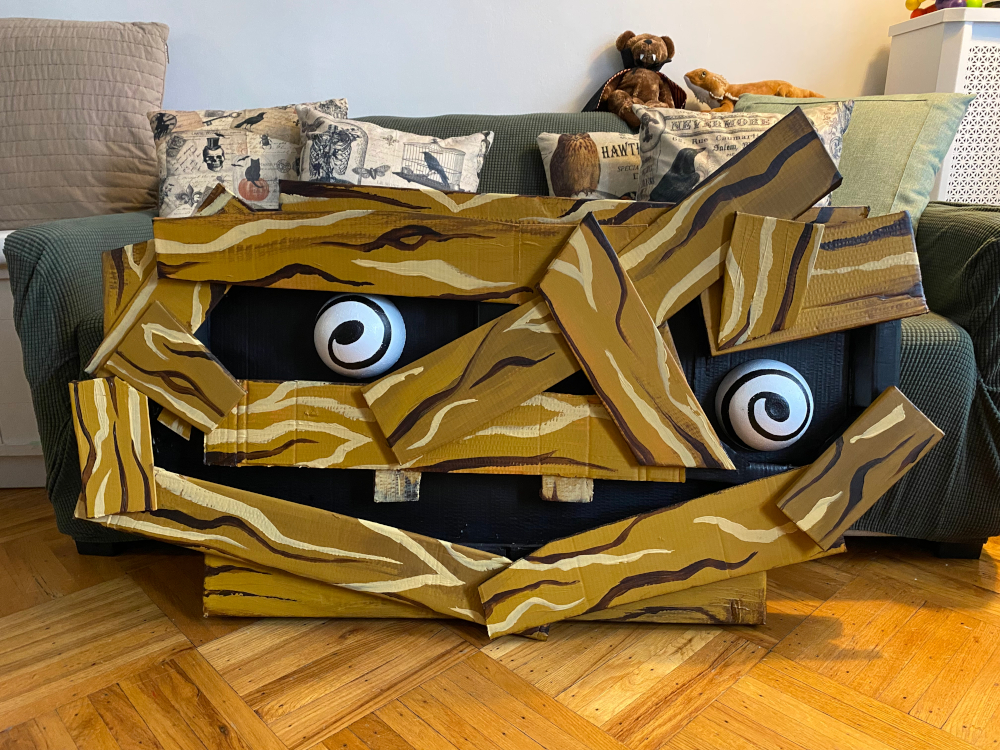
If you don’t already know, Floory is a sentient section of the playhouse’s floor that was discovered under a tarp. You will notice in the picture below that he is basically a large face comprised of loose floorboards. For my puppet, I created mechanisms to allow his mouth to move and his eyes to spin.
0. Materials
- 1 Large rectangular box
- Miscellaneous cardboard
- 2 – 4″ diameter Half Round Styrofoam Spheres
- Medium thickness wire
- 1 Square wooden rod about 24″ long
- Utility Knife
- Scissors
- Tape Measure
- Hot Glue Gun
- Acrylic Paint – Black, Yellow Ochre, Orange & White
- Painter’s Tape
1. Rough Sketch & Cut Outs
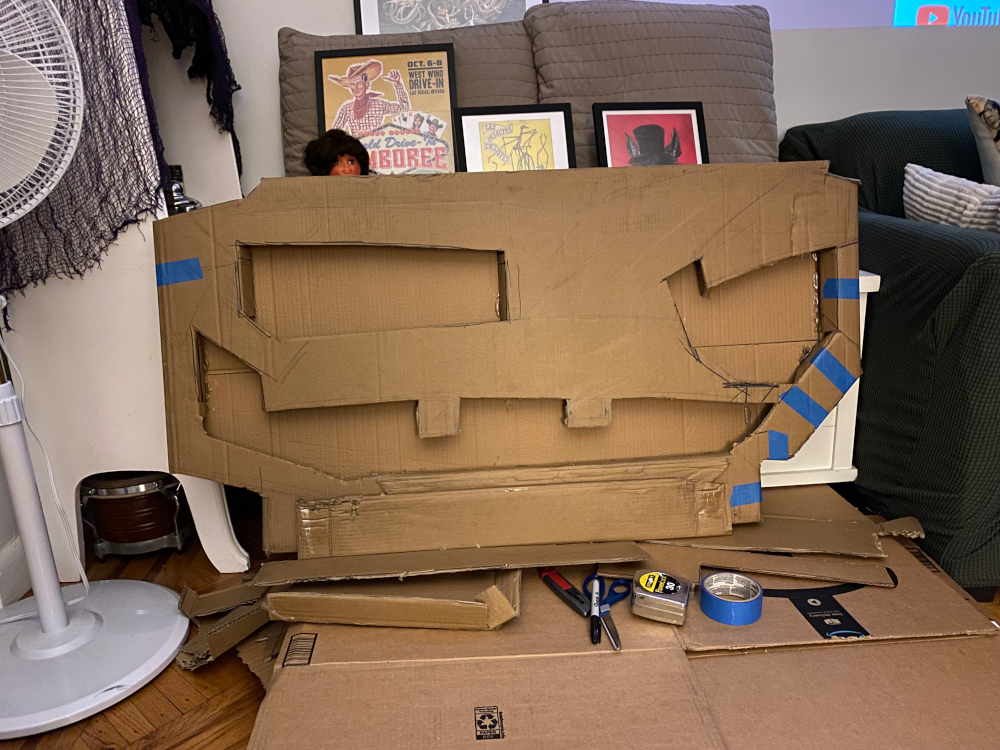
I found a rectangular box about 4′-0″ wide by 2′-0″ high by 3″ deep that would suit this project nicely. Don’t worry if you don’t have the same size box, find some large cardboard and build your own.

Start by sketching the features with a pencil. Then cut out the holes for the eyes and the mouth, leaving the back of the box solid.
2. Build Boards and Attach Them
Next, I built the individual “boards” that would make up his mouth and eyebrows and other facial features. Do this by scoring and bending cardboard, folding over and hot gluing into the final shapes. The glued seam should typically be hidden on the back or underside when possible.
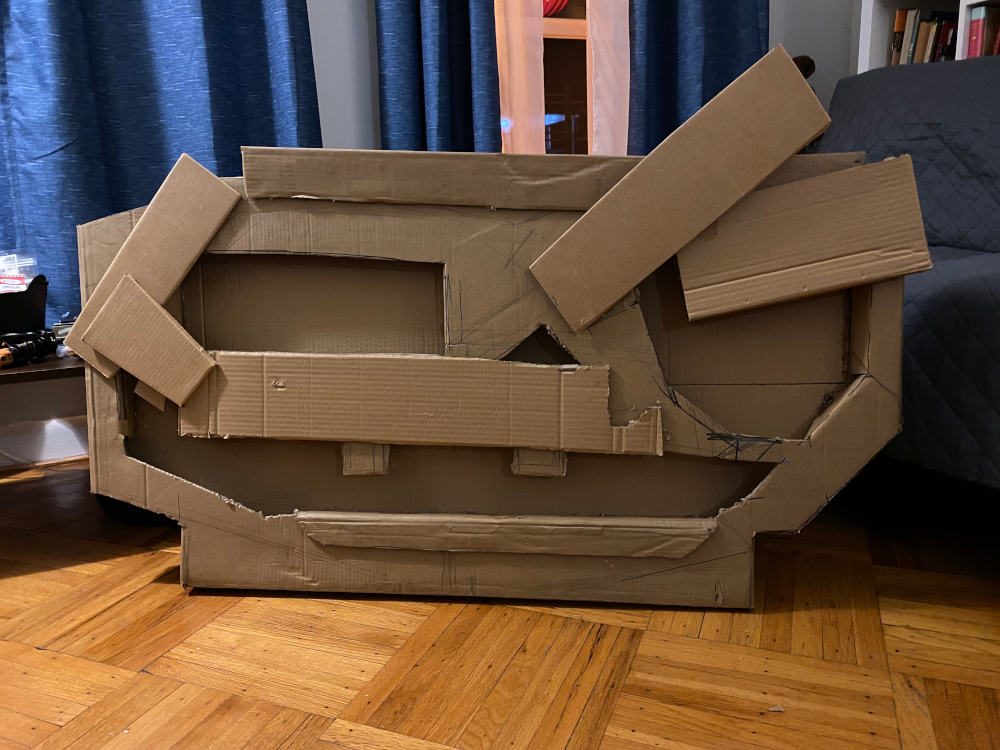
These boards are only about 1/2″ thick, just enough to give some depth when glued on top of the larger box below.
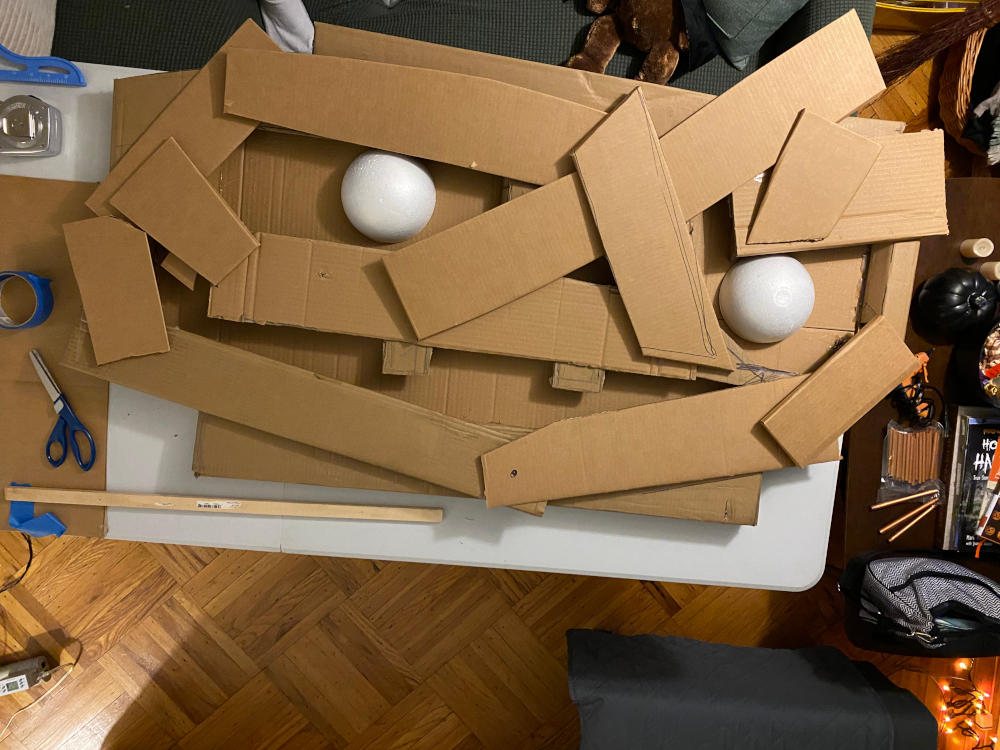
Almost all the boards have been assembled and put in place. The styrofoam eyes are temporarily in place as well. Keep in mind the two lower boards that make up the mouth should not be glued in place! See the next step for an explanation of the puppetry mechanism I devised.
3. Puppetry Mechanisms
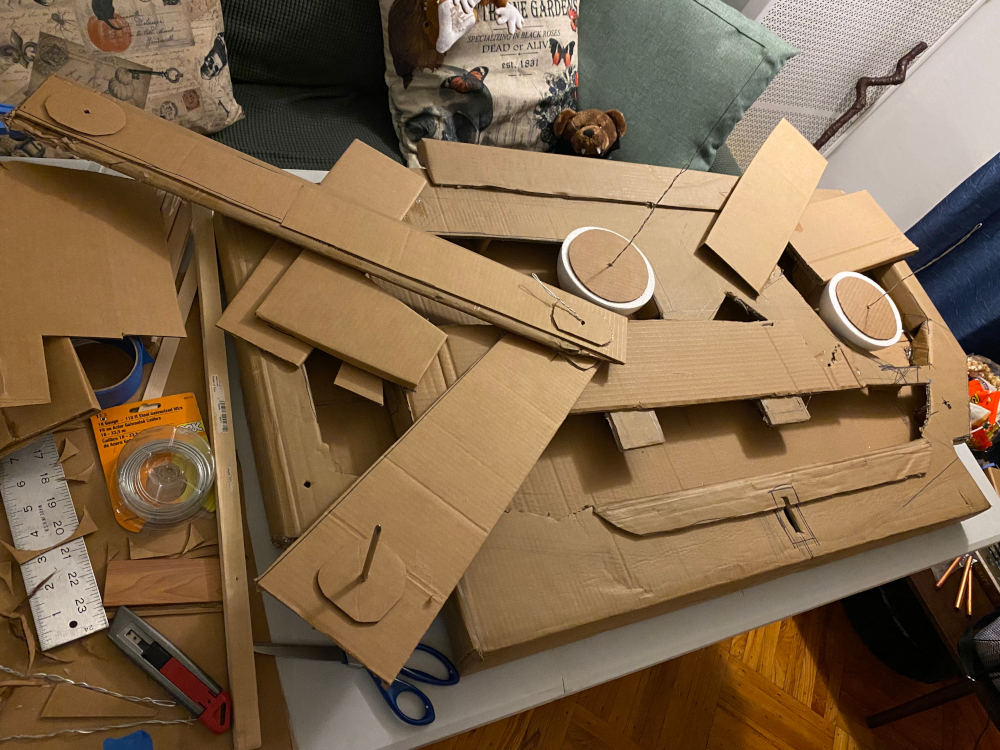
3a. The Eyes
Based on the original character, I needed the eyes to spin simultaneously. I have no clue how the original puppeteers did it on the show, so I devised my own mechanism. You can see in the picture above how the eyeballs have a wire coming straight off the back, from the center of the circle. These wires pass through a hole to the back side of the box where they are attached to a single wooden rod. I will illustrate how they work below.
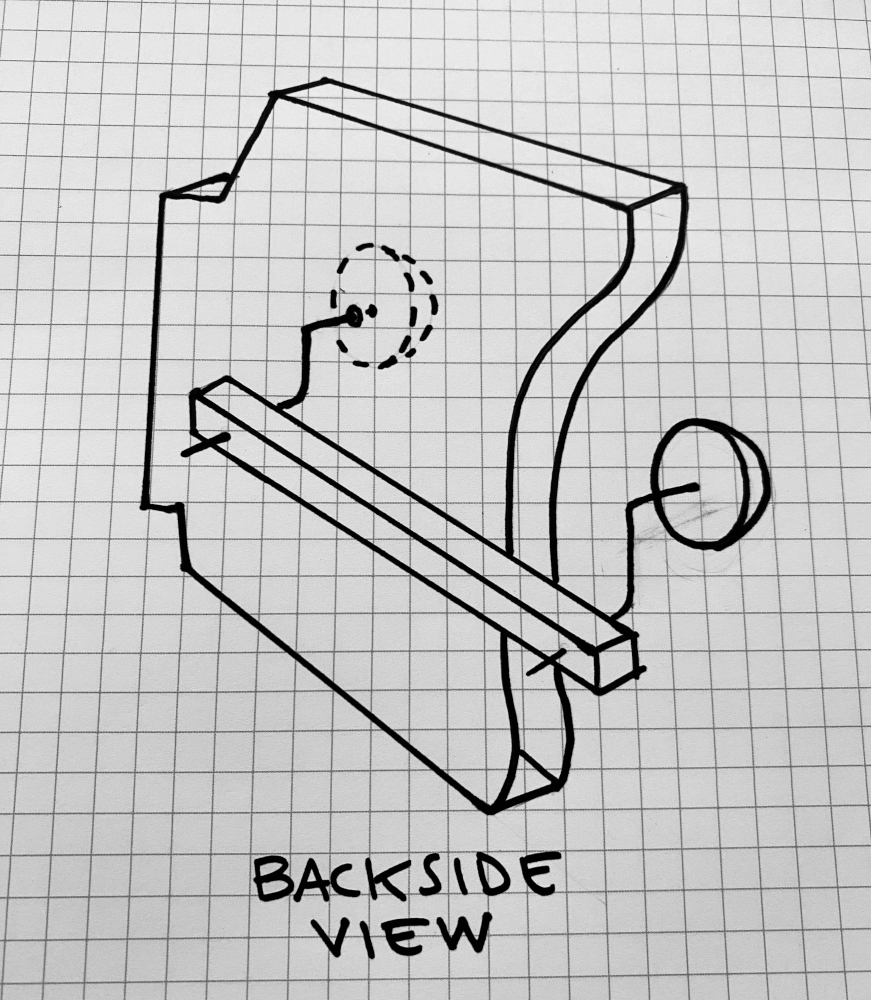
The wires are bent and pass through a wooden rod. The as the rod rotates in a circular motion, the eyeballs spin, similar to an old-fashioned locomotive.

3b. The Mouth
The mouth or lower jaw is comprised of two boards that are fixed at either end and move at the center. The mouth works with a wooden rod that protrudes from the front to the back, it moves vertically up and down to open and close the mouth.
4. Painting and final touches

After confirming that all the mechanics worked, the final step was to paint everything. Using a combination of cheap acrylic paint I tried to mimic the original design of he character. I first painted the insides black, then I attached the eyes and jaw. Next, I painted the base coat over all the “wood” to look yellow-ish beige and I tried to have a little variation in the individual boards. I painted the sides darker, adding a little brown, to enhance the depth, to make things look as 3D as possible. Last I used a combo of different colors to paint the grain of the wood. I used photo and video references, but mostly relied on artistic license.
So there you have it, my process for creating this custom costume. If you enjoyed this, please check out my other tutorial on making a cardboard Krampus mask.
And if you need other types of creative inspiration, check out my IDEAS page!
Please reach out on Instagram if you have any questions and or comments!
